yourproject.onspace.app) or your own custom domain. This comprehensive guide covers domain connection, troubleshooting, and hosting options.
Why Custom Domains Matter
Transform your project’s online presence with a custom domain:- 🎯 Professional Branding - Build trust with a branded URL
- 📈 Better SEO - Improve search engine rankings
- 💭 Memorable URLs - Easy to share and remember
- 🔒 Enhanced Trust - Users feel more confident with professional domainsRecommended Domain Providers
- Namecheap - Budget-friendly with excellent support
- Cloudflare - Built-in CDN and security features
- GoDaddy - Popular choice with global availability
- Google Domains - Simple interface and reliable service
Quick Setup with Entri Integration
Step 1: Access Domain Settings
Navigate to Project → Publish → Add Existing Domain → Connect Domains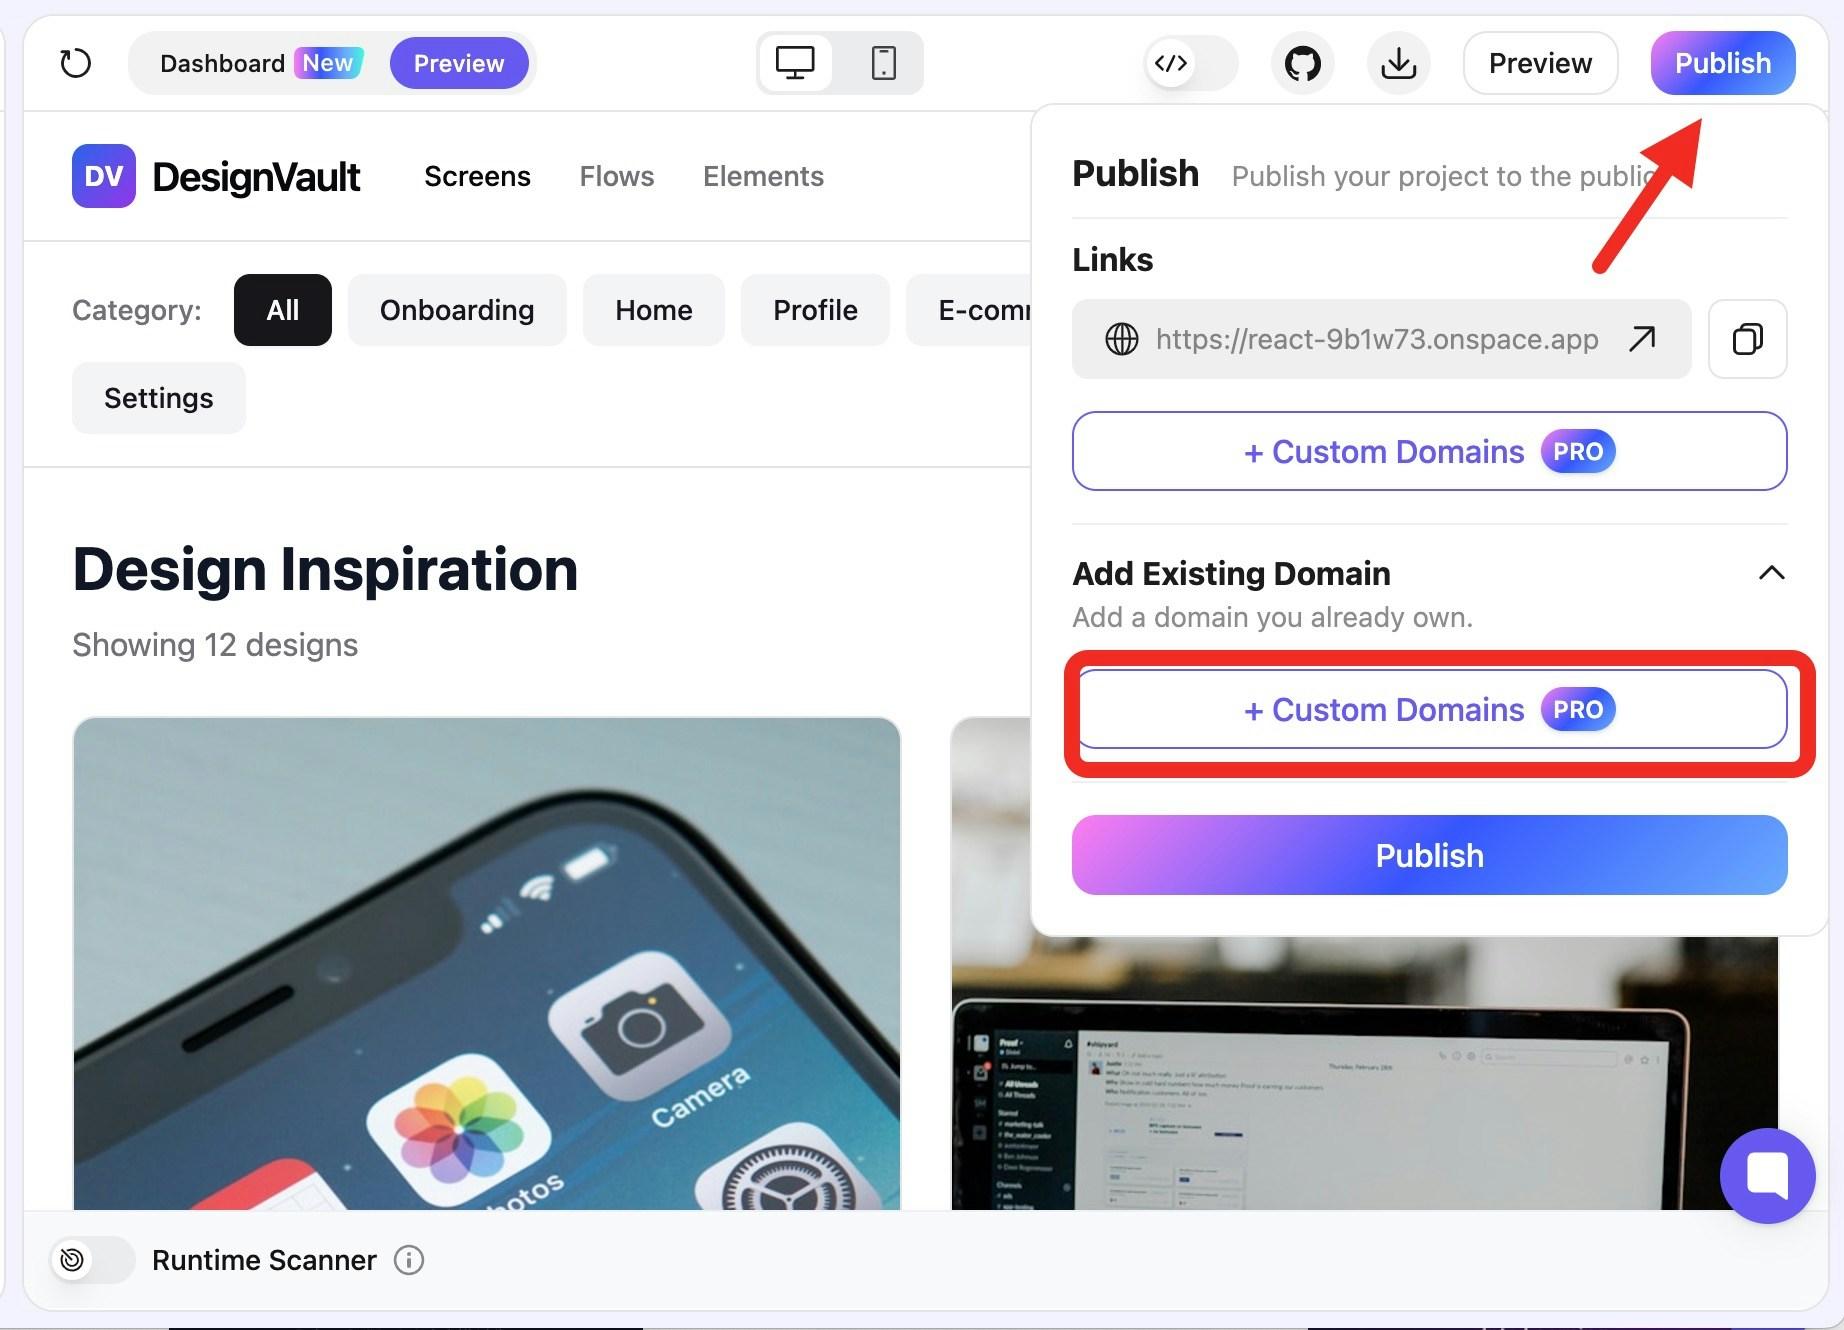
Step 2: Enter Your Domain
Input your domain name (e.g.,myapp.com or app.mycompany.com) OnSpace AI streamlines domain connection with a straightforward DNS setup process. Unlike complex multi-record configurations, we only require a single A Record to get your custom domain live.
Step 3: Copy DNS Information
Once validated, you’ll see the DNS configuration panel with three key pieces of information:- Type: Always “A” for OnSpace AI domains
- Host: Shows ”@” (root domain) with a copy button
- Target: Your specific IP address with a copy button
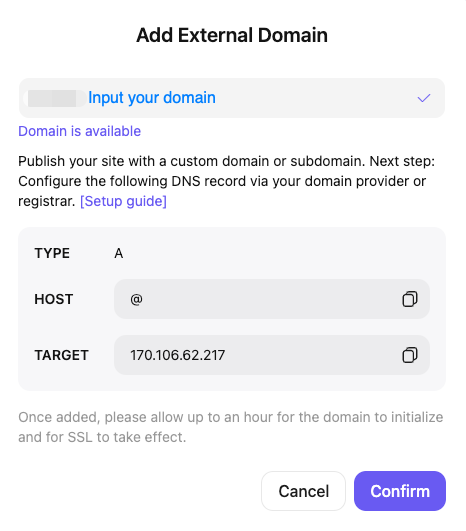
Step 4:Configure at Your Domain Provider
Take the Host and Target IP Address values and add them to your domain provider’s DNS settings.Popular Provider Instructions
- Cloudflare
- Namecheap
- GoDaddy
Login to Cloudflare Dashboard
- Select your domain
- Go to DNS → Records
- Add the required A record
- Set proxy status to “DNS only” (gray cloud icon)
SSL Certificate Management
Automatic SSL Provisioning
OnSpace AI automatically handles SSL certificates for all domains using Let’s Encrypt - no manual configuration required! Features:- 🔒 Auto-Issuance - Certificates generated upon domain verification
- 🔄 Auto-Renewal - Renewed before expiration automatically
- 💰 No Extra Cost - Included with Pro plans
- 🚀 Instant HTTPS - All traffic redirected to secure connections
Troubleshooting Guide
Common Fixes:- Ensure DNS records match exactly
- Remove conflicting existing records
- Wait for full DNS propagation (up to 48 hours)
- Check domain isn’t expired or locked
SSL Certificate Problems
Symptoms: Browser security warnings or certificate errors Solutions:- Wait 20 minutes after domain verification for SSL provisioning
- Clear browser cache and cookies
- Try accessing via incognito/private mode
- Verify domain is properly pointing to OnSpace servers
Domain Management Best Practices
Security Checklist
- Enable domain registrar lock
- Set up two-factor authentication
- Configure auto-renewal payments
- Monitor expiration dates
- Use strong, unique passwords
Pricing & Feature Comparison
Next Steps
Once your custom domain is live:- 🔍 SEO Setup - Submit sitemap to Google Search Console
- 📊 Analytics - Configure Google Analytics or similar tracking
- 🚀 Performance - Monitor loading speeds and optimize
- 🔄 Maintenance - Set up automated monitoring and alerts
- 📈 Growth - Plan for traffic scaling and CDN needs
Need Help?
- 💬 Community Forum - Get help from other OnSpace users
- 📧 Support Team - Contact our technical support
- 📚 Documentation - Browse our comprehensive guides
- 🎥 Video Tutorials - Watch step-by-step setup videos