

Overview
OnSpace Cloud supports Sign in with Apple, allowing users to sign in to your app or website with their Apple account. Apple sign-in is disabled by default and must be enabled manually. To complete the setup, you will need credentials from your Apple Developer account, including:- Client ID
- Client Secret (JWT)
- Private Key (
.p8file) - Key ID
- Team ID
- Redirect URL
Before You Start
Make sure you have:- An active Apple Developer account
- A configured Apple auth client in Apple Developer Console
- A valid Services ID or Bundle ID
- A Sign in with Apple private key (
.p8) - Access to your project in OnSpace Cloud
Step 1: Open the Apple sign-in settings
In your project, go to: Cloud → Users → Auth Under Sign in methods, locate Apple, then click it to open the Apple settings page.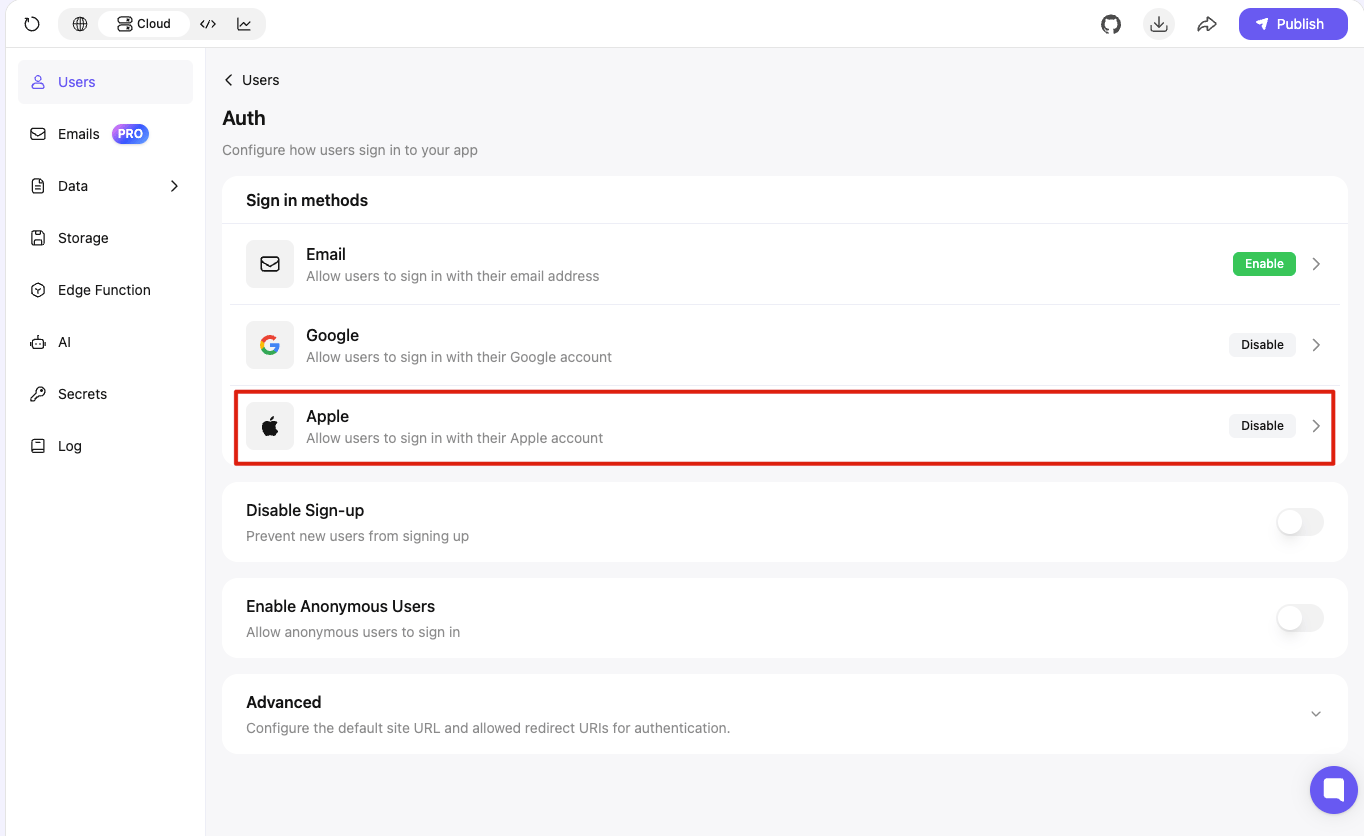
Step 2: Enable Apple sign-in
On the Apple settings page, turn on Enable Apple sign-in. Apple sign-in is disabled by default, so you must enable it manually before entering your credentials.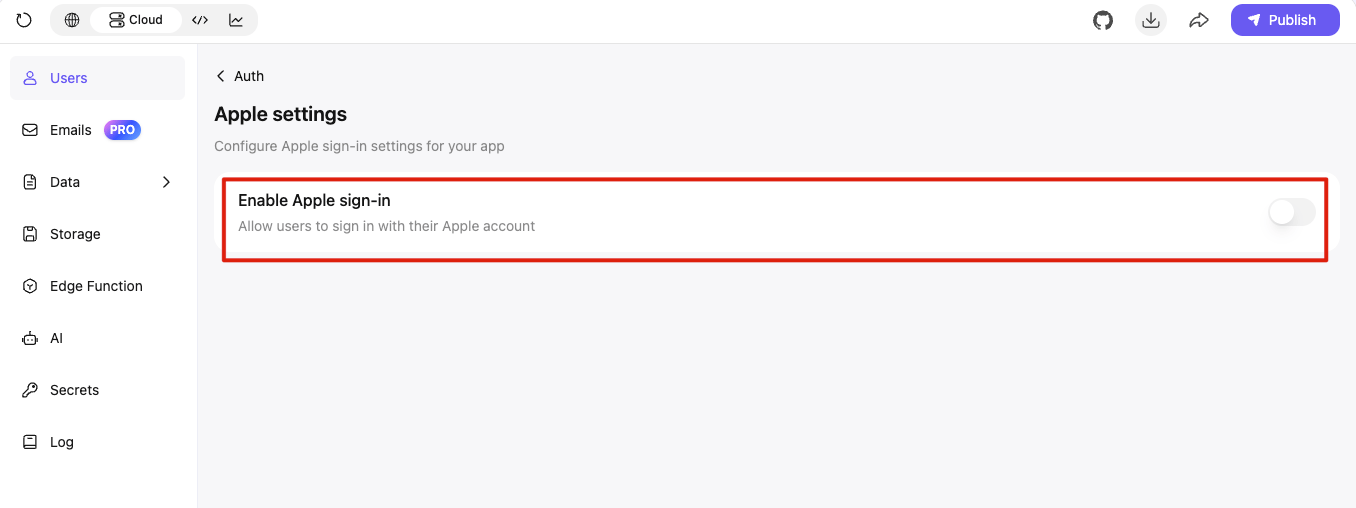
Step 3: Choose your own credentials
After Apple sign-in is enabled, select Your own credentials. This allows your project to use credentials from your own Apple Developer account. You can complete the setup in either of these ways:- Paste an existing Client Secret (JWT).
- Generate a new Client Secret (JWT) inside OnSpace Cloud using your
.p8private key.
Step 4: Enter the Client ID and Client Secret
Enter the following values:Client ID
Enter your Apple Client ID. This can be a Services ID or Bundle ID and usually uses a reverse-domain format. Example:Client Secret (JWT)
Enter a valid Apple Client Secret (JWT). If you already have one, paste it into the field. Otherwise, expand Generate secret to create one inside OnSpace Cloud.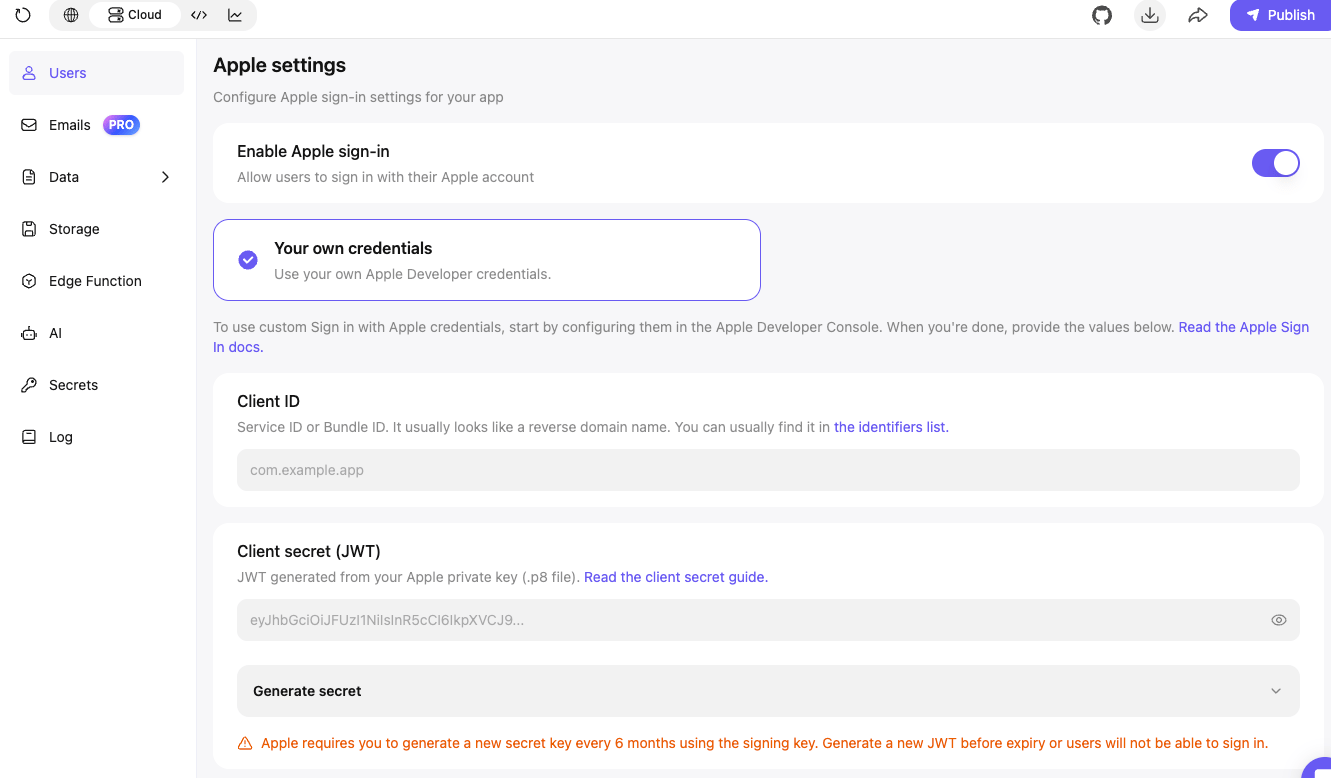
Important: Apple requires a new client secret to be generated every 6 months using the signing key. Generate a new JWT before the current one expires, or users will no longer be able to sign in.
Step 5: Generate a Client Secret in OnSpace Cloud
Expand Generate secret, then complete the following fields.Private Key (.p8 file)
Click Upload .p8 file and select the private key downloaded from Apple Developer Console. The secret-generation tool runs on your device. Your Apple credentials stay private and are not sent to OnSpace servers.Key ID
Enter your Apple Key ID. If the uploaded file uses Apple’s default filename format, such asAuthKey_XXXXXXXXXX.p8, the Key ID may be filled automatically. You can edit it when necessary.
Example:
Client ID (Services ID)
Enter your Apple Services ID. Example:Team ID
Enter the 10-character Team ID from your Apple Developer account. Example: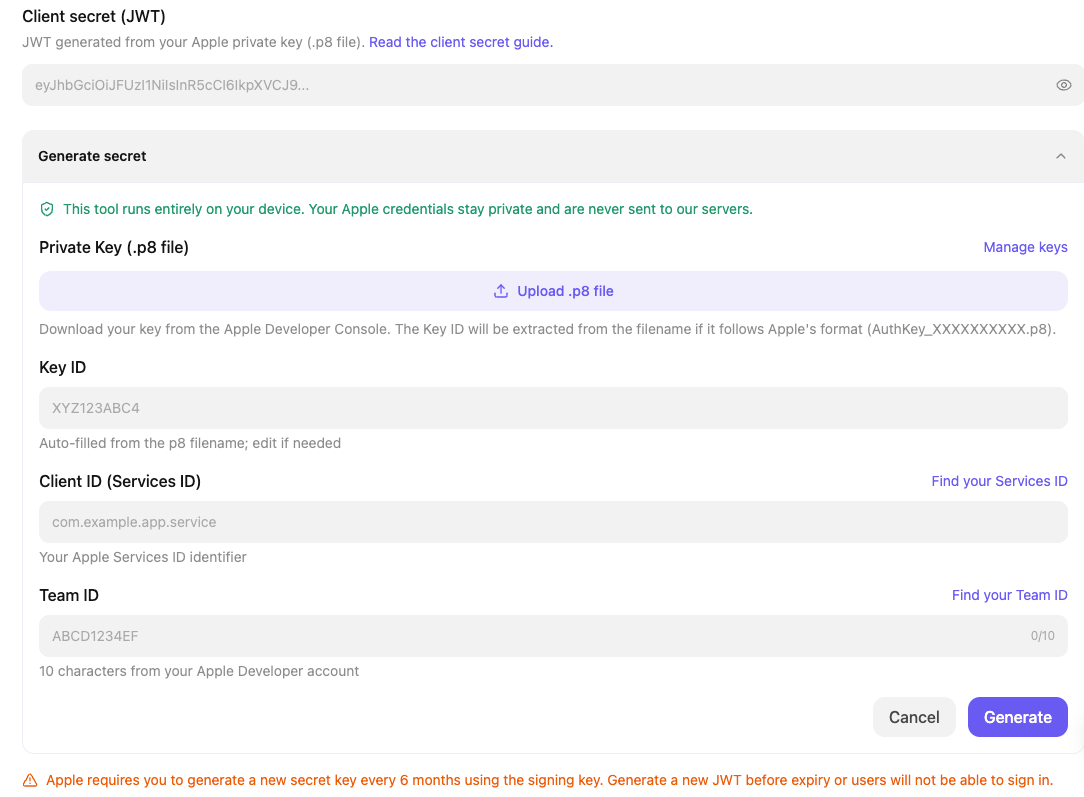
.p8 private key and enter the Key ID, Services ID, and Team ID, then click Generate.
Step 6: Configure email privacy behavior
You can optionally enable Allow users without an email. This allows users to hide their email address when signing in with Apple. When a user chooses to hide their email, Apple may provide a private relay email address instead of the user’s personal address.Step 7: Add the Redirect URL to Apple Developer Console
In the Redirect URL(s) section, OnSpace Cloud provides the callback URL required for Apple sign-in. Copy the URL exactly as displayed and add it to the Return URLs section of your Apple auth client in Apple Developer Console.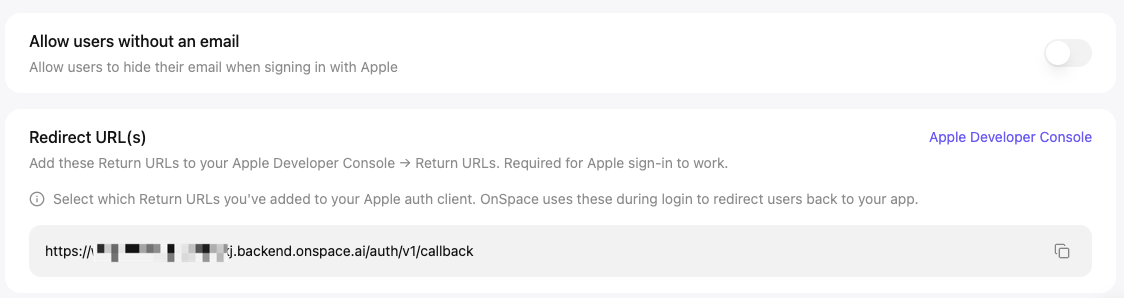
Do not modify the URL. Differences such as a missing protocol, an extra slash, or a different domain can cause Apple sign-in to fail.
Step 8: Save and test Apple sign-in
After completing the configuration, test the full sign-in flow. Confirm that:- Apple sign-in remains enabled.
- The Sign in with Apple button appears in your app or website.
- Selecting the button opens Apple’s authentication flow.
- A new user can sign in successfully.
- A returning user can sign in with the same Apple account.
- Apple redirects the user back to the correct app or website.
Common Issues
Invalid Client ID
Make sure the Client ID exactly matches the Services ID or Bundle ID configured in Apple Developer Console.Invalid or expired Client Secret
Generate a new JWT and verify the following values:- Private Key (
.p8) - Key ID
- Client ID (Services ID)
- Team ID
Redirect URL mismatch
Make sure the Redirect URL displayed by OnSpace Cloud exactly matches the Return URL configured in Apple Developer Console.Lost .p8 file
Apple private keys can normally be downloaded only once. If the file is lost, create a new Sign in with Apple key in Apple Developer Console, then generate a new Client Secret in OnSpace Cloud.
Security Notes
- Keep your
.p8private key secure. - Never expose Apple credentials in frontend code.
- Do not share your Client Secret publicly.
- Generate a new JWT before the existing one expires.
Configuration Checklist
- Opened Cloud → Users → Auth → Apple
- Enabled Apple sign-in
- Selected Your own credentials
- Entered the Client ID
- Added or generated the Client Secret (JWT)
- Uploaded the correct
.p8private key - Entered the Key ID, Services ID, and Team ID
- Added the OnSpace Redirect URL to Apple Developer Console
- Tested new-user and returning-user sign-in