Getting Started with RevenueCat
This guide will walk you through the essential steps to integrate RevenueCat with your application, focusing on App Store Connect configuration.What’s RevenueCat Integration?
RevenueCat helps you manage subscriptions and in-app purchases for your mobile app. This integration allows you to monetize your OnSpace-built app with ease.1. Prerequisites
- An OnSpace app published to the App Store
- Apple Developer Account access
- App Store Connect access
- Setup all required steps under https://appstoreconnect.apple.com/business
Step 1: Create RevenueCat Account
Sign up for RevenueCat- Go to RevenueCat and create an account
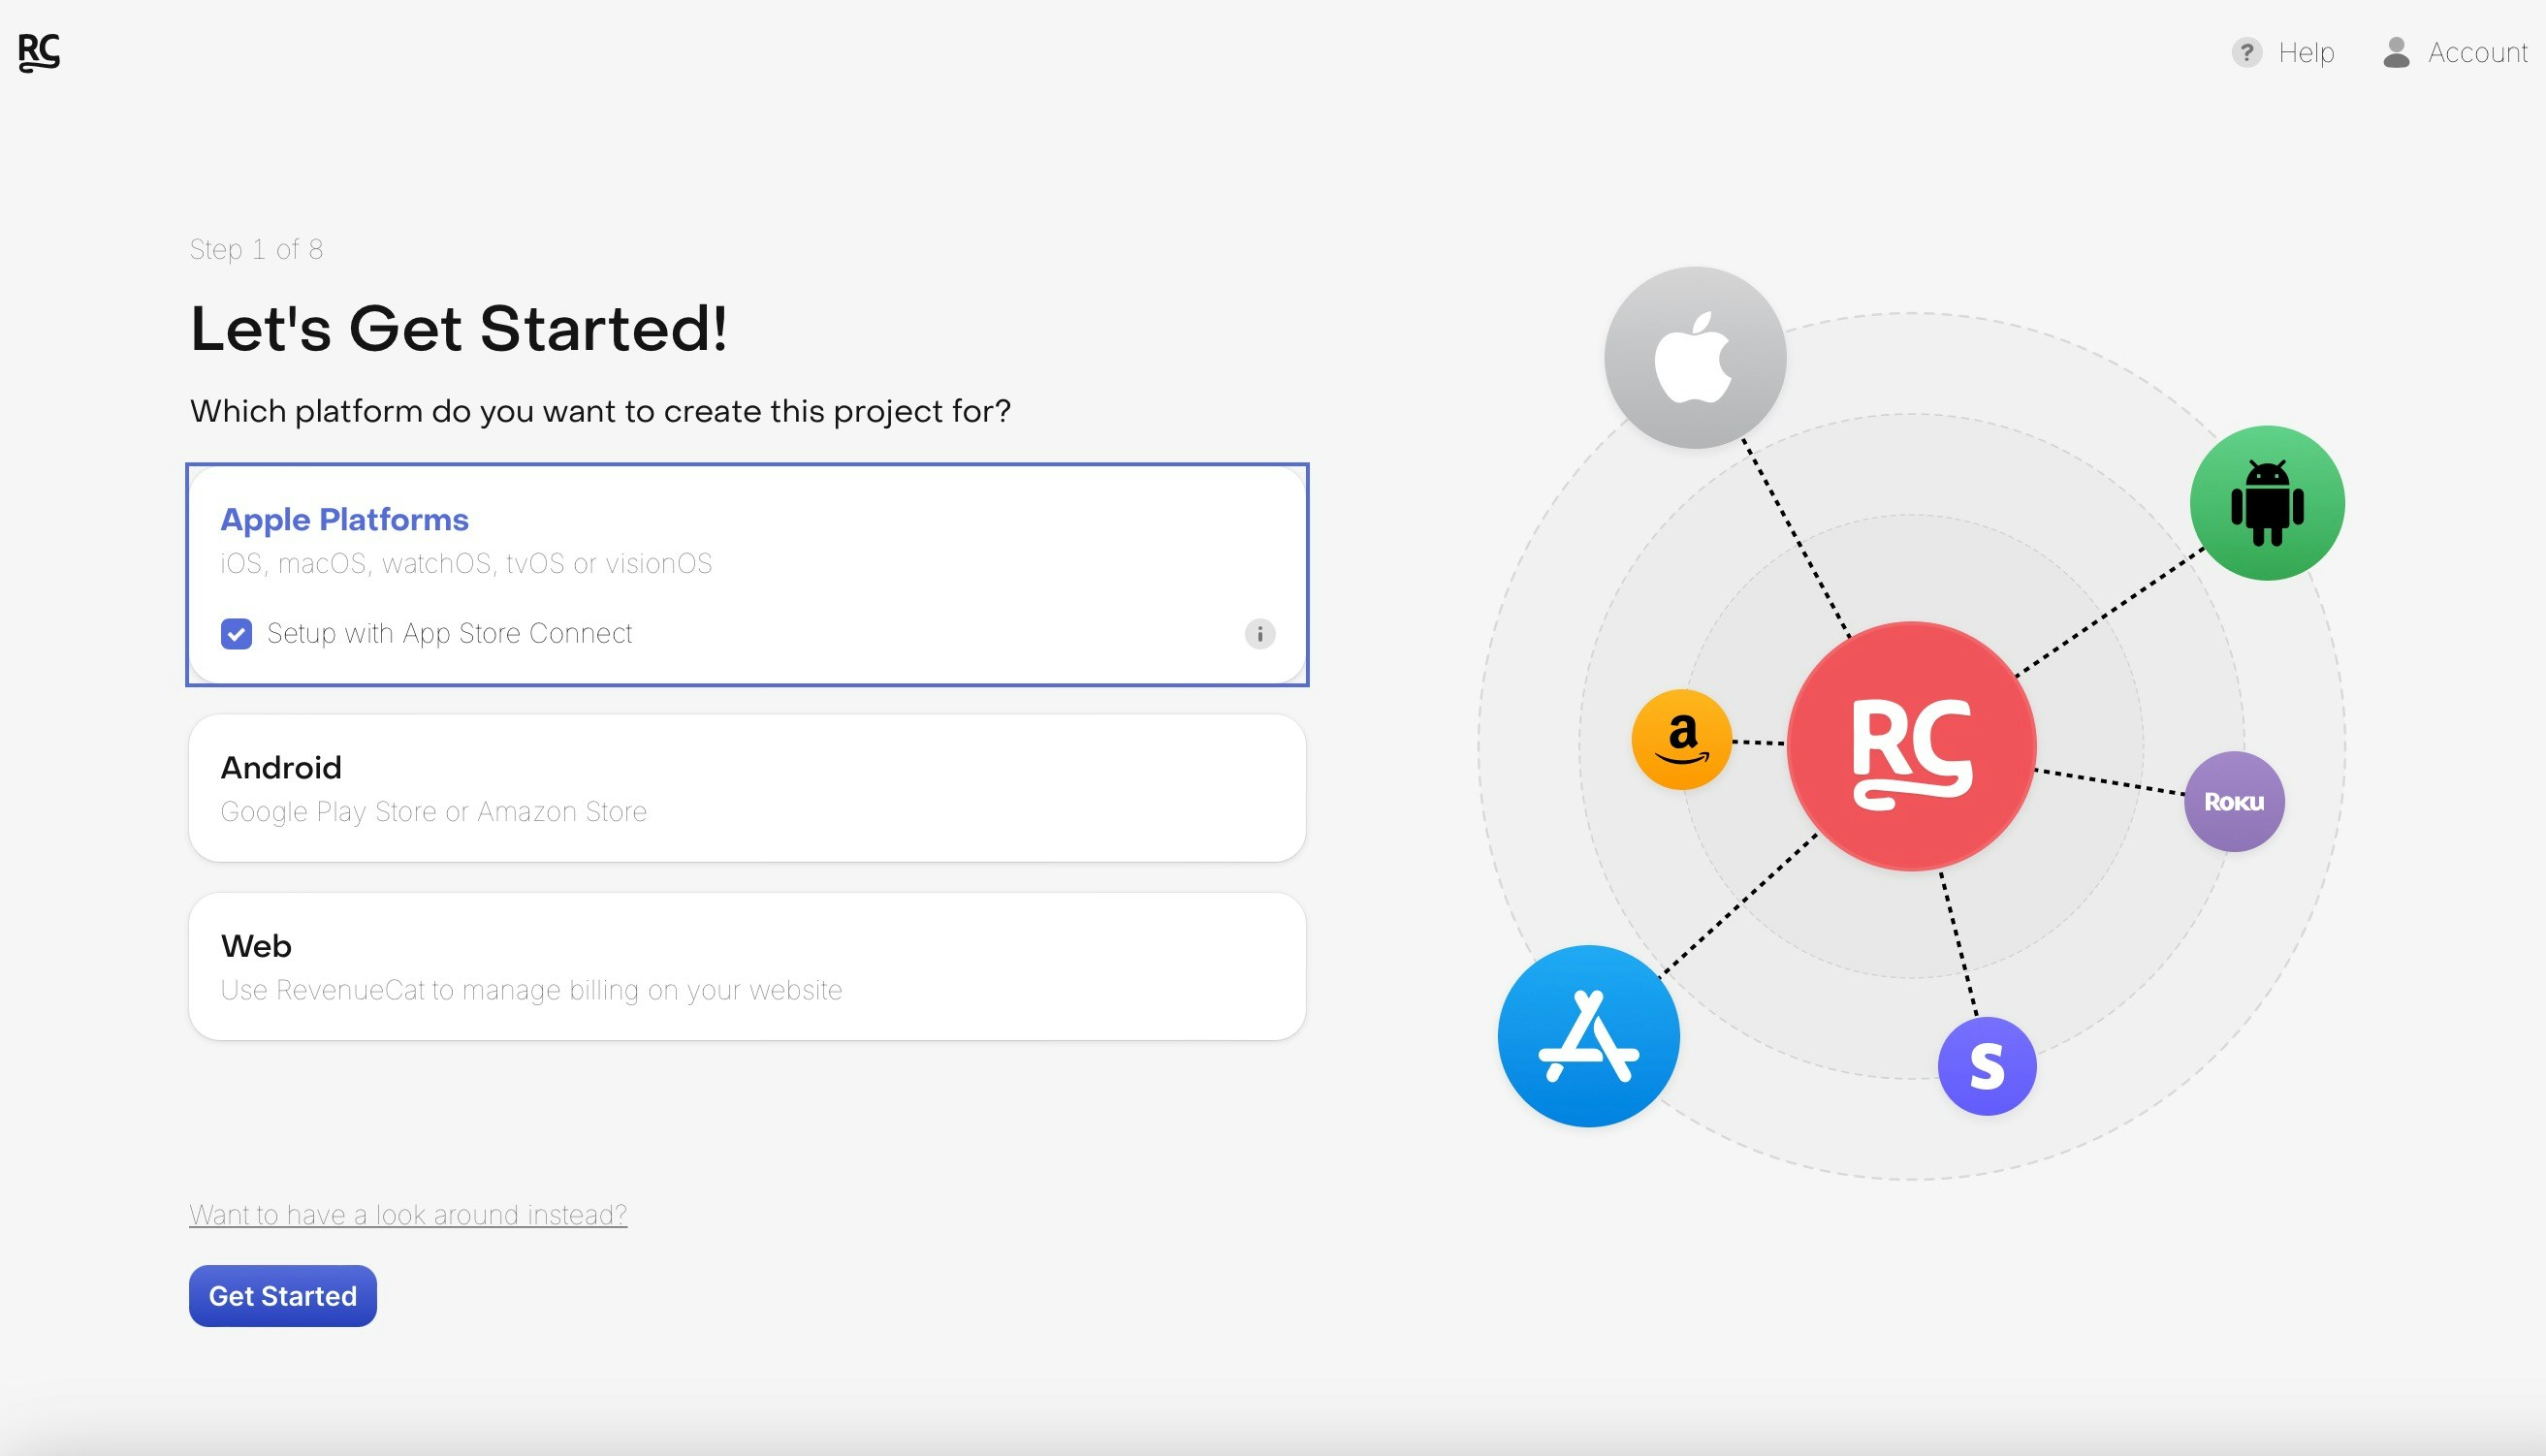
- Select Apple as your platform during setup
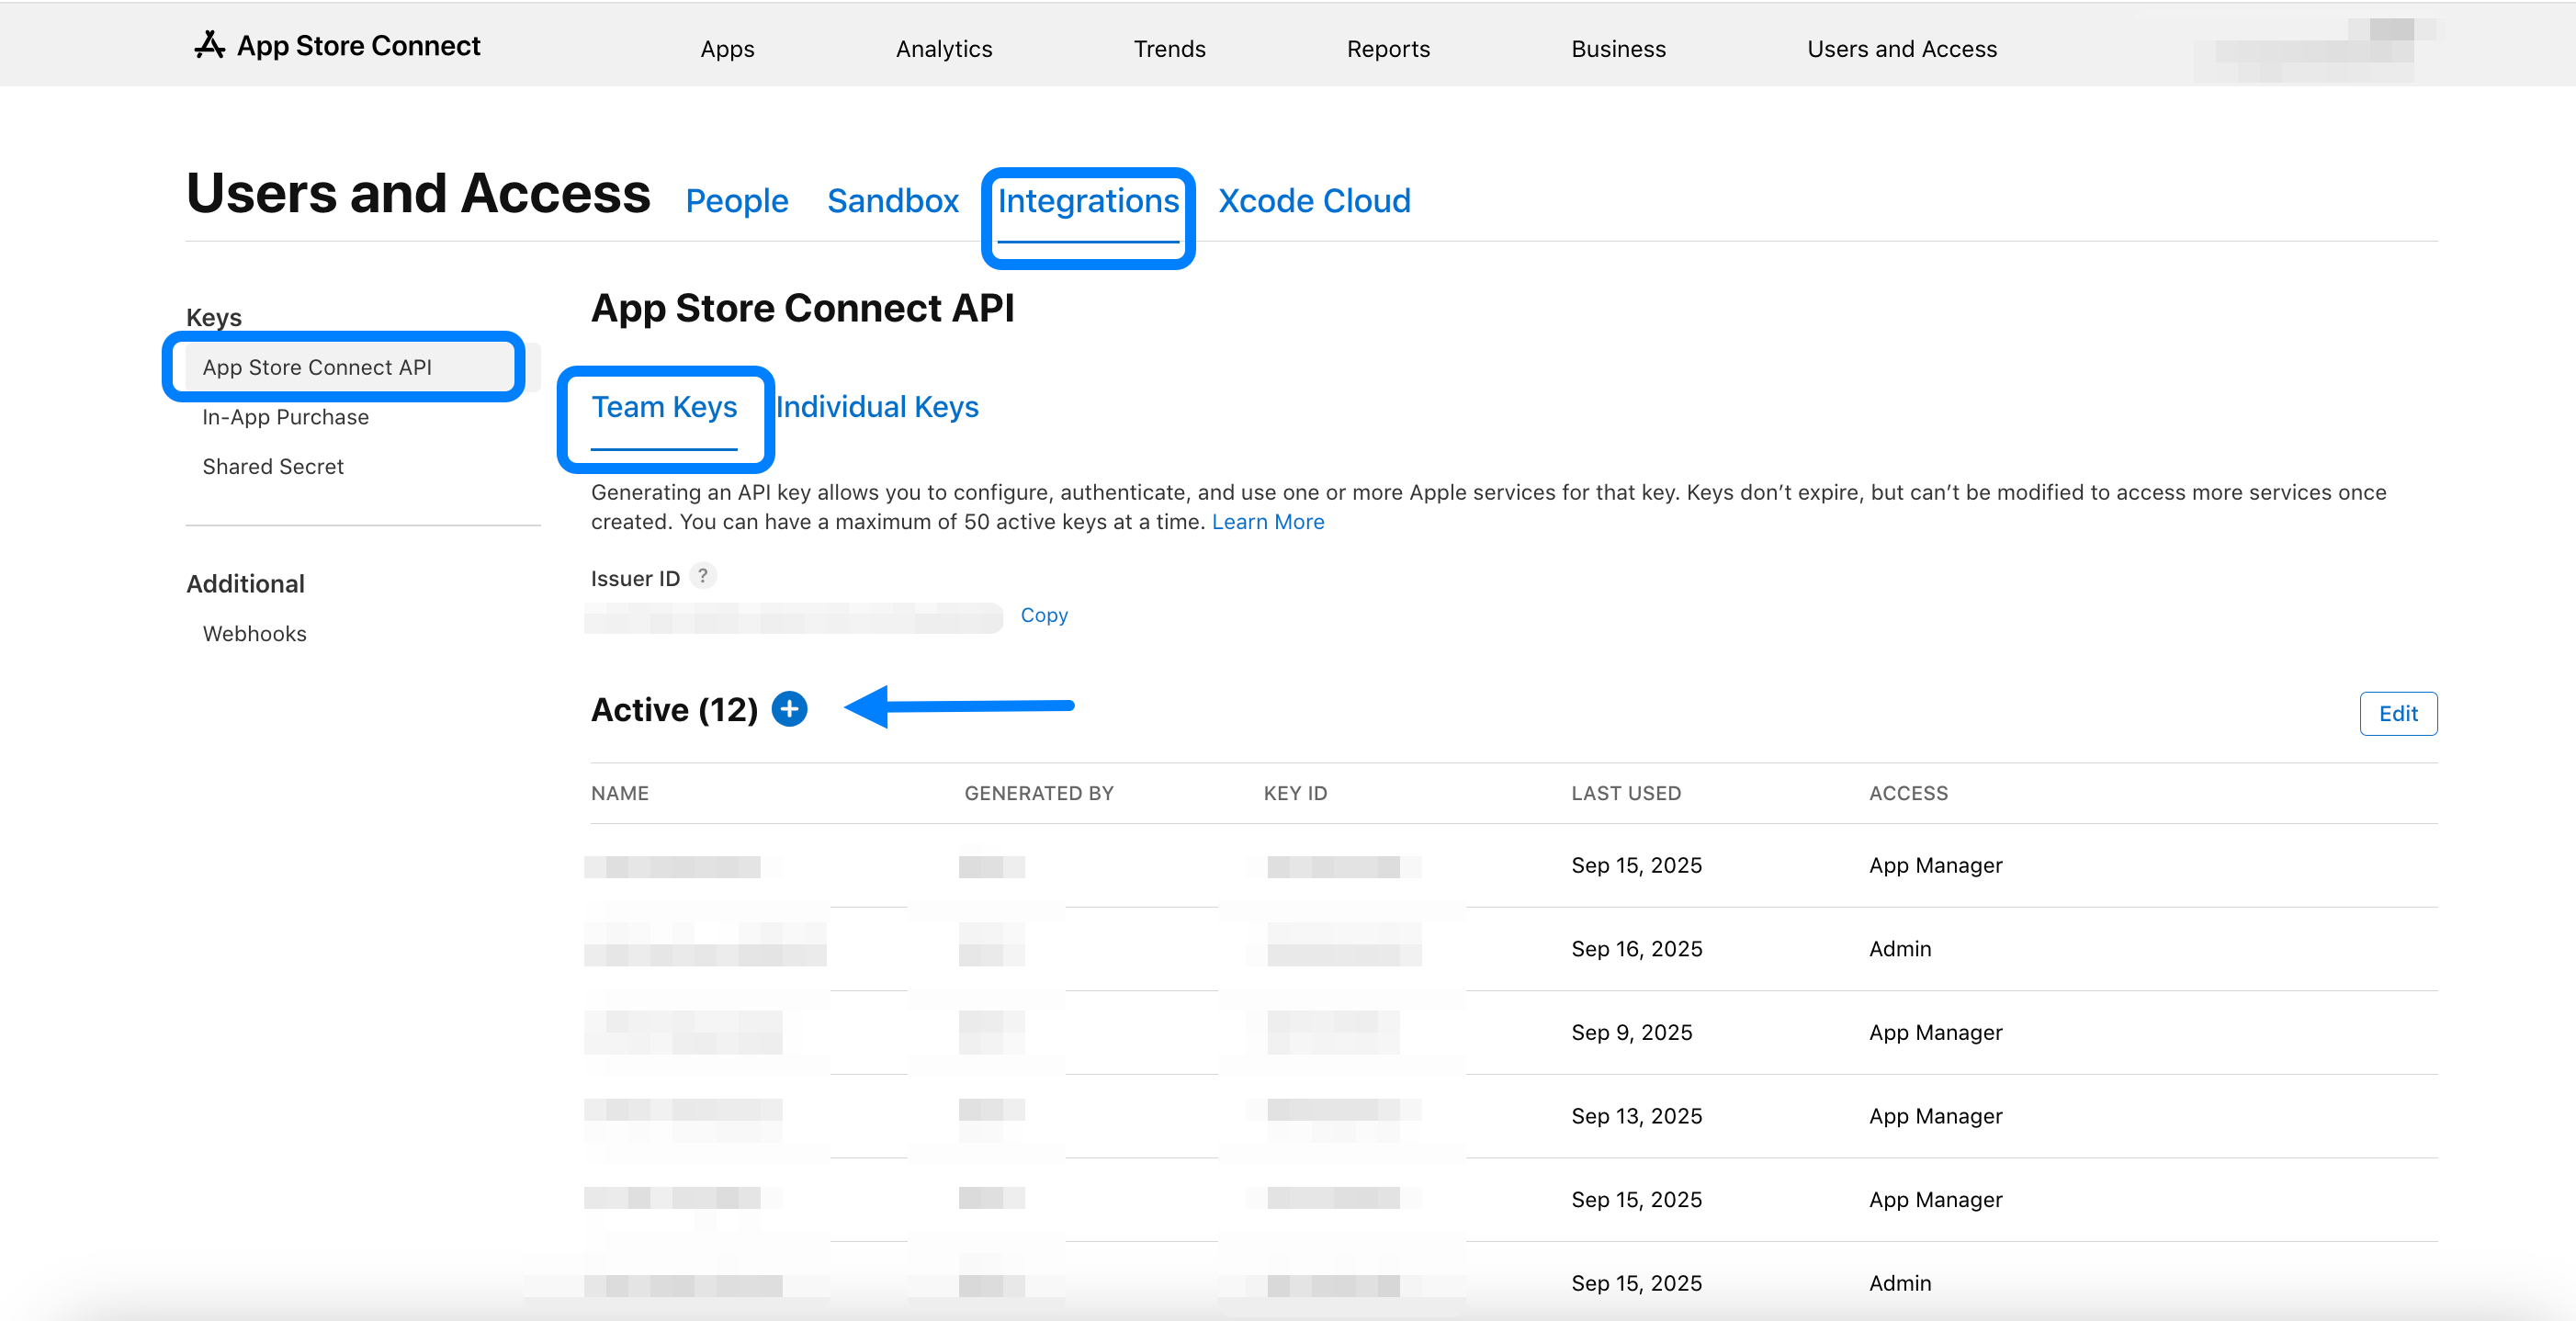
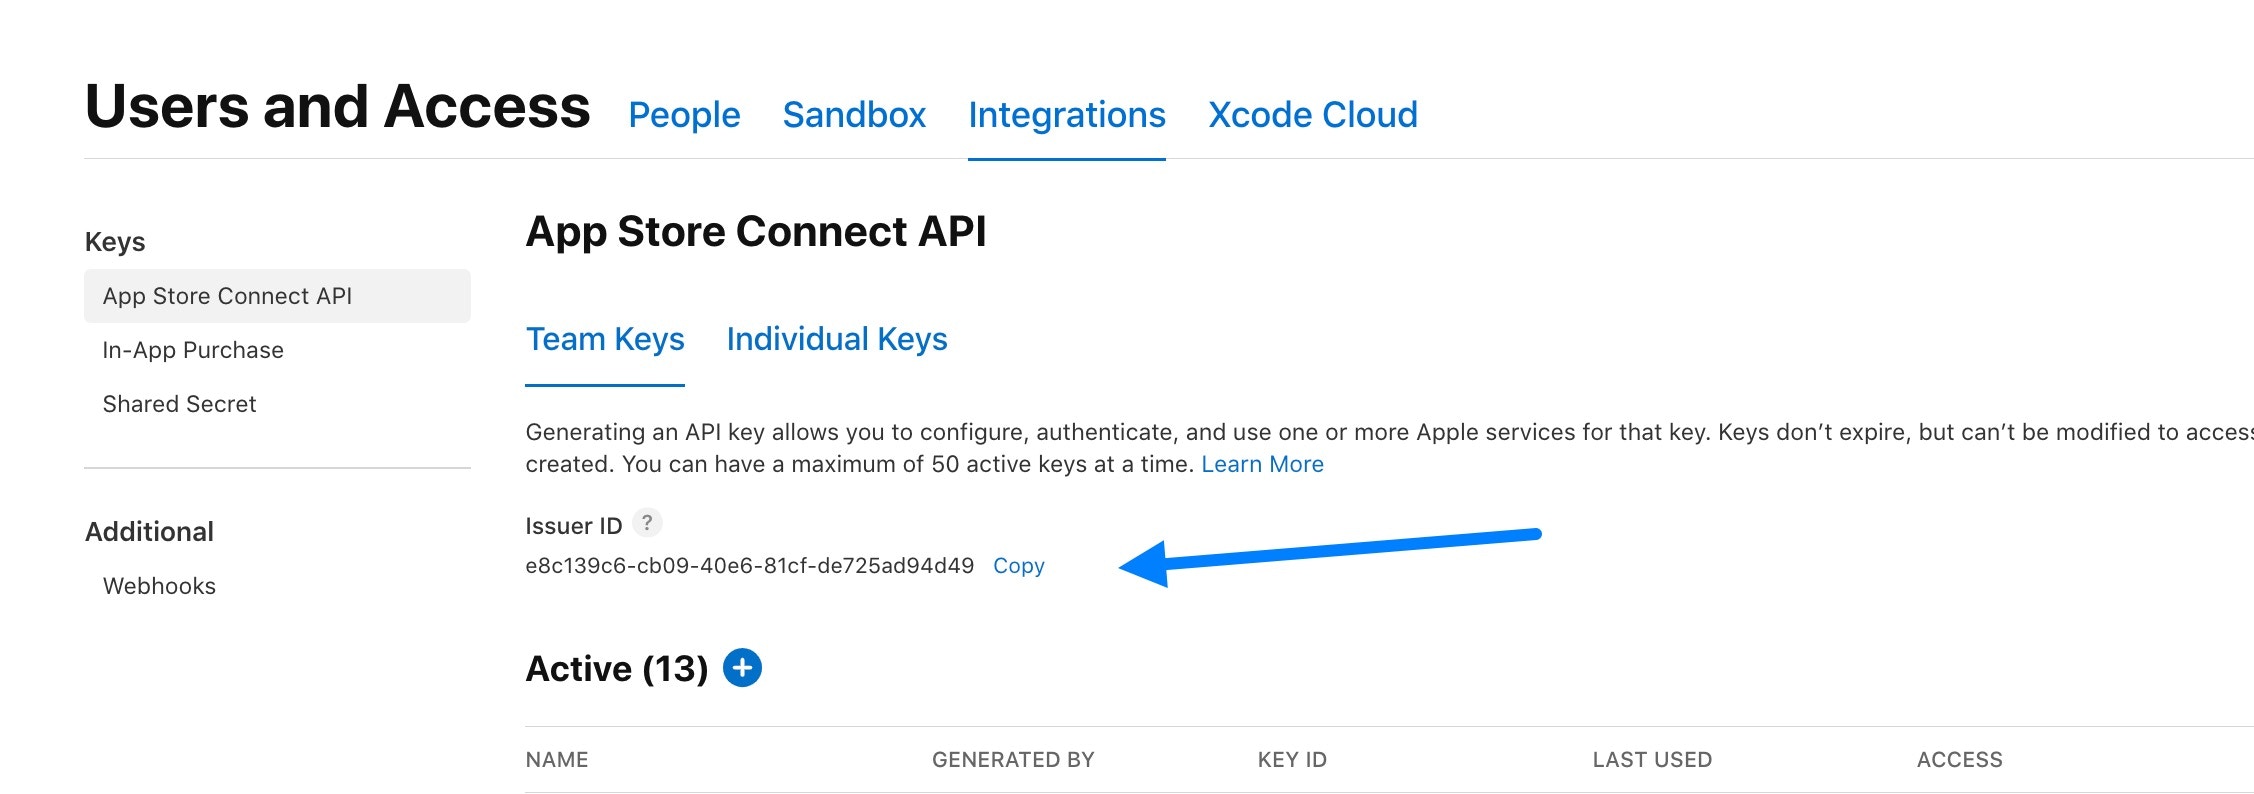
Step 2: Generate App Store Connect API Key
Navigate to App Store Connect → Users and Access → Integrations → Team Keys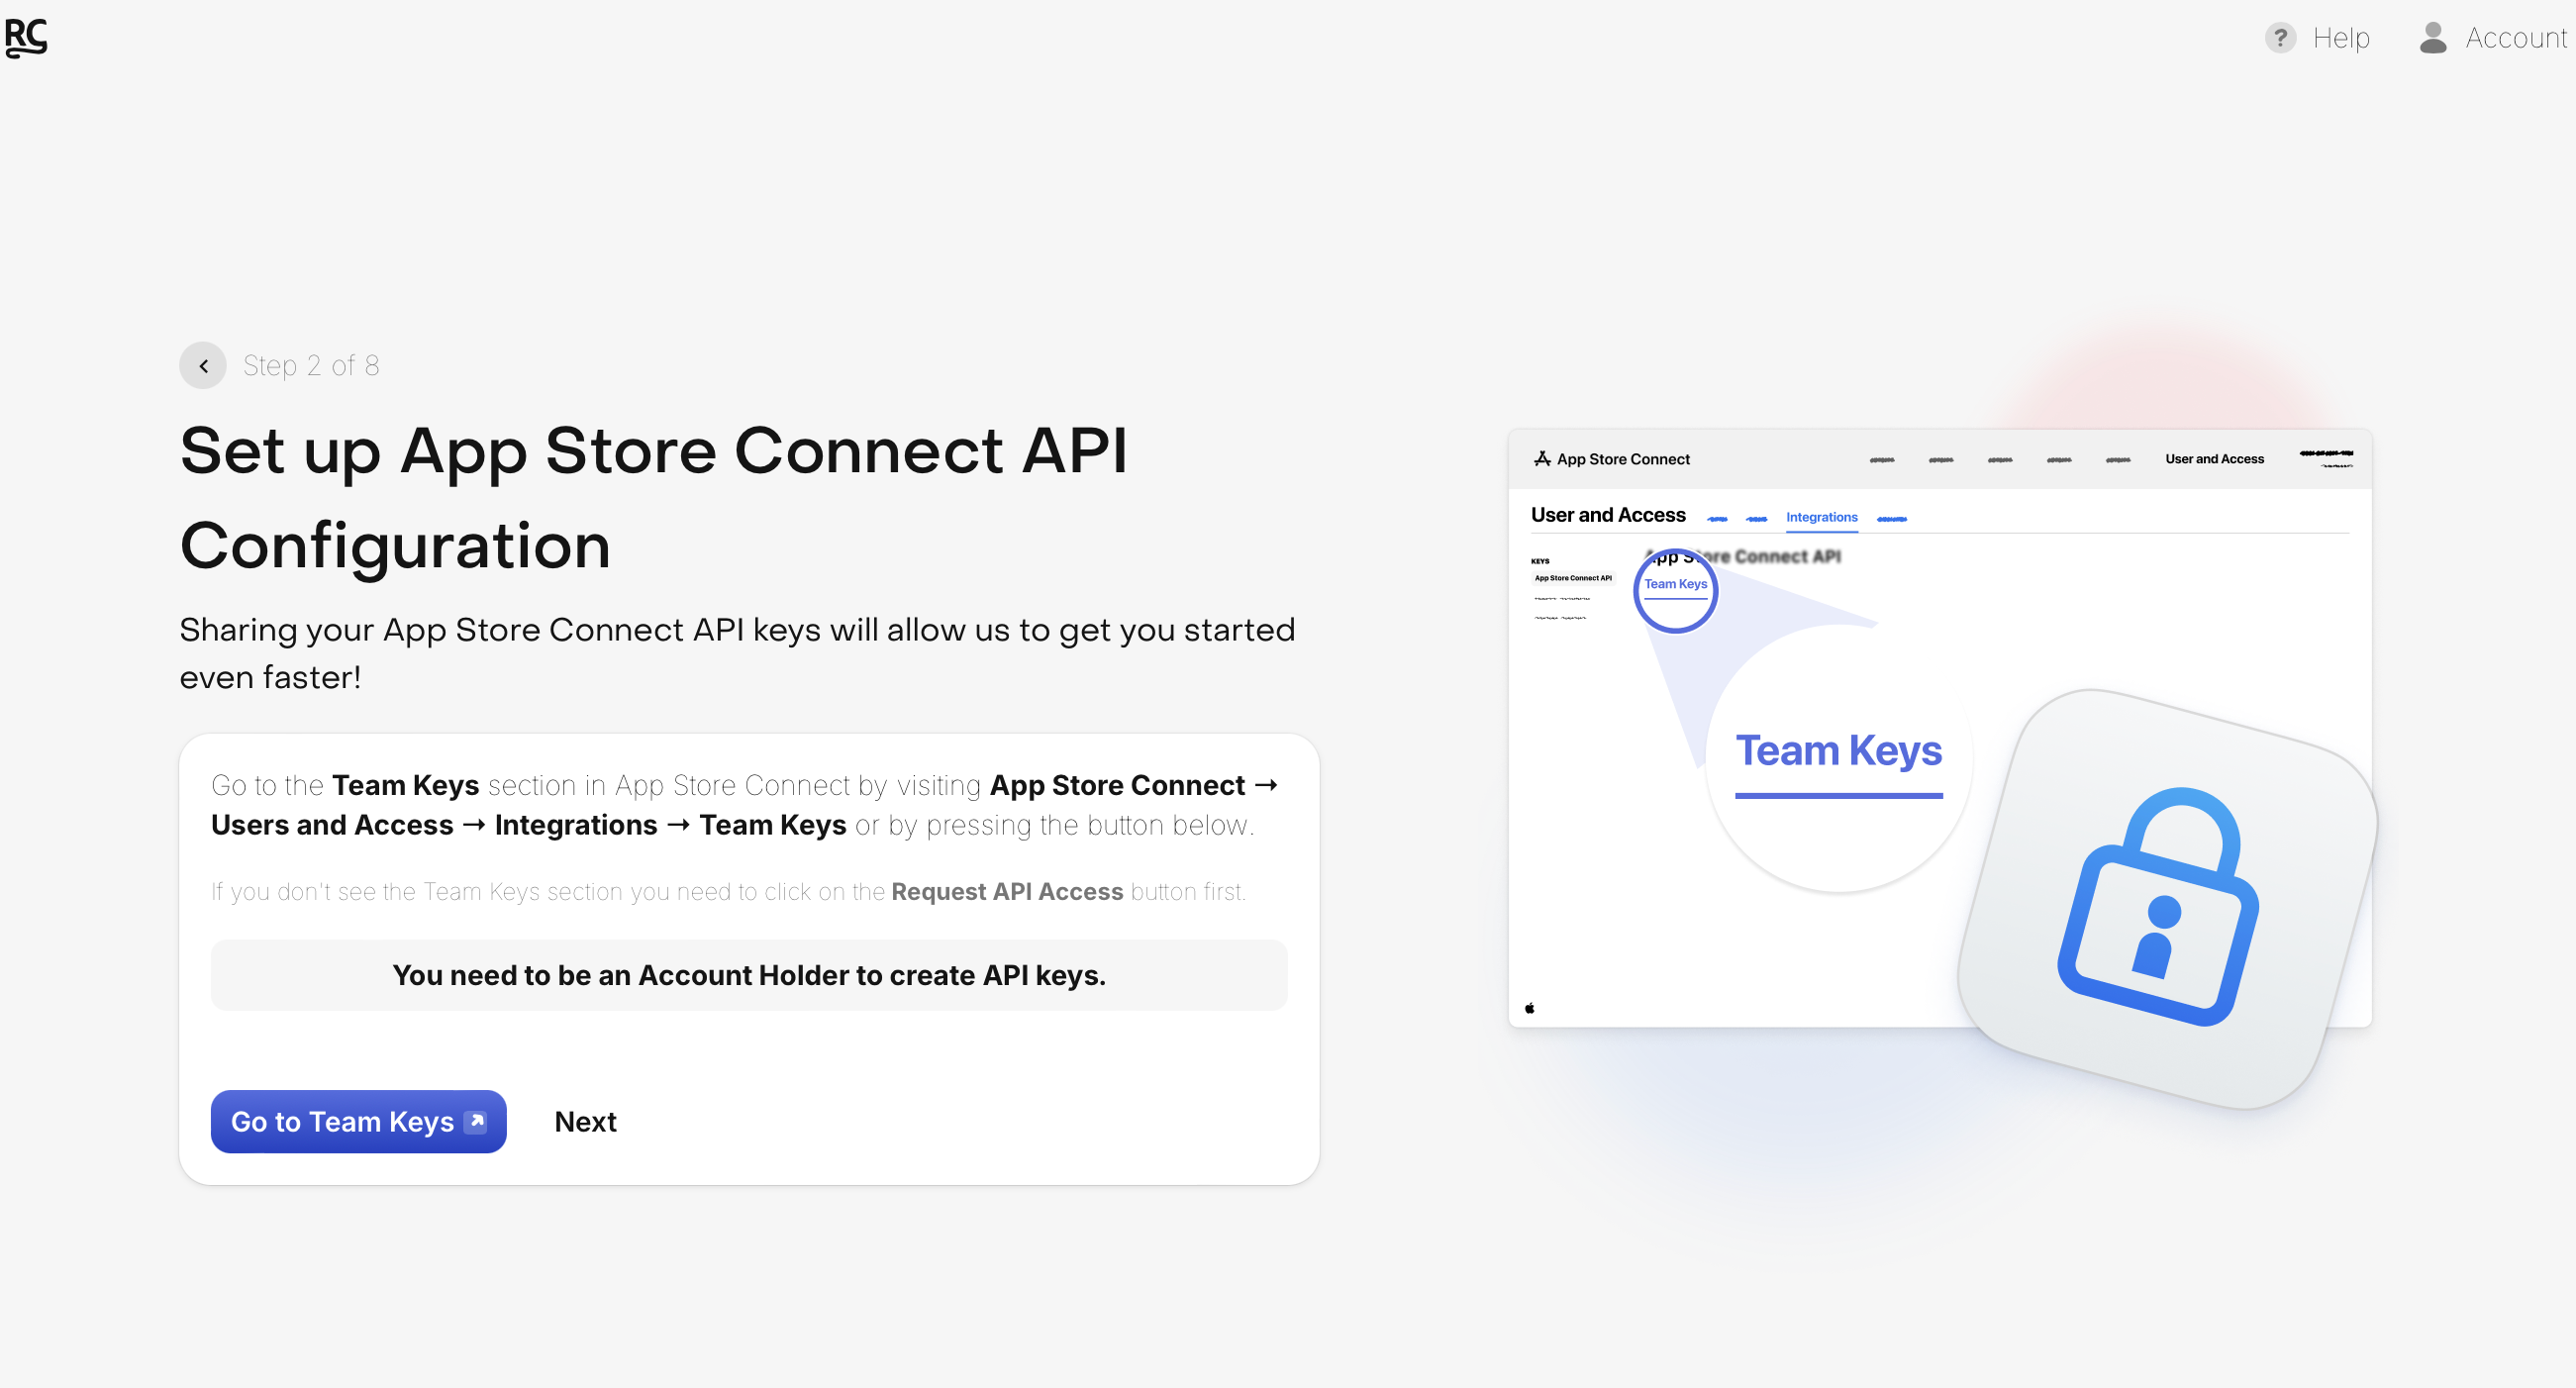
Create New API Key
- Click “Create New API Key” button
- Set Access Level to “App Manager” (minimum required)
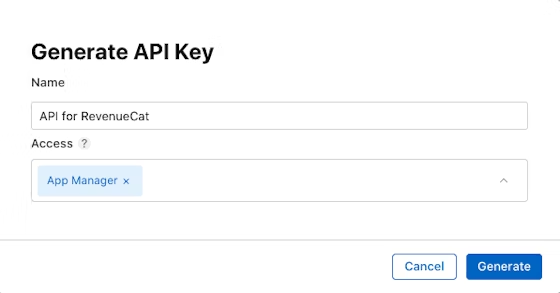
- Download the API key (.p8 file) and save it securely
- Copy the Issuer ID from the API page
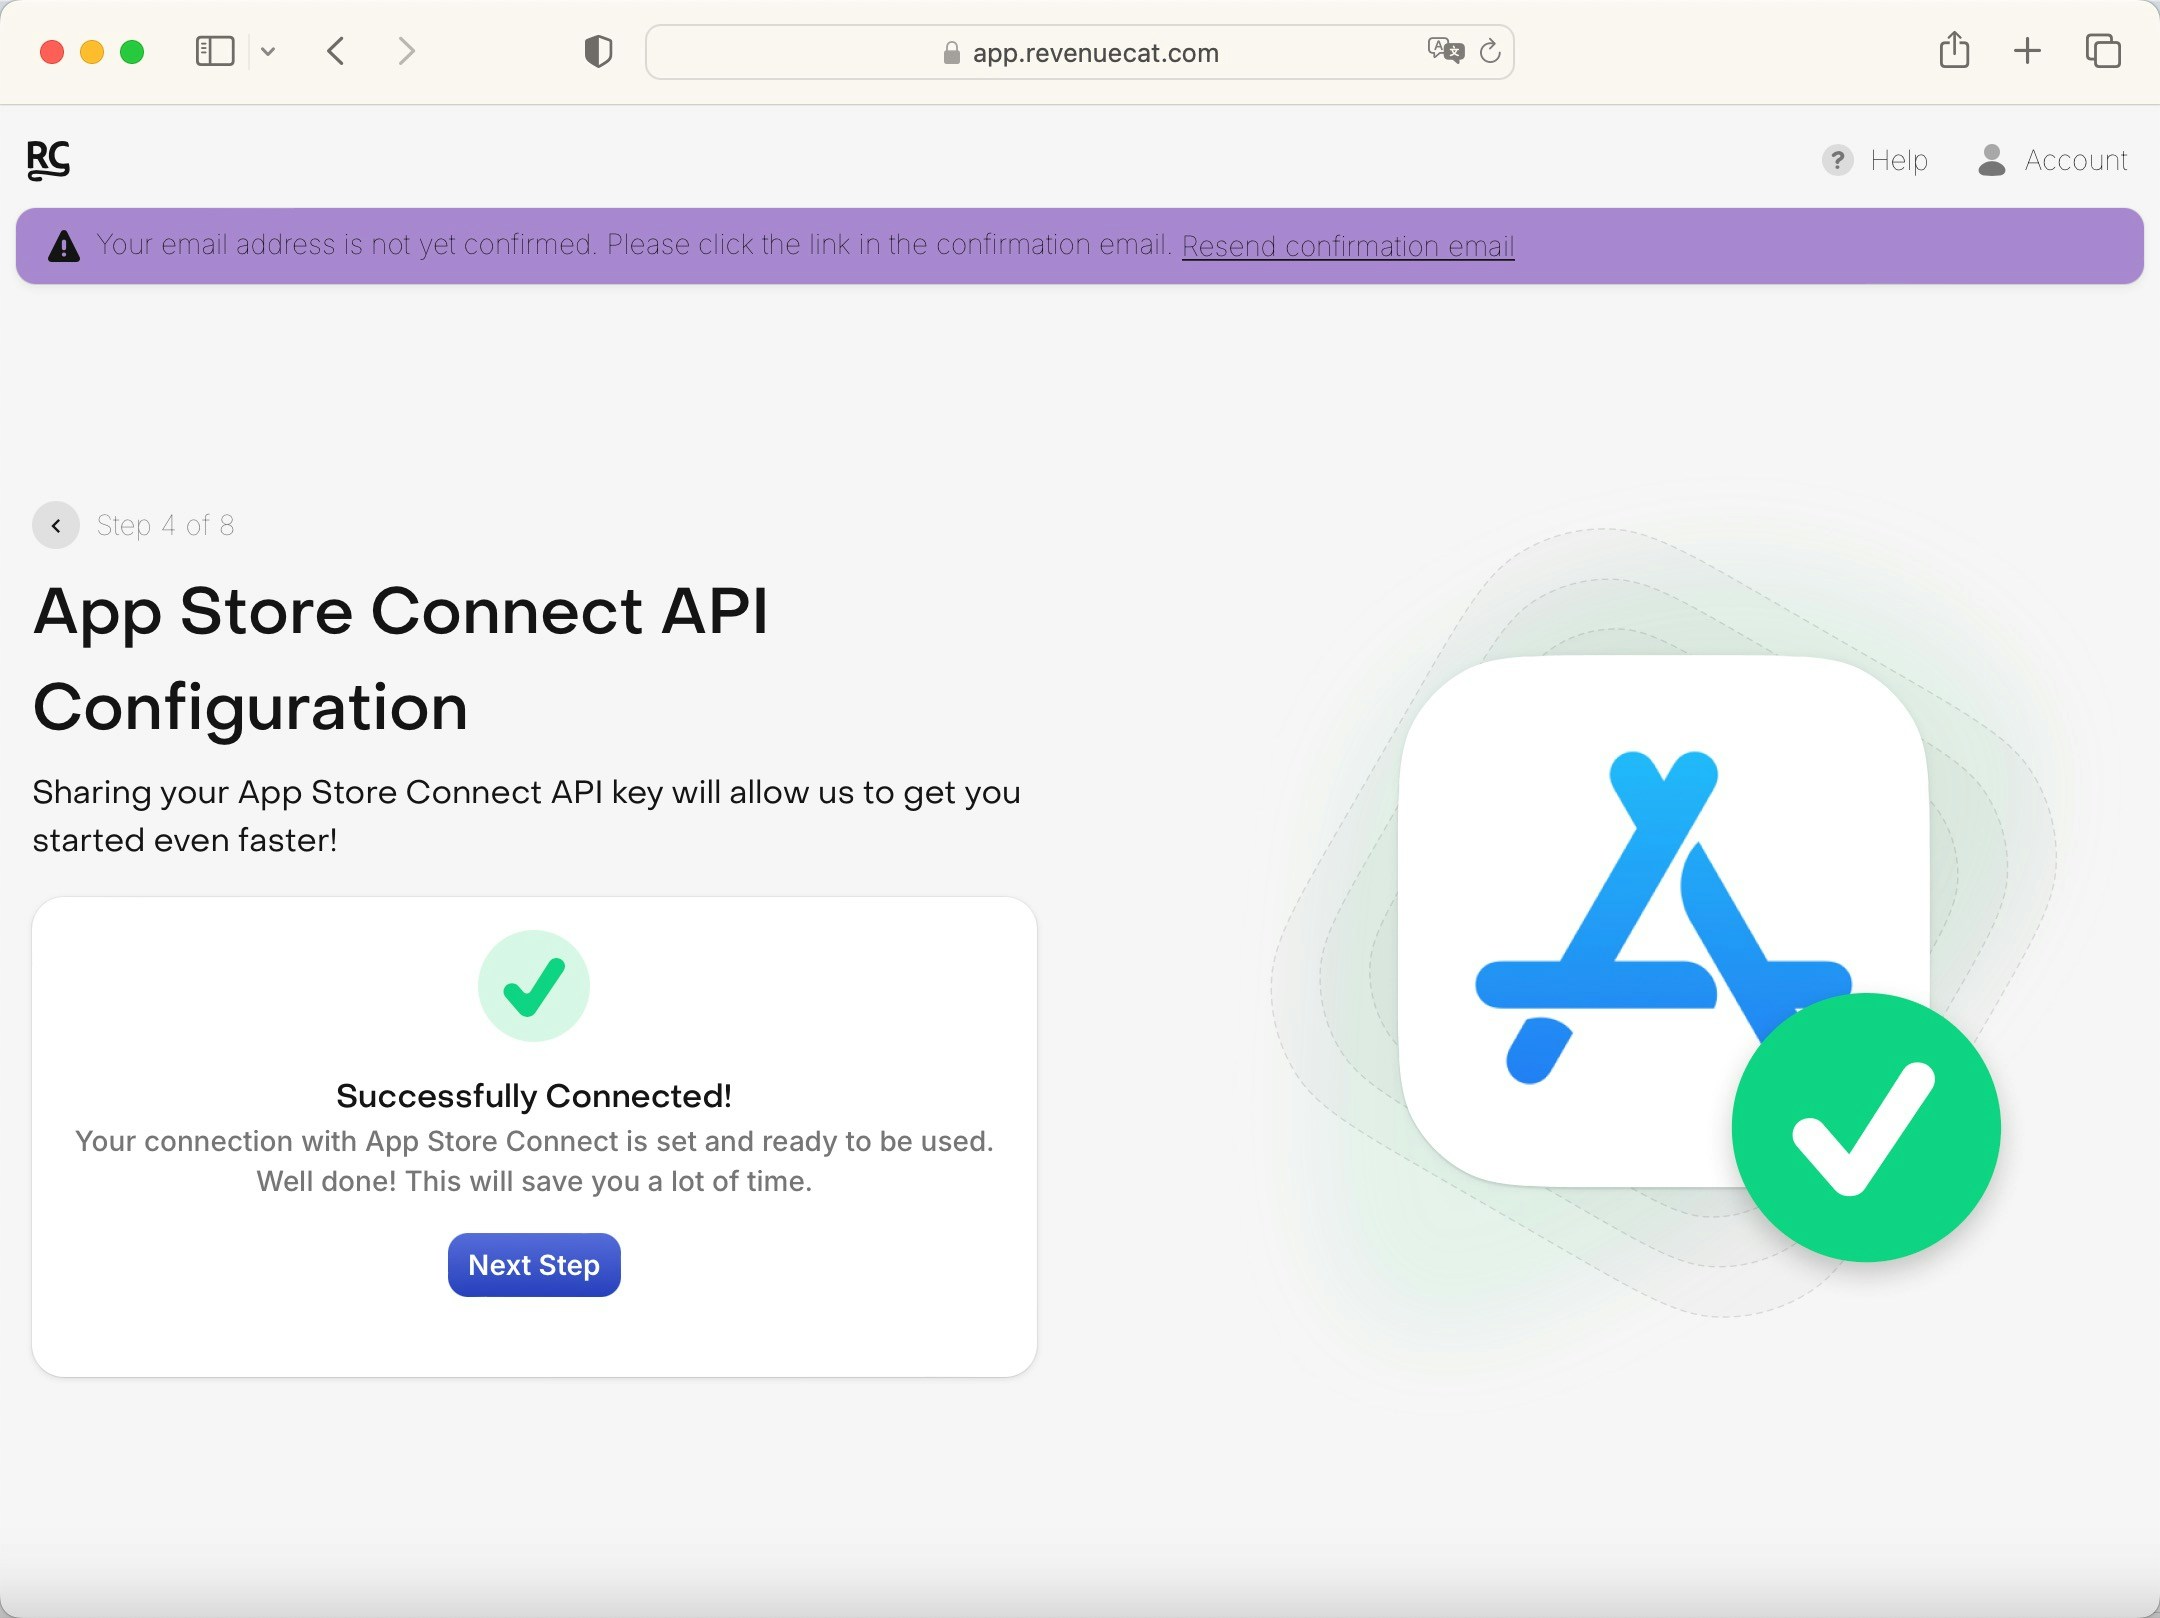
Step 3: Upload API Key to RevenueCat
Return to RevenueCat dashboard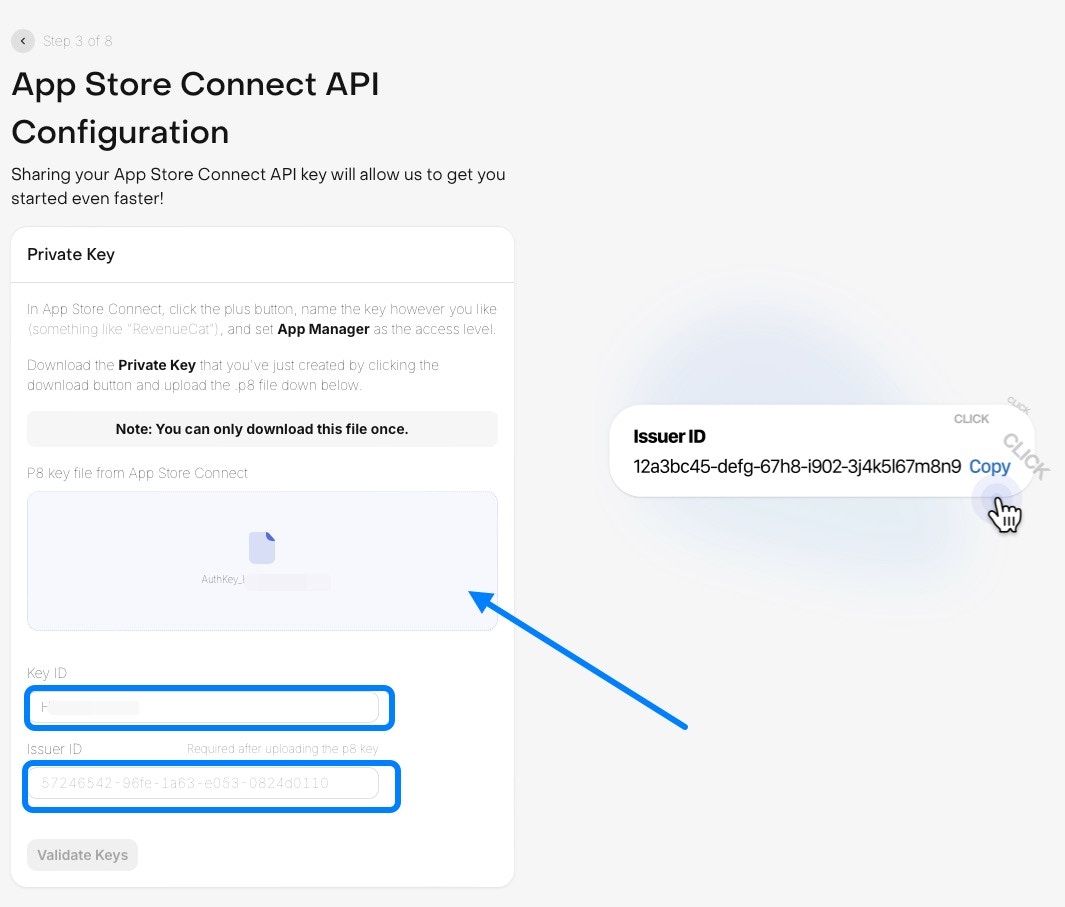
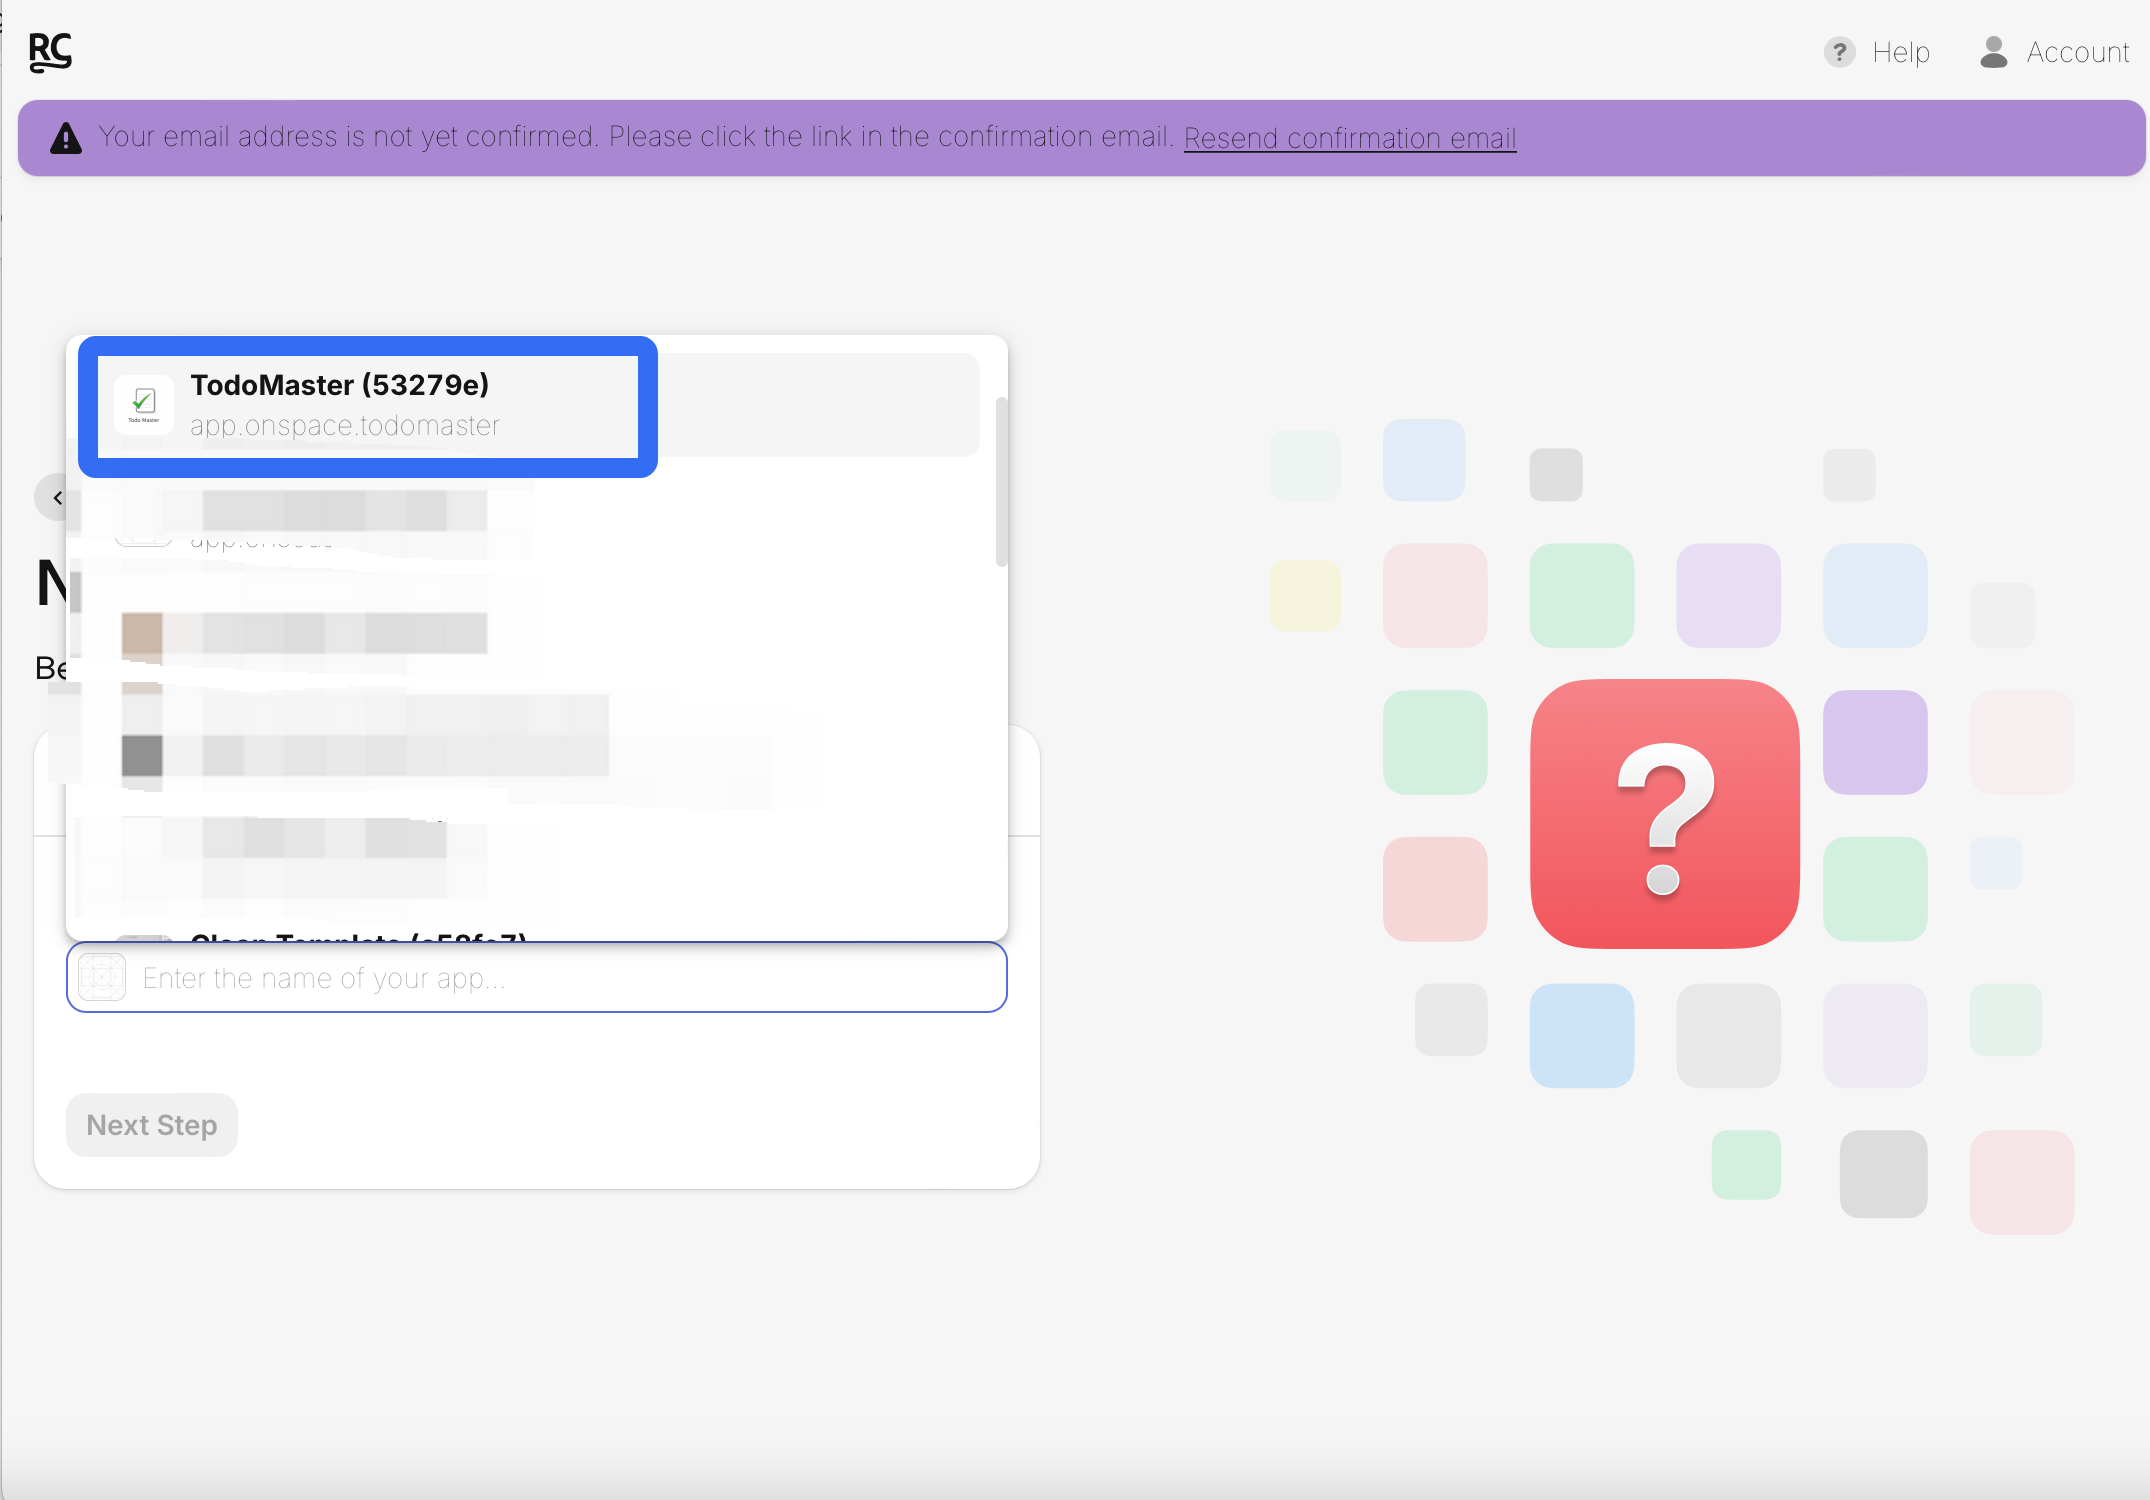
Step 4&5: Select Your App
RevenueCat will automatically read your apps from App Store Connect:- Select the app you want to set up with RevenueCat
- Don’t have an app yet? Build your first app with OnSpace and publish it to the App Store first
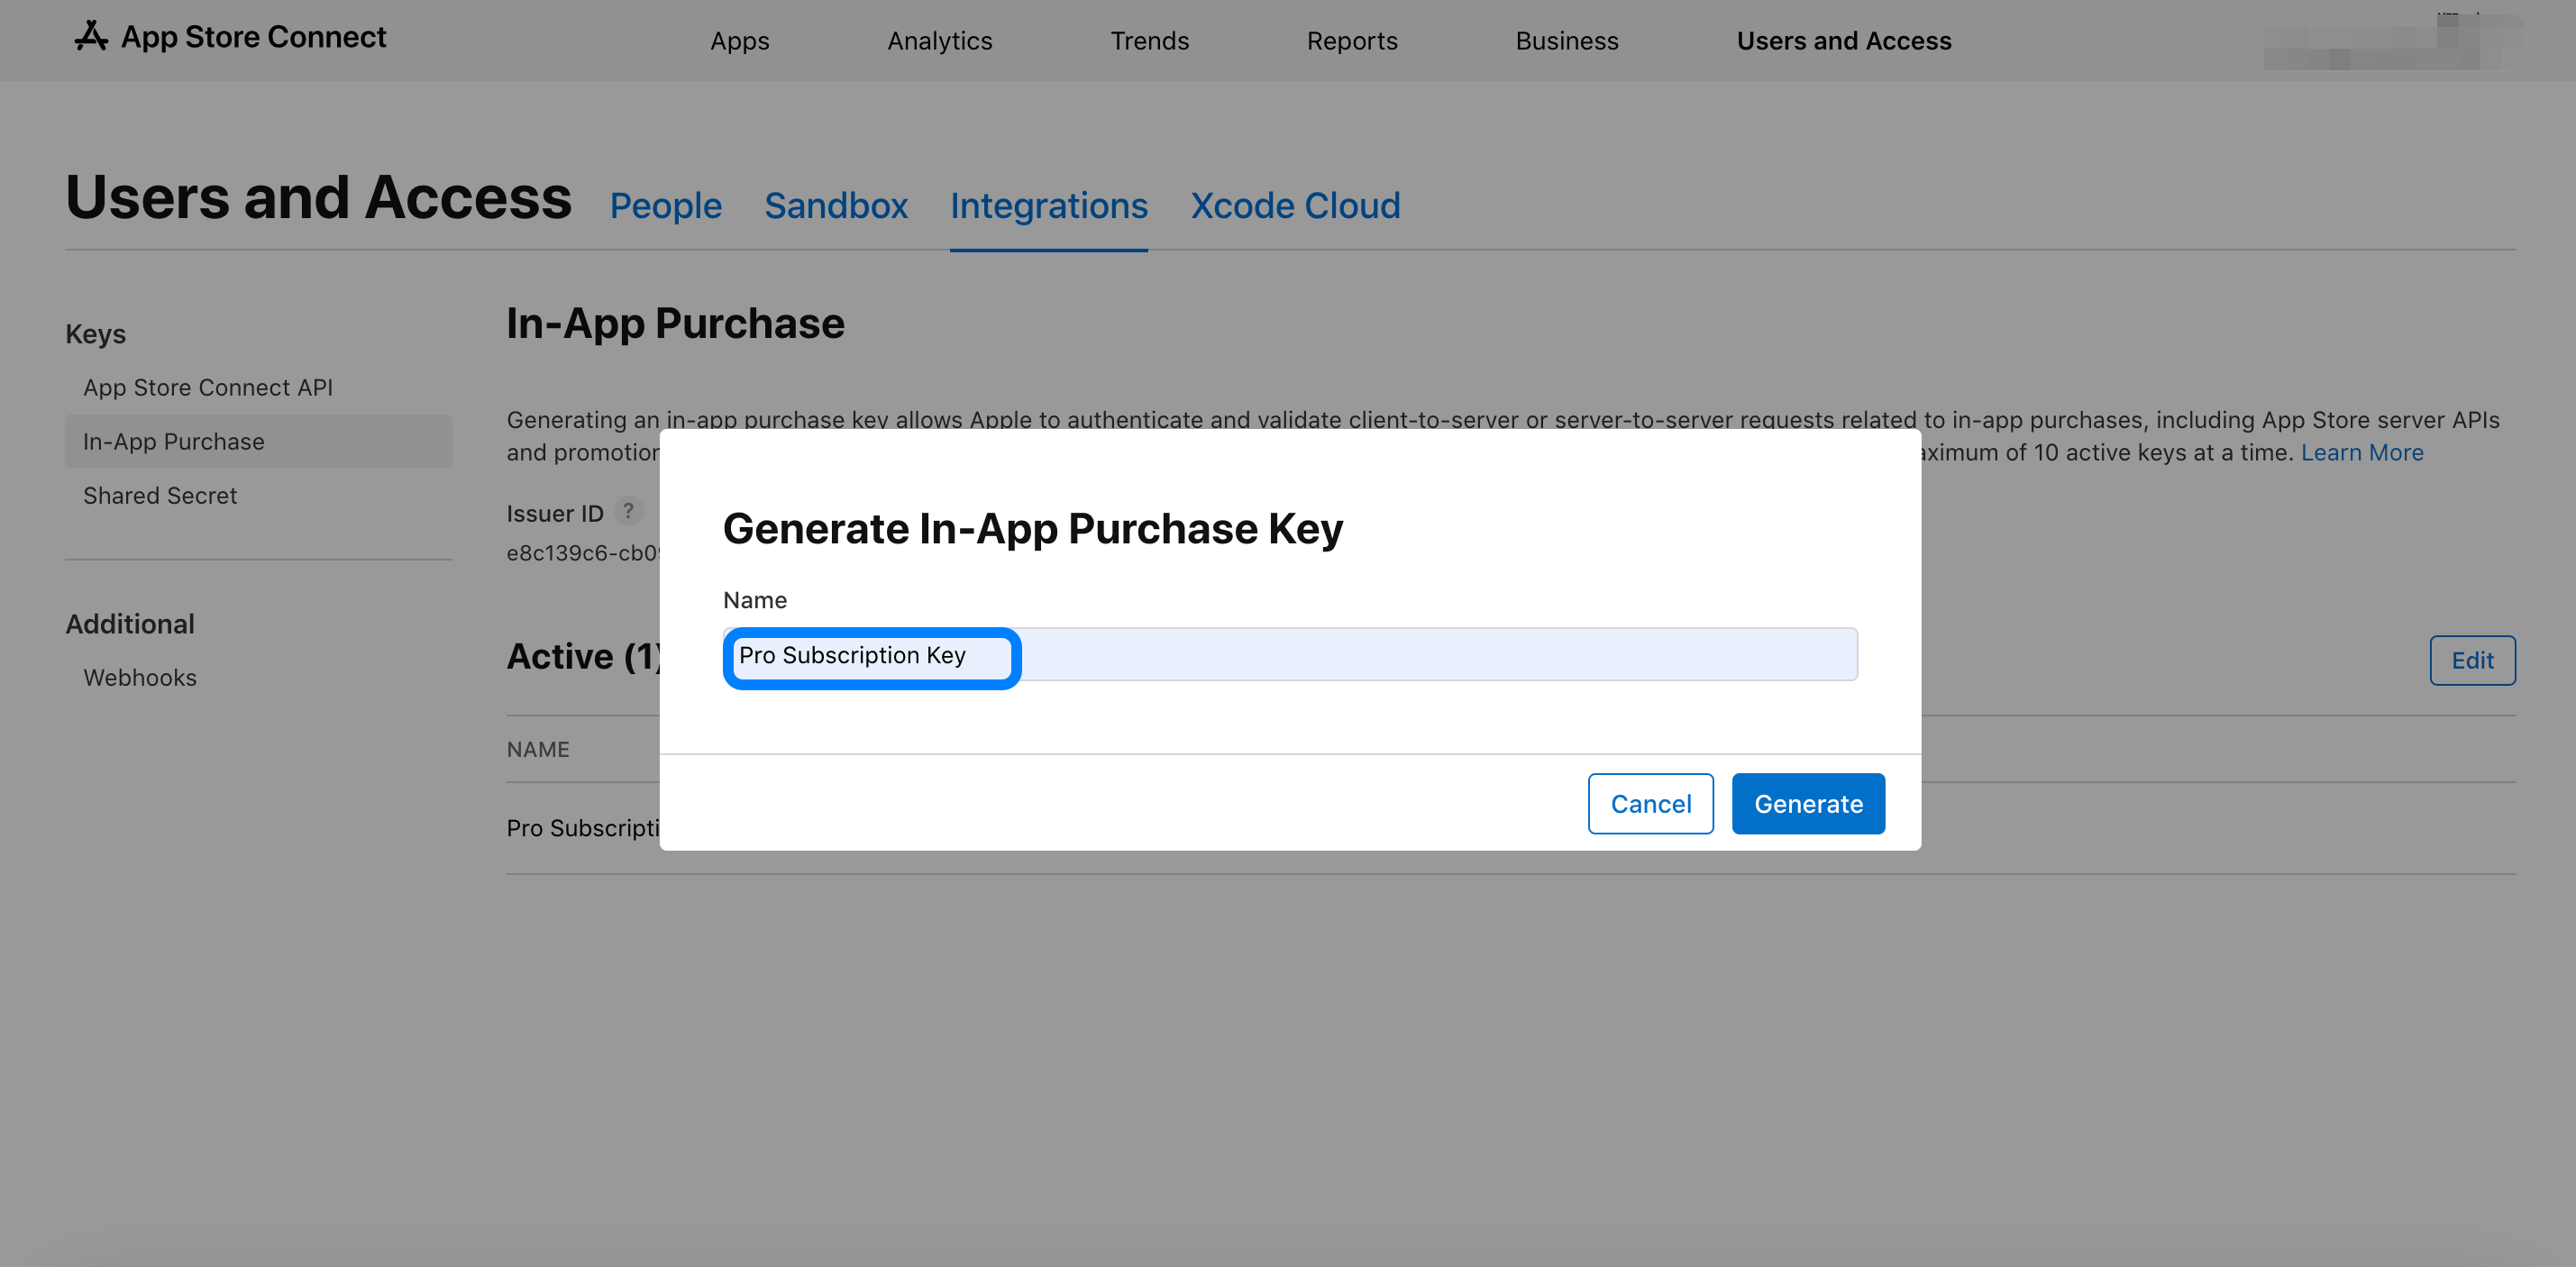
Step 6: Set Up In-App Purchase Configuration
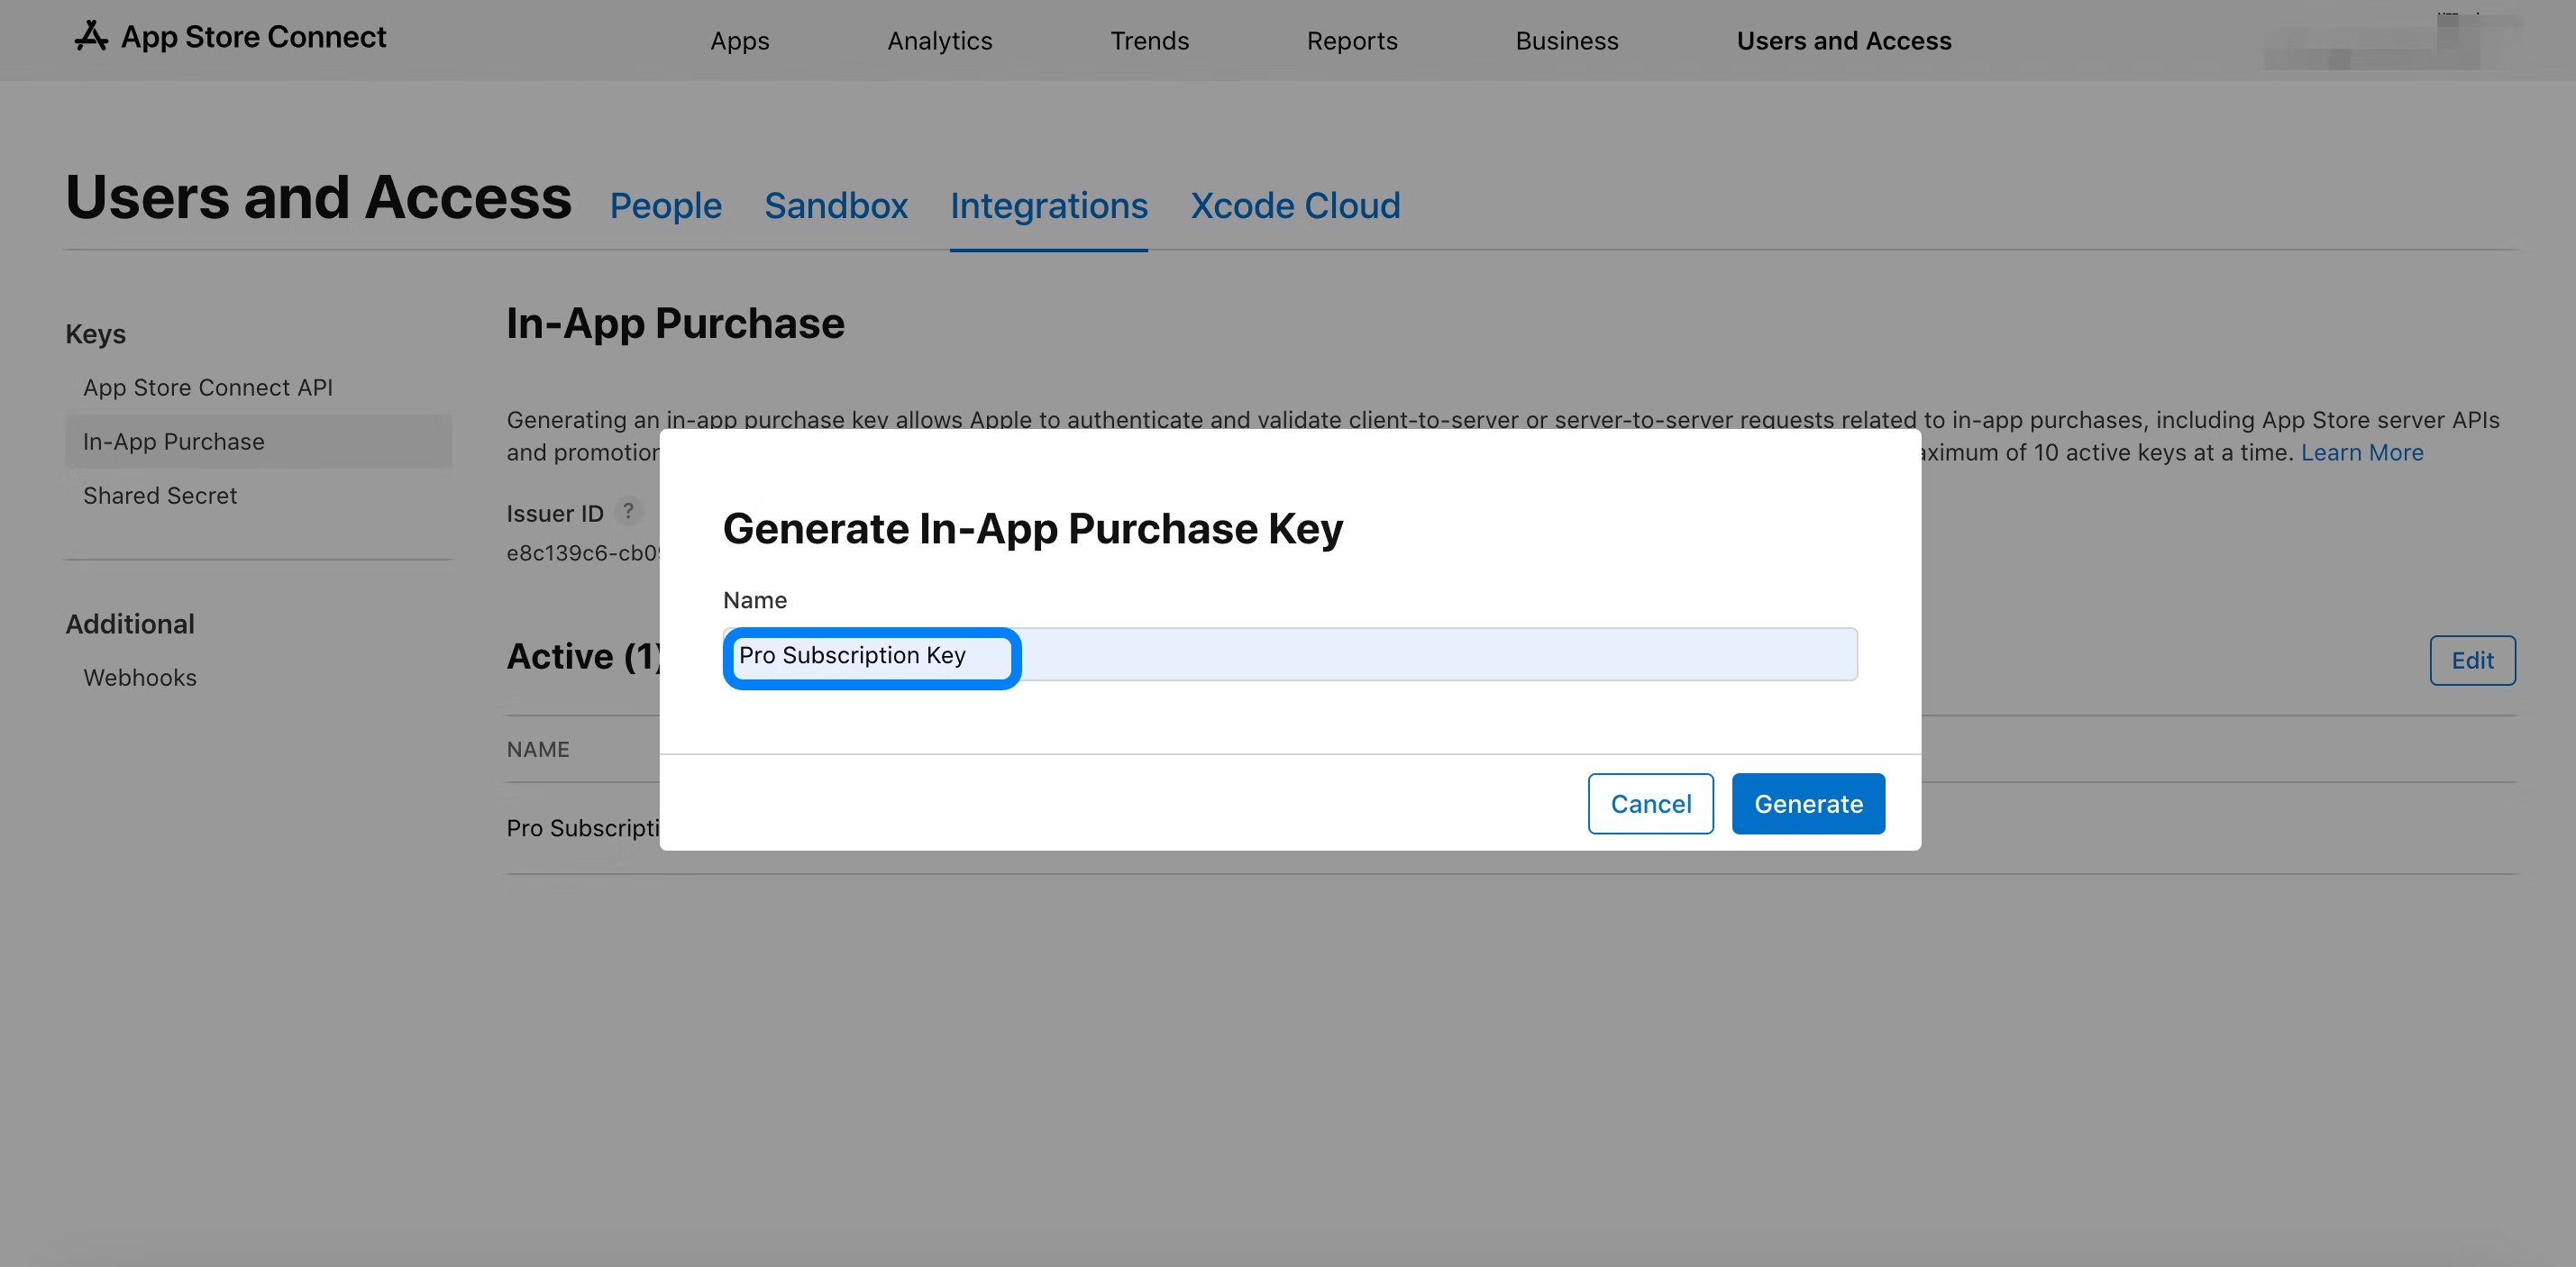
Navigate to App Store Connect → Users and Access → Integrations → In-App PurchaseGenerate In-App Purchase Key
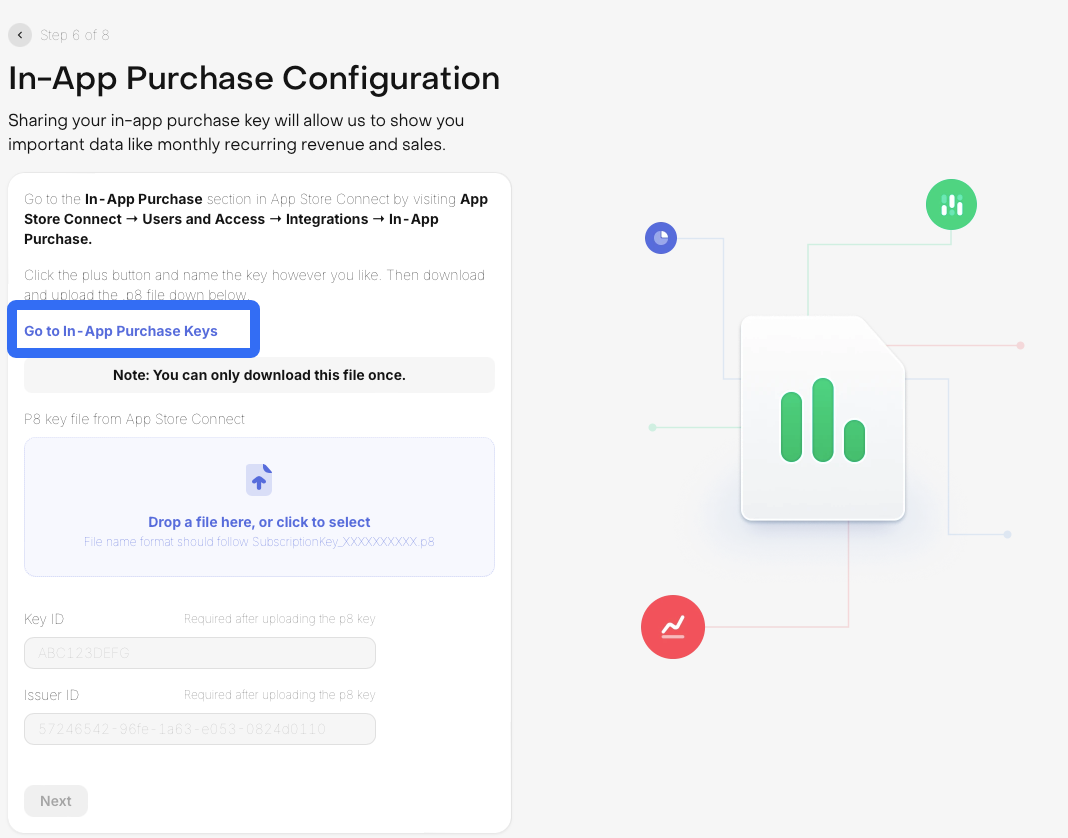
- Click “Go to In-App Purchase Keys”
- Navigate to Users and Access → Integrations

- Select In-App Purchase
- Click “Generate In-App Purchase Key” or the ”+” symbol
- Enter a name for the key when prompted
Step 7: Product Setup
Skip manual product creation in RevenueCat. Instead:- Set up products in App Store Connect first
- Import products directly back to RevenueCat
- This ensures consistency and reduces setup errors
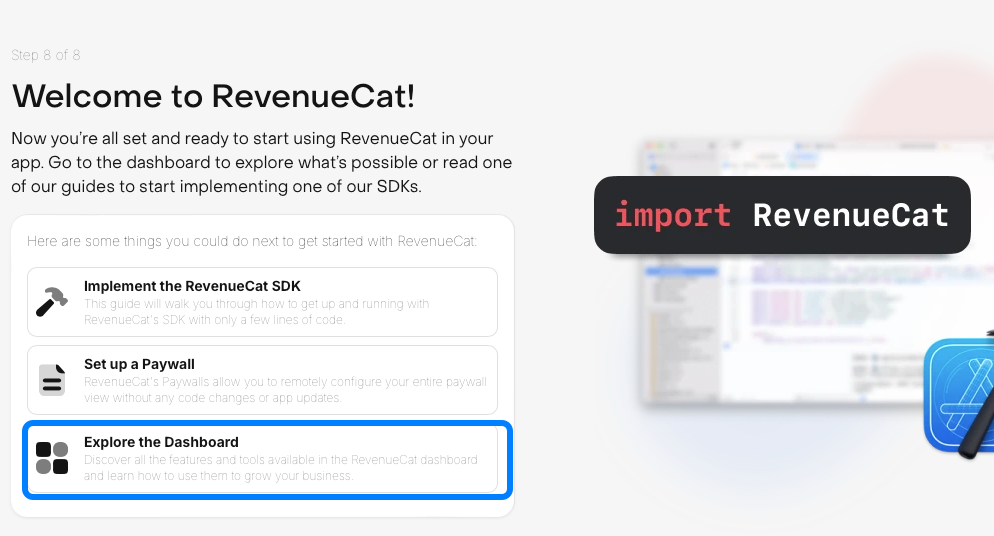
Step 8: Export Dashboard
- Click “Export Dashboard”
- You’re all set! Your RevenueCat integration is now complete
2. Add App Configuration
- Navigate to your project settings and begin configuring your app.

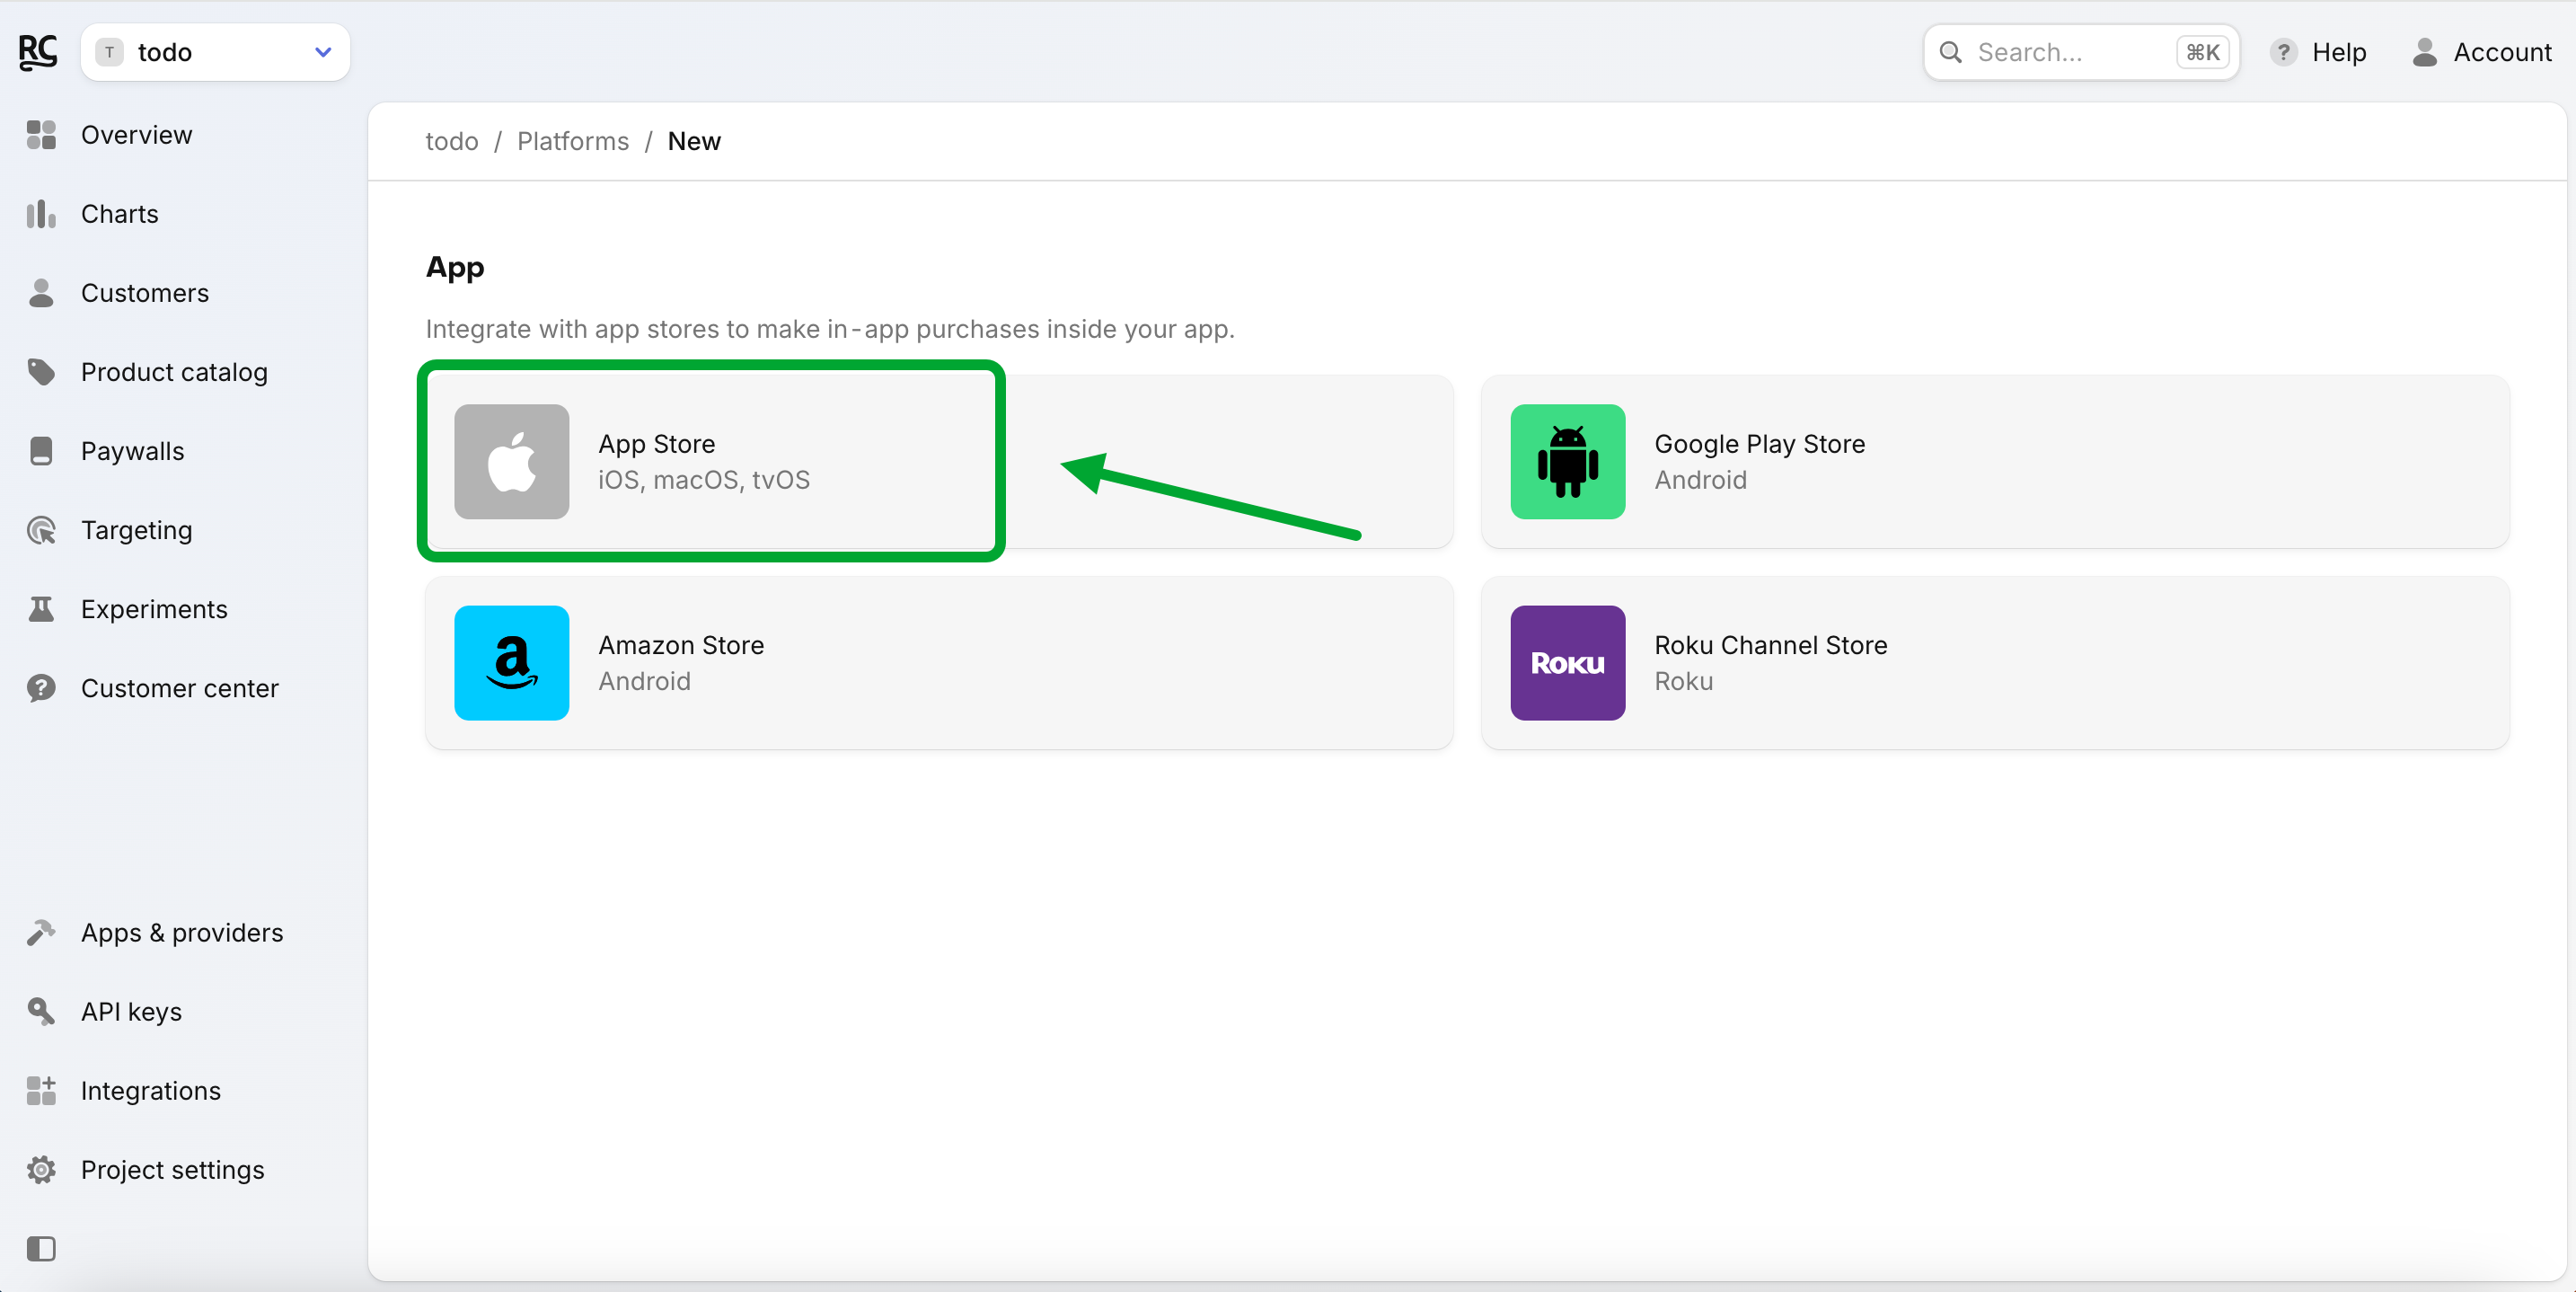
3. Select App Store
- Choose App Store as your platform.
4. Add App Bundle ID
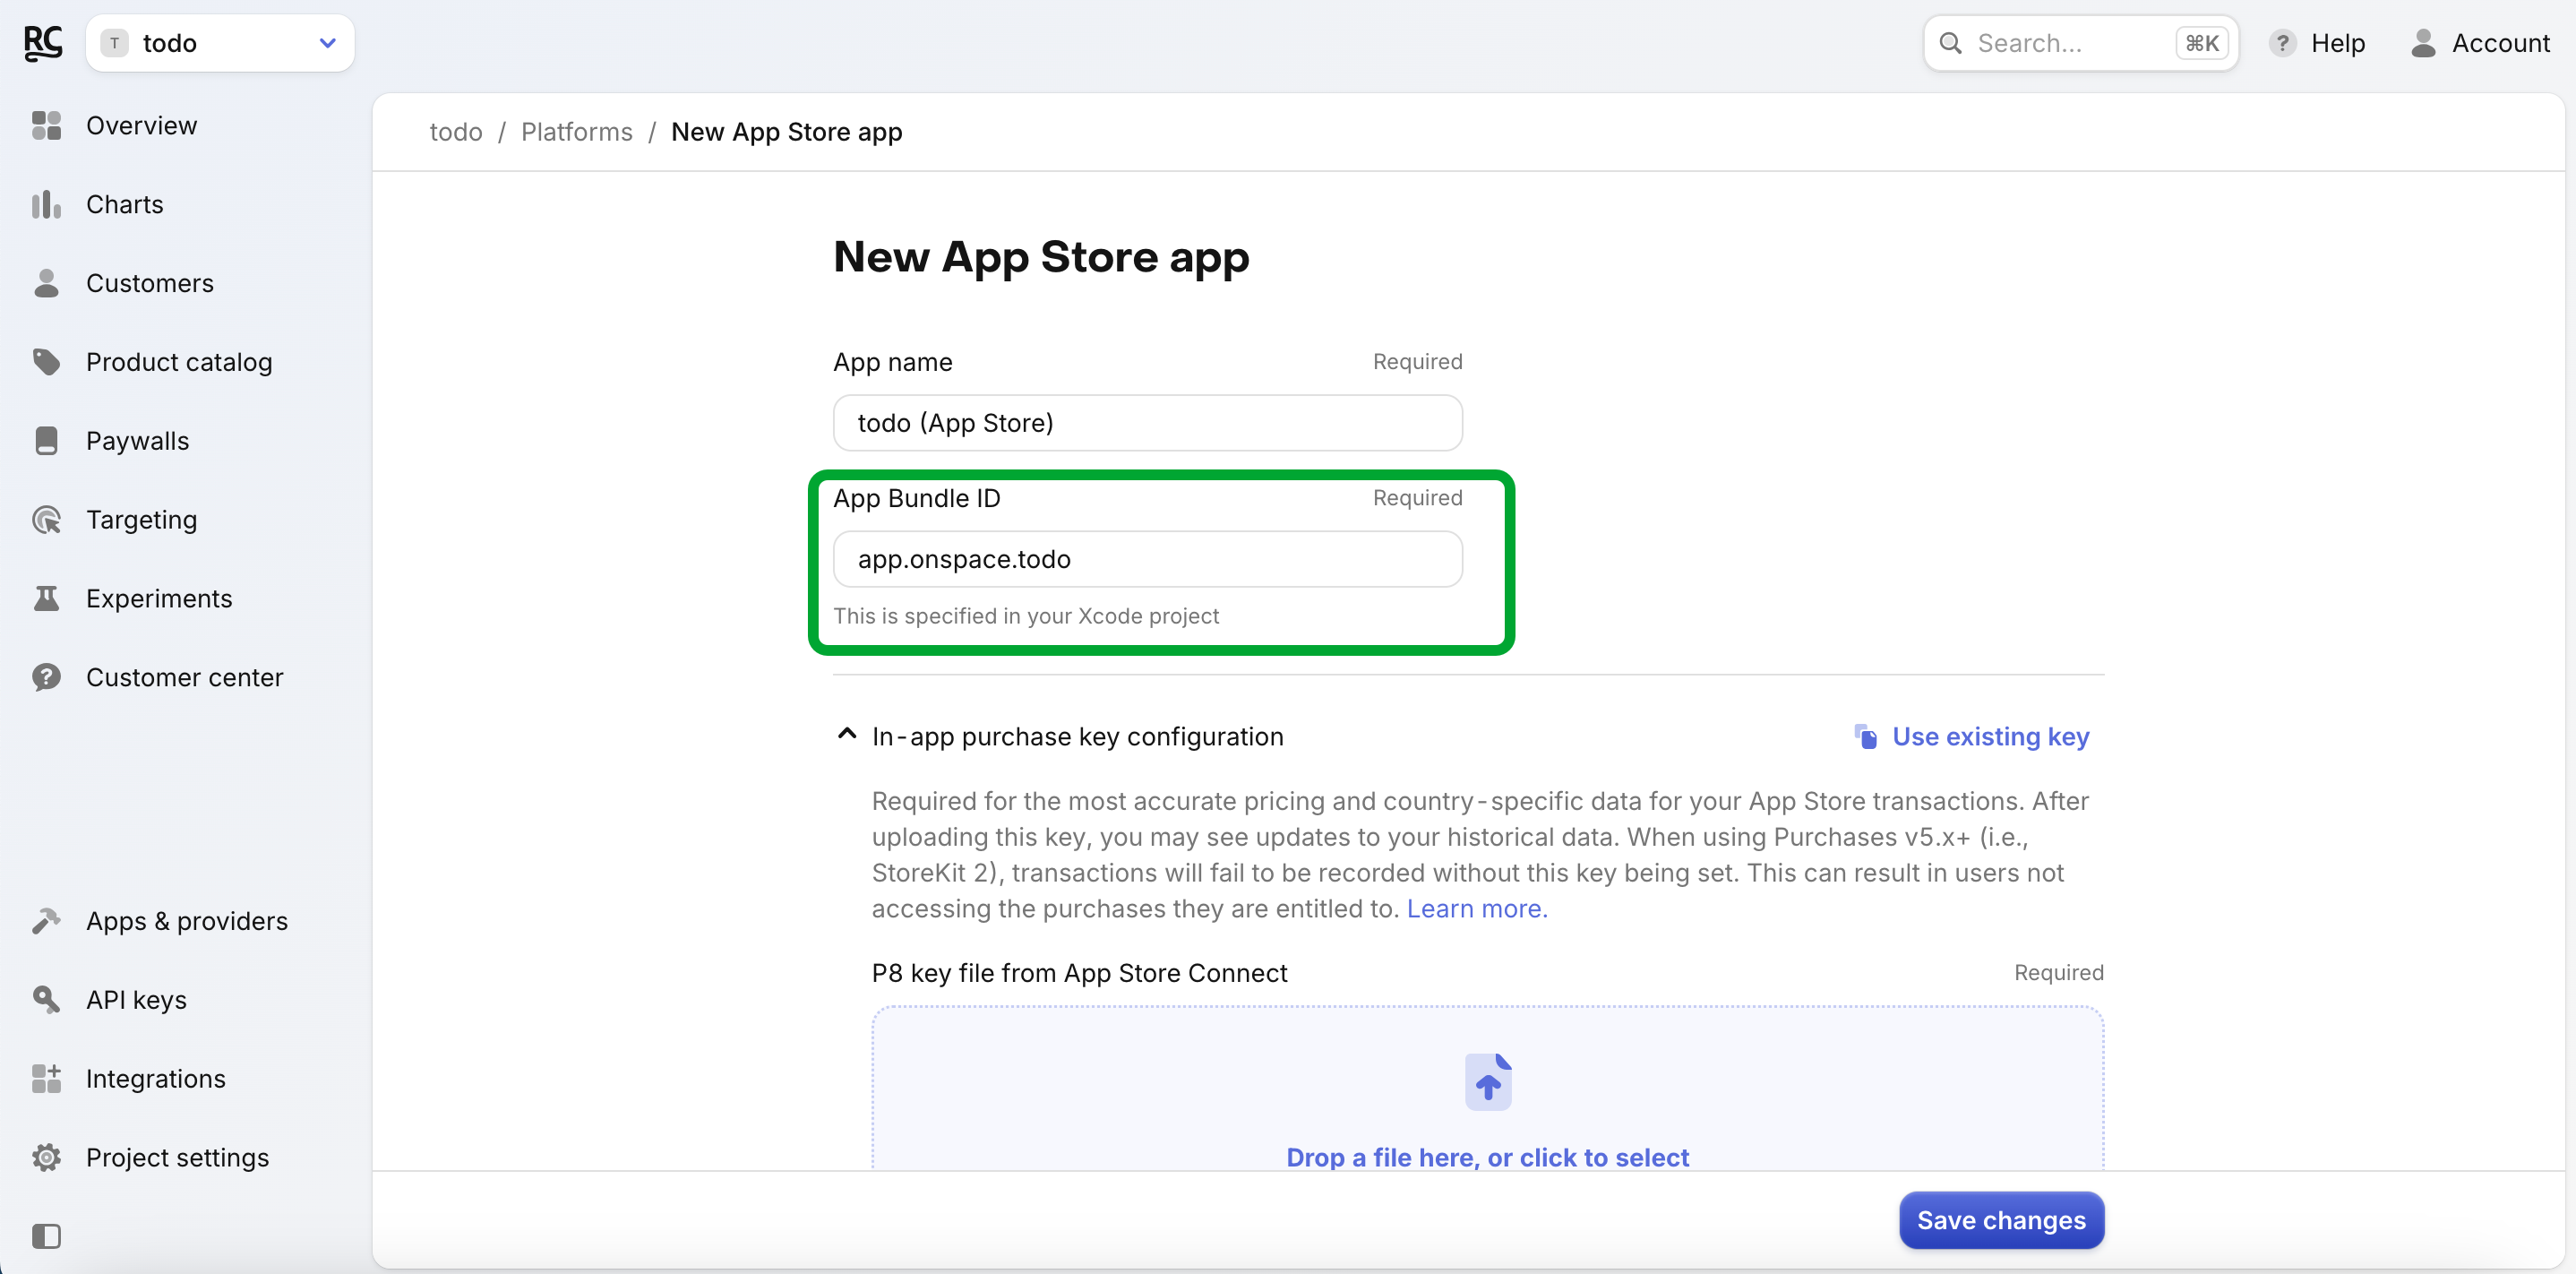
- Where to find your “App Bundle ID”:
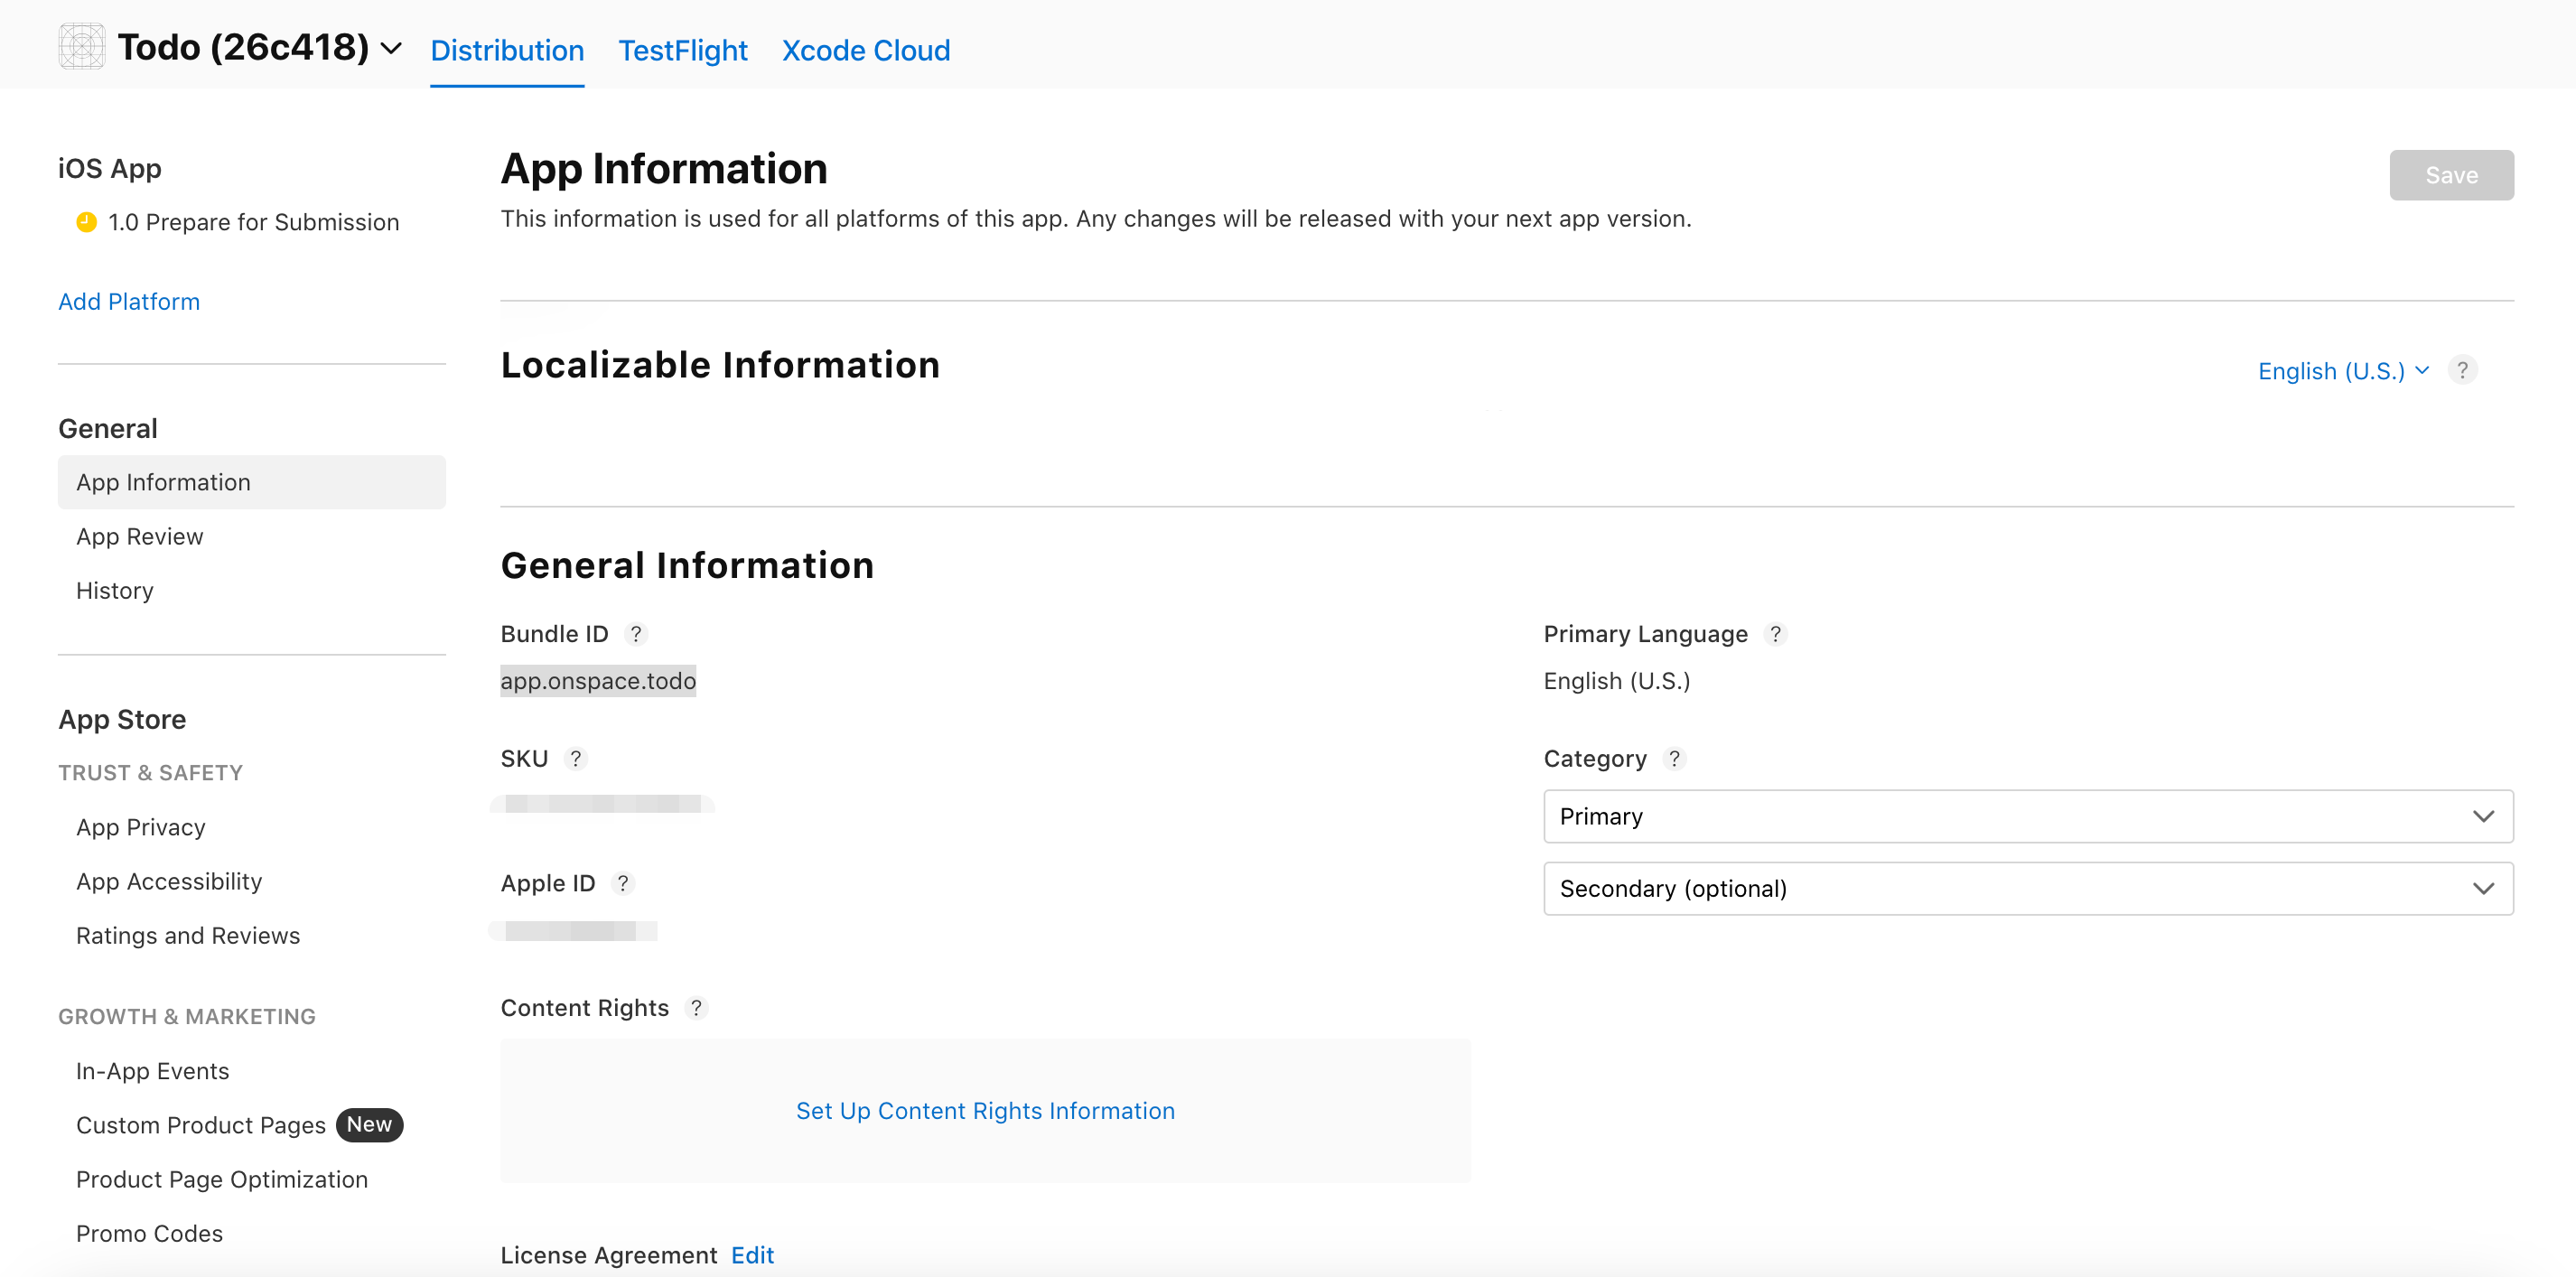
- Go to App Store Connect.
- Navigate to General ➡️ App Information.
- Copy the Bundle ID found under the General Information section.
- Paste this Bundle ID into the corresponding field in RevenueCat.
5. Add App-Specific Shared Secret
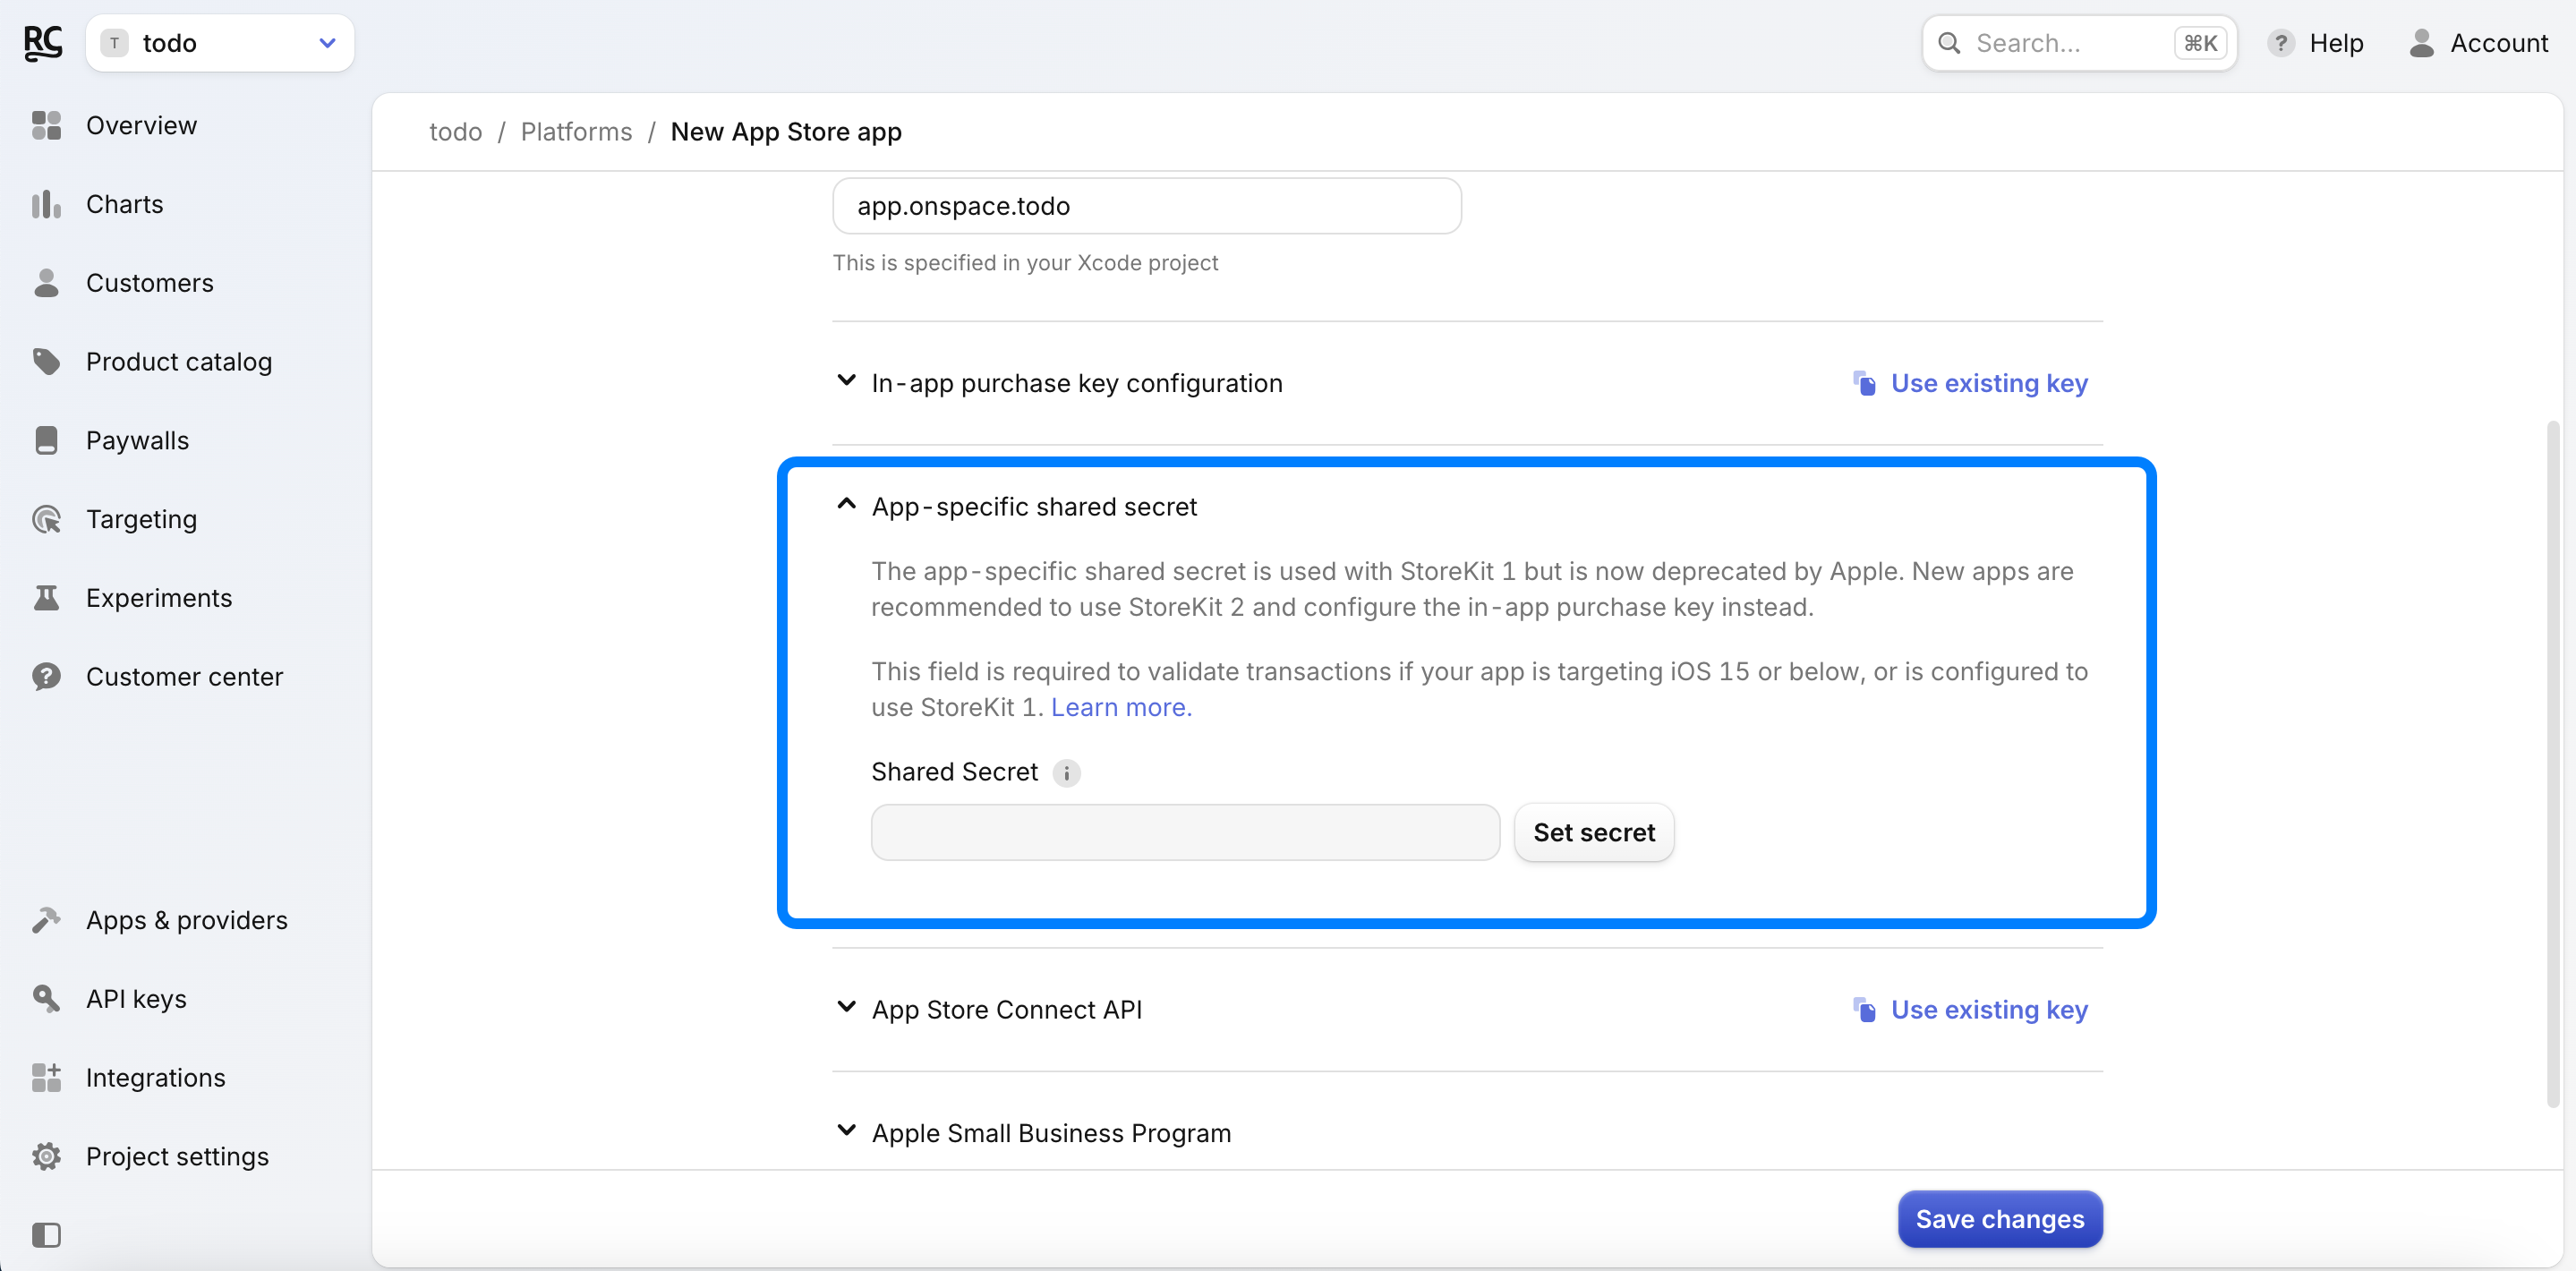
- Where to find your “App-specific Shared Secret”:
- Go to App Store Connect.
- Navigate to General ➡️ App Information.
- Locate the App-Specific Shared Secret section.

- Click Manage ➡️ Generate.
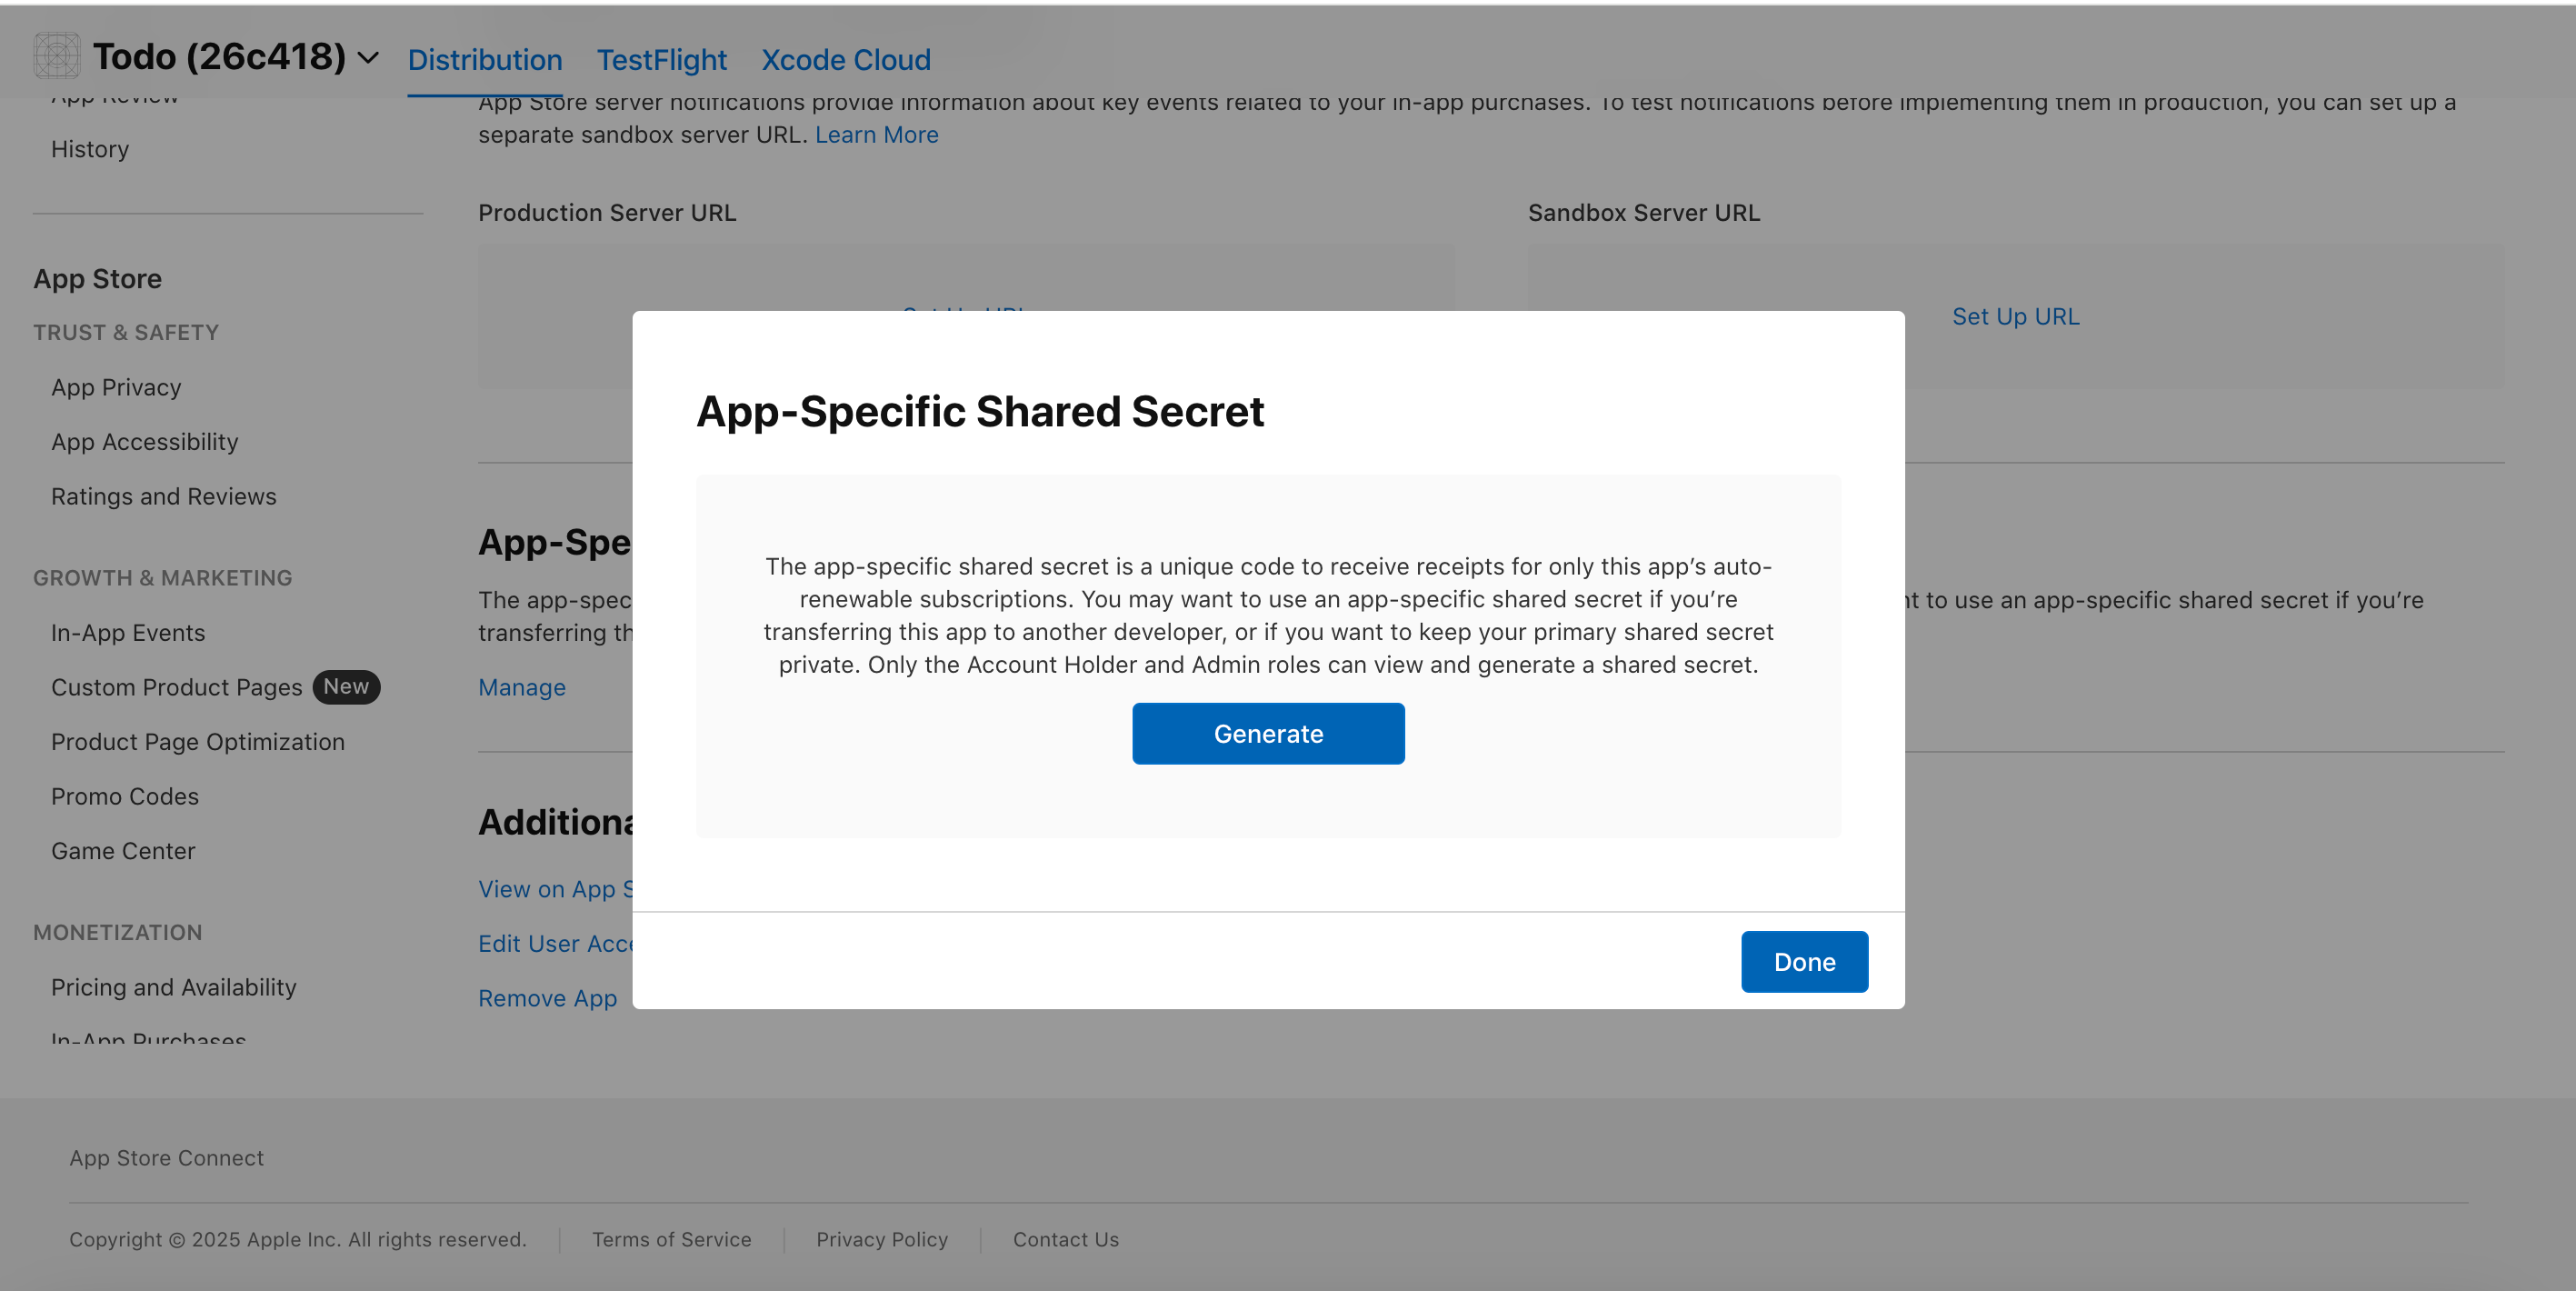
- Copy the generated Shared Secret.
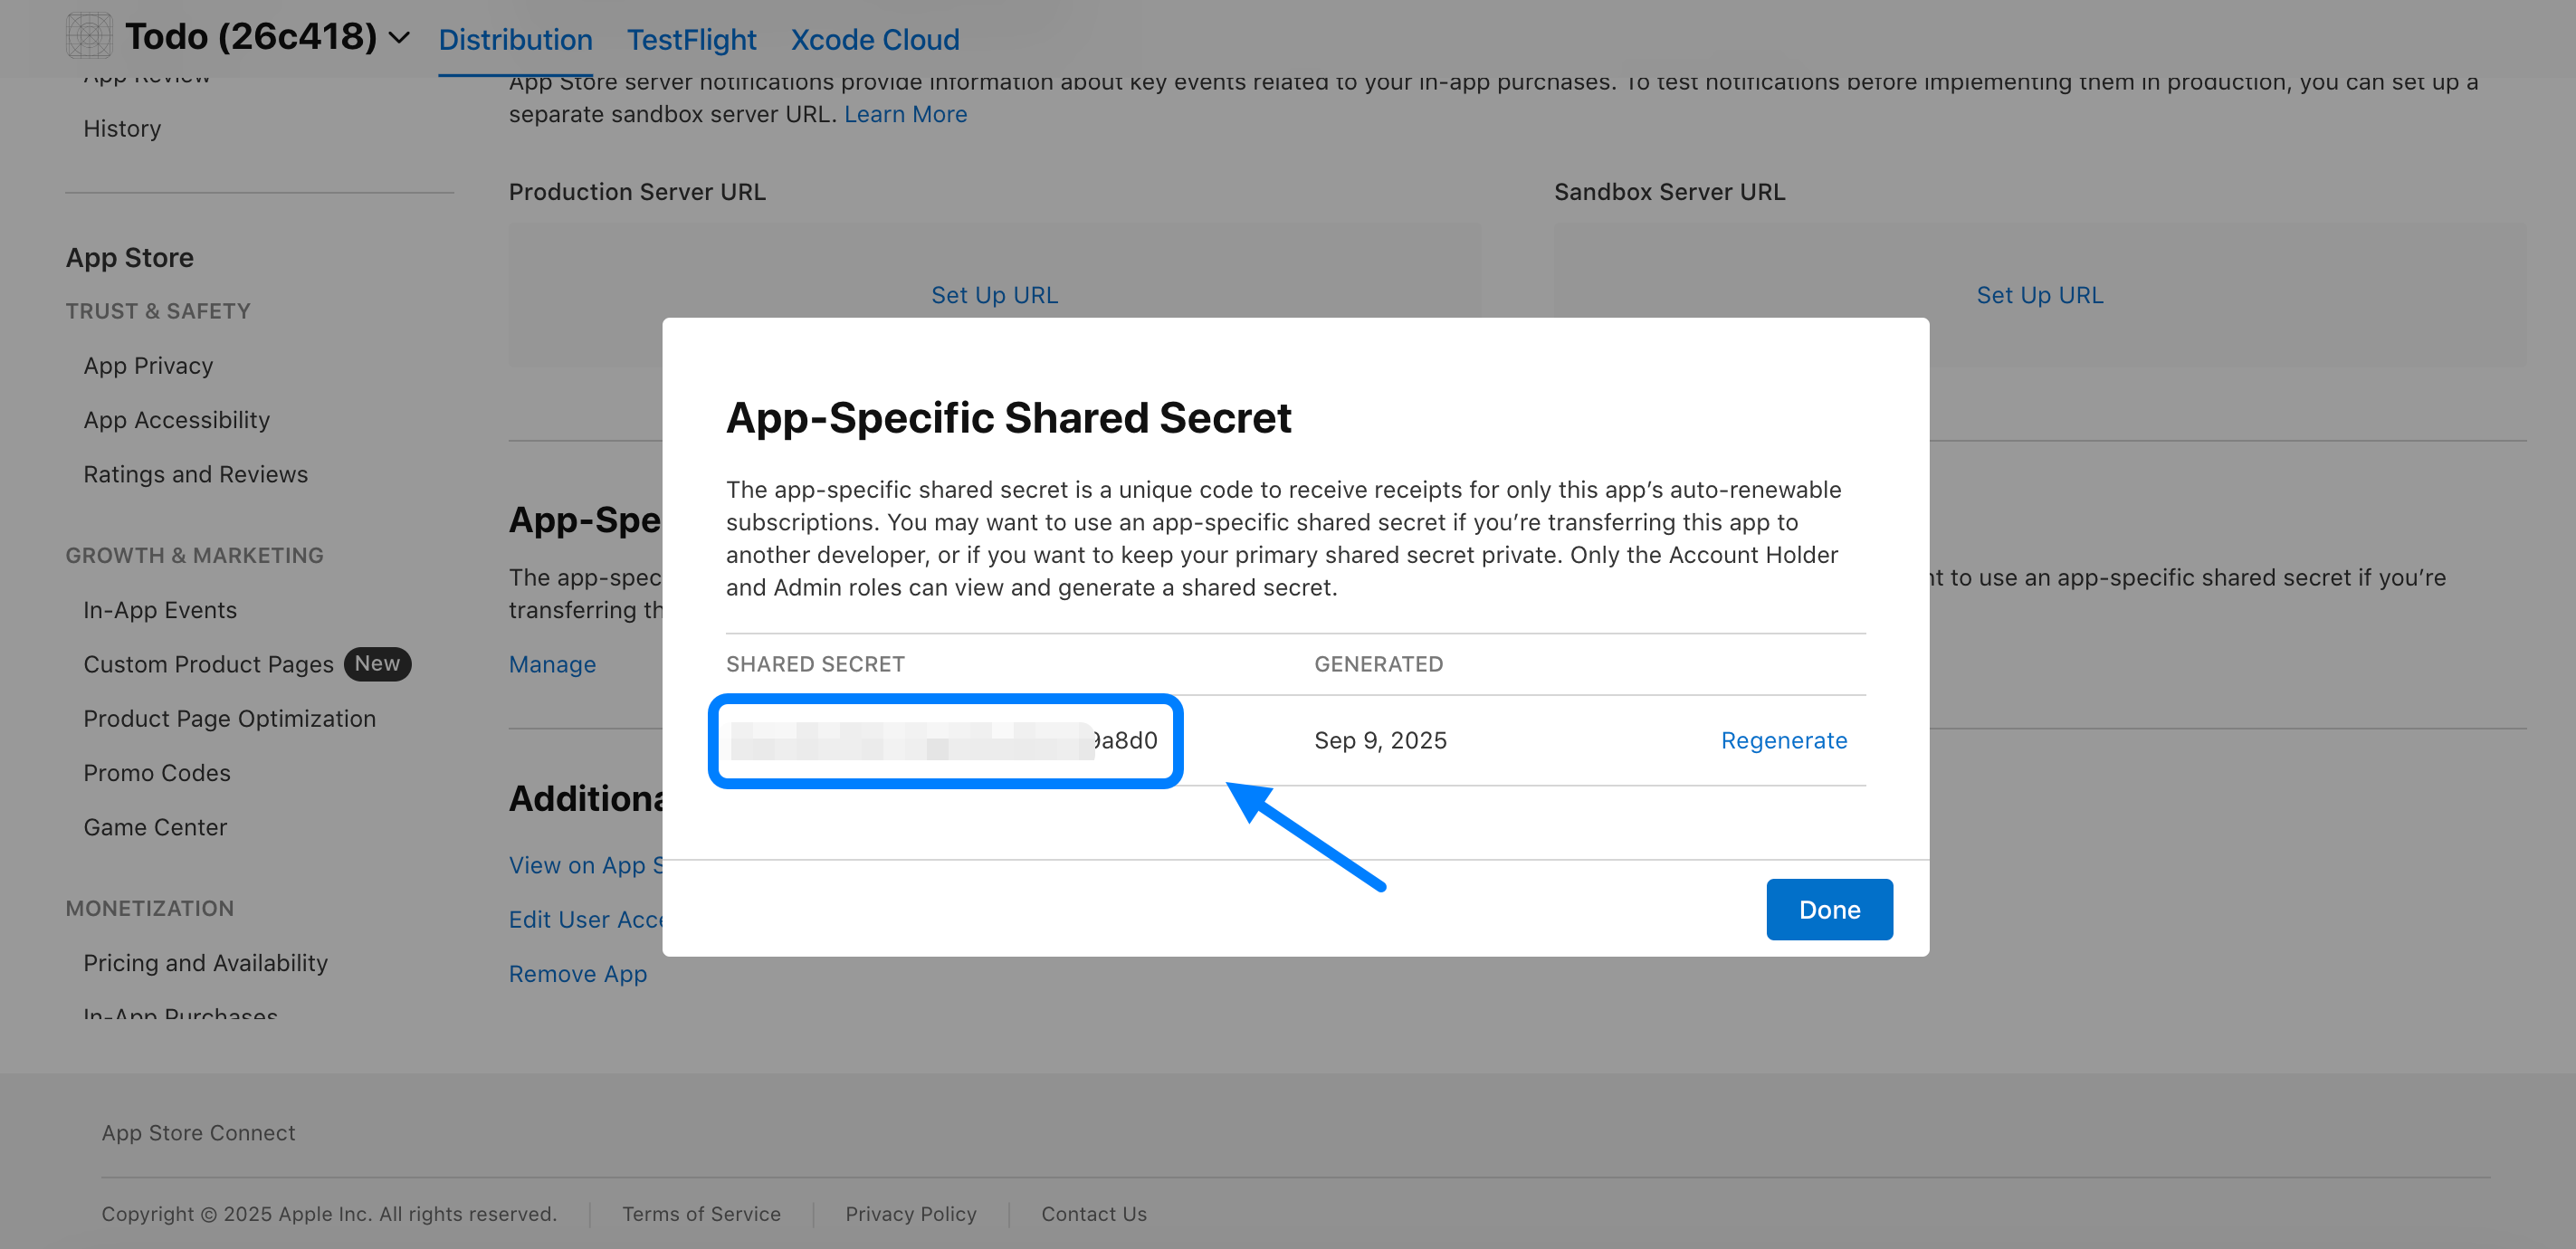
- Paste this Shared Secret into the designated field in RevenueCat.

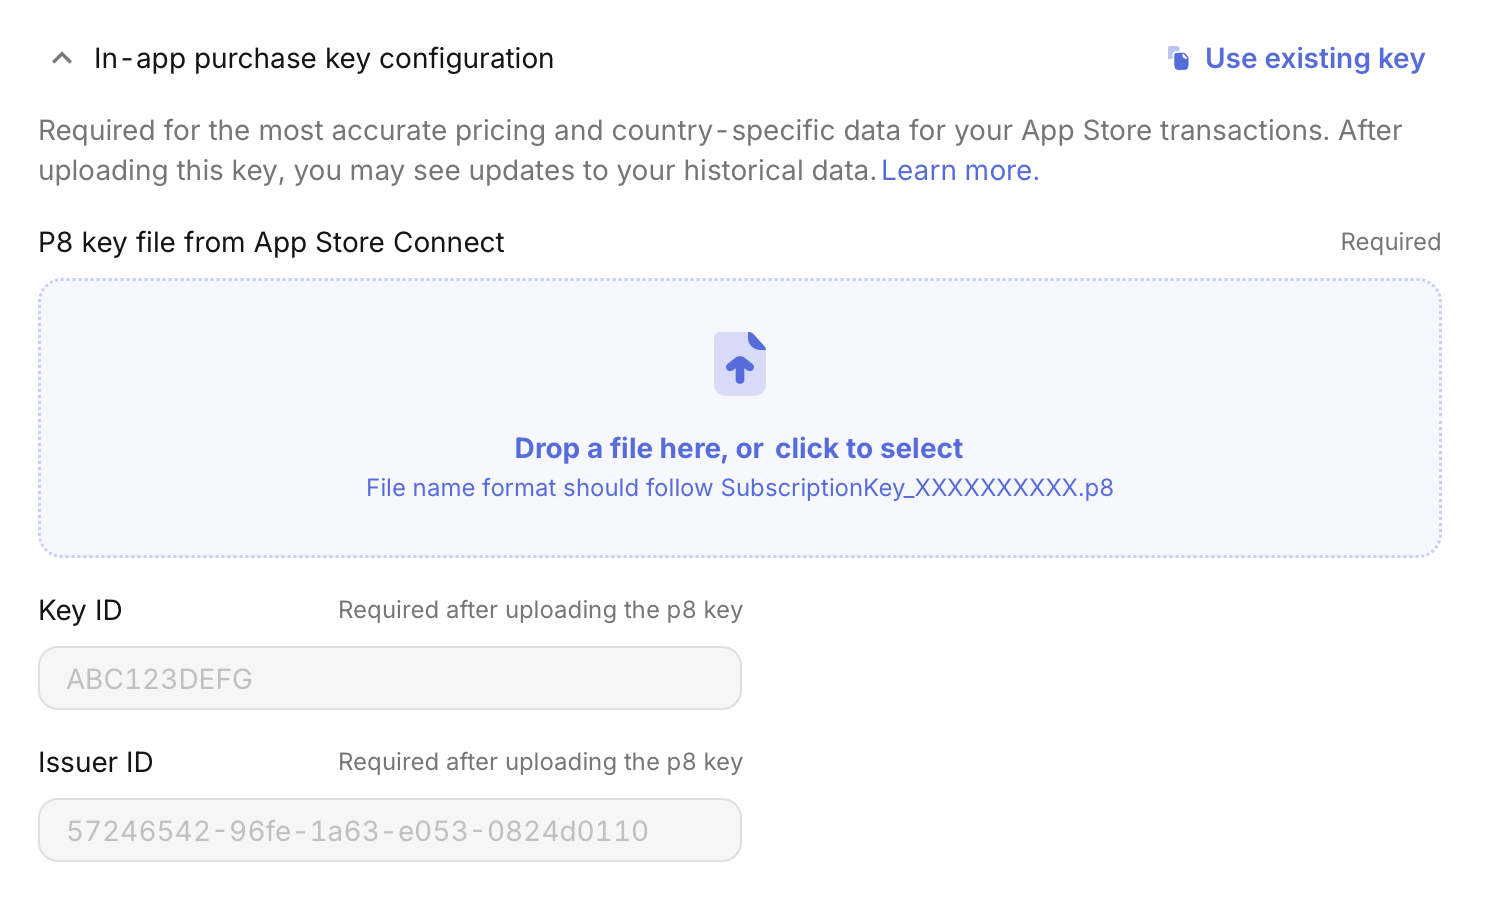
6. Add In-App Purchase Key Configuration
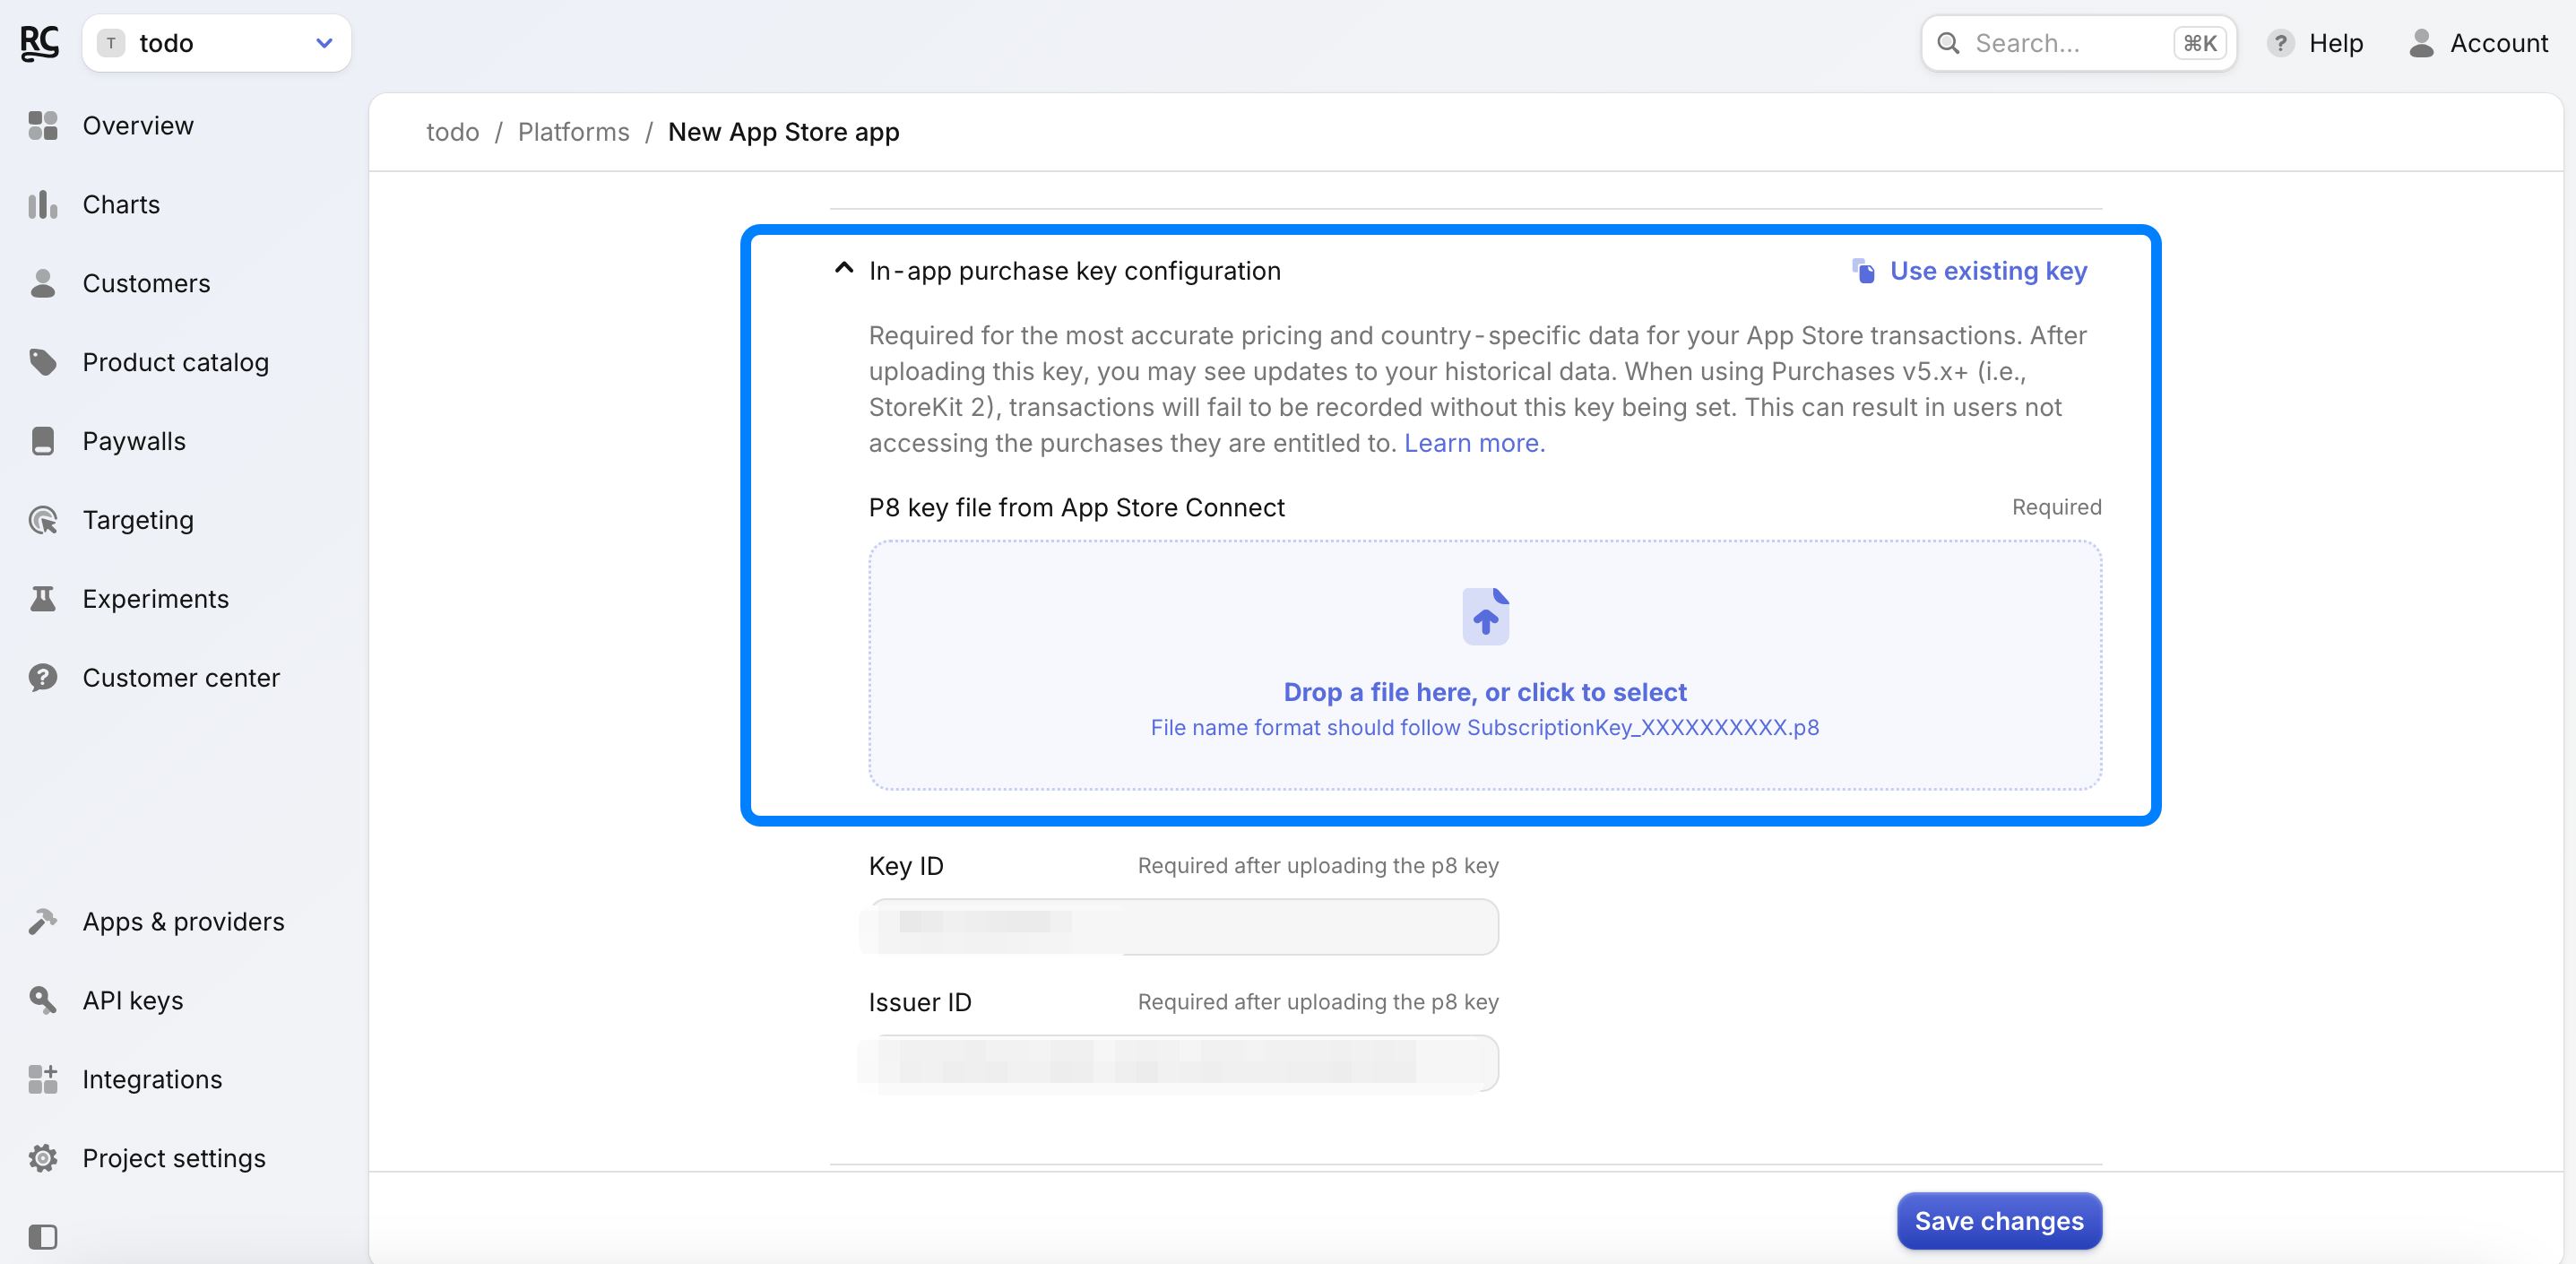
- Where to find your “In-app purchase key configuration”:
- Go to App Store Connect.
- Navigate to Users and Access ➡️ Integrations.
- Select In-App Purchase.
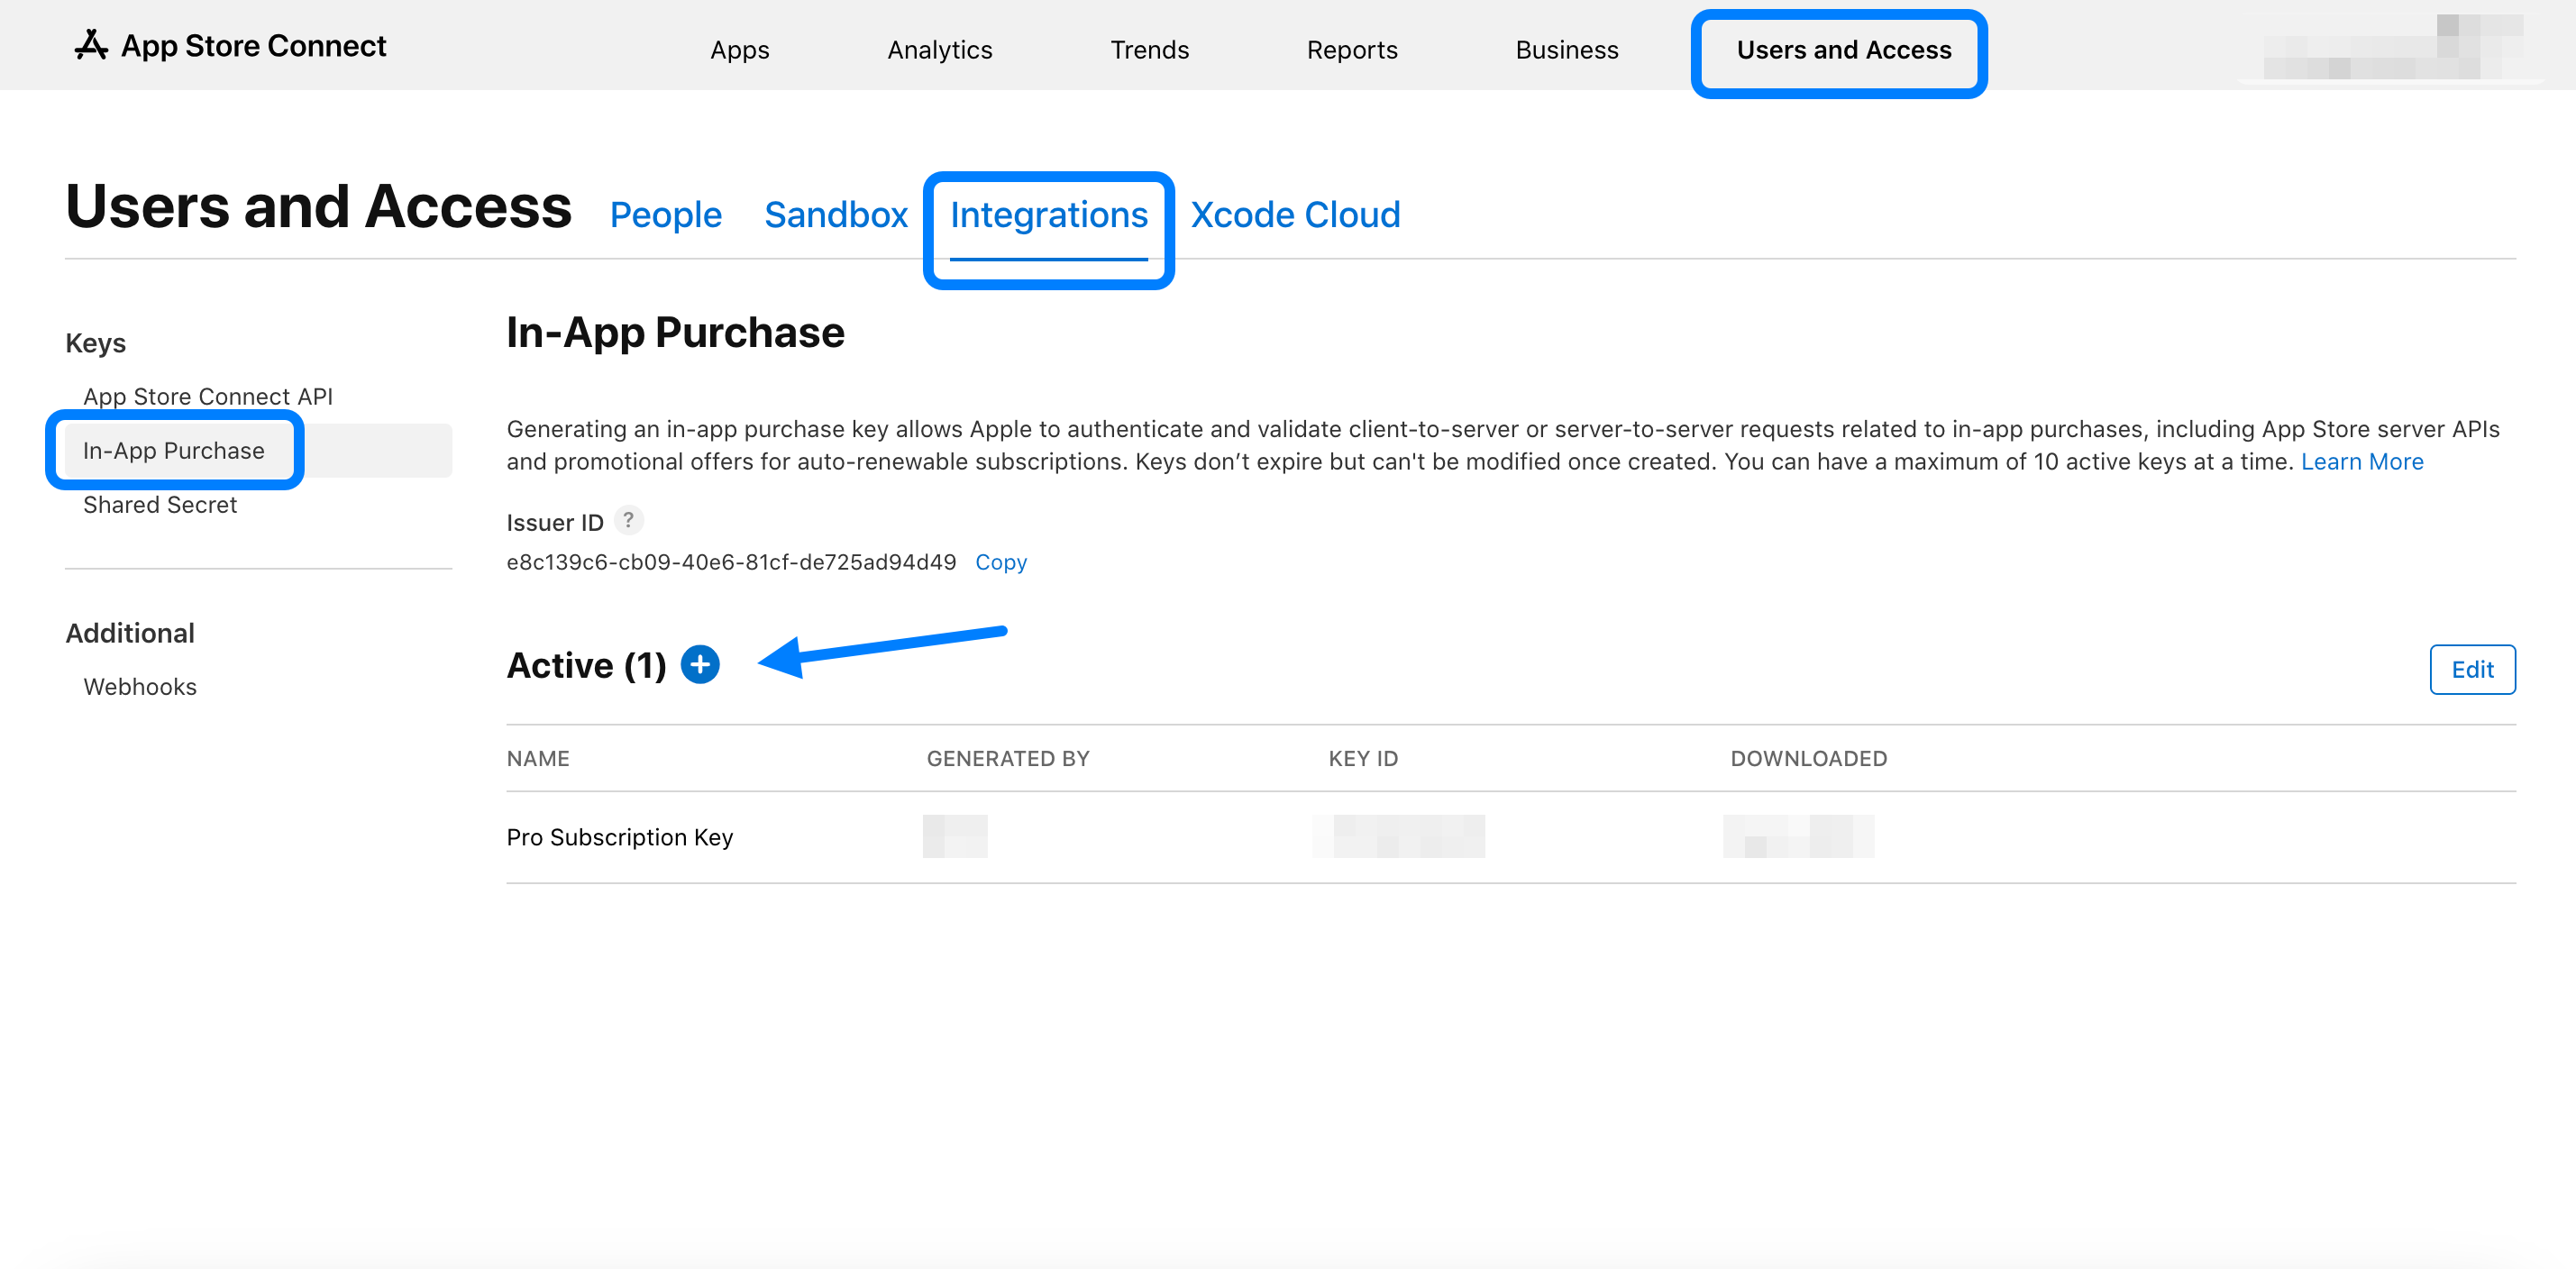
- Click Generate In-App Purchase Key, or click the ”+” symbol next to the “Active” header if you have generated one previously.
- Enter a name for the key when prompted.
- Once generated, your key will appear under Active Keys. You will have one opportunity to Download API Key.
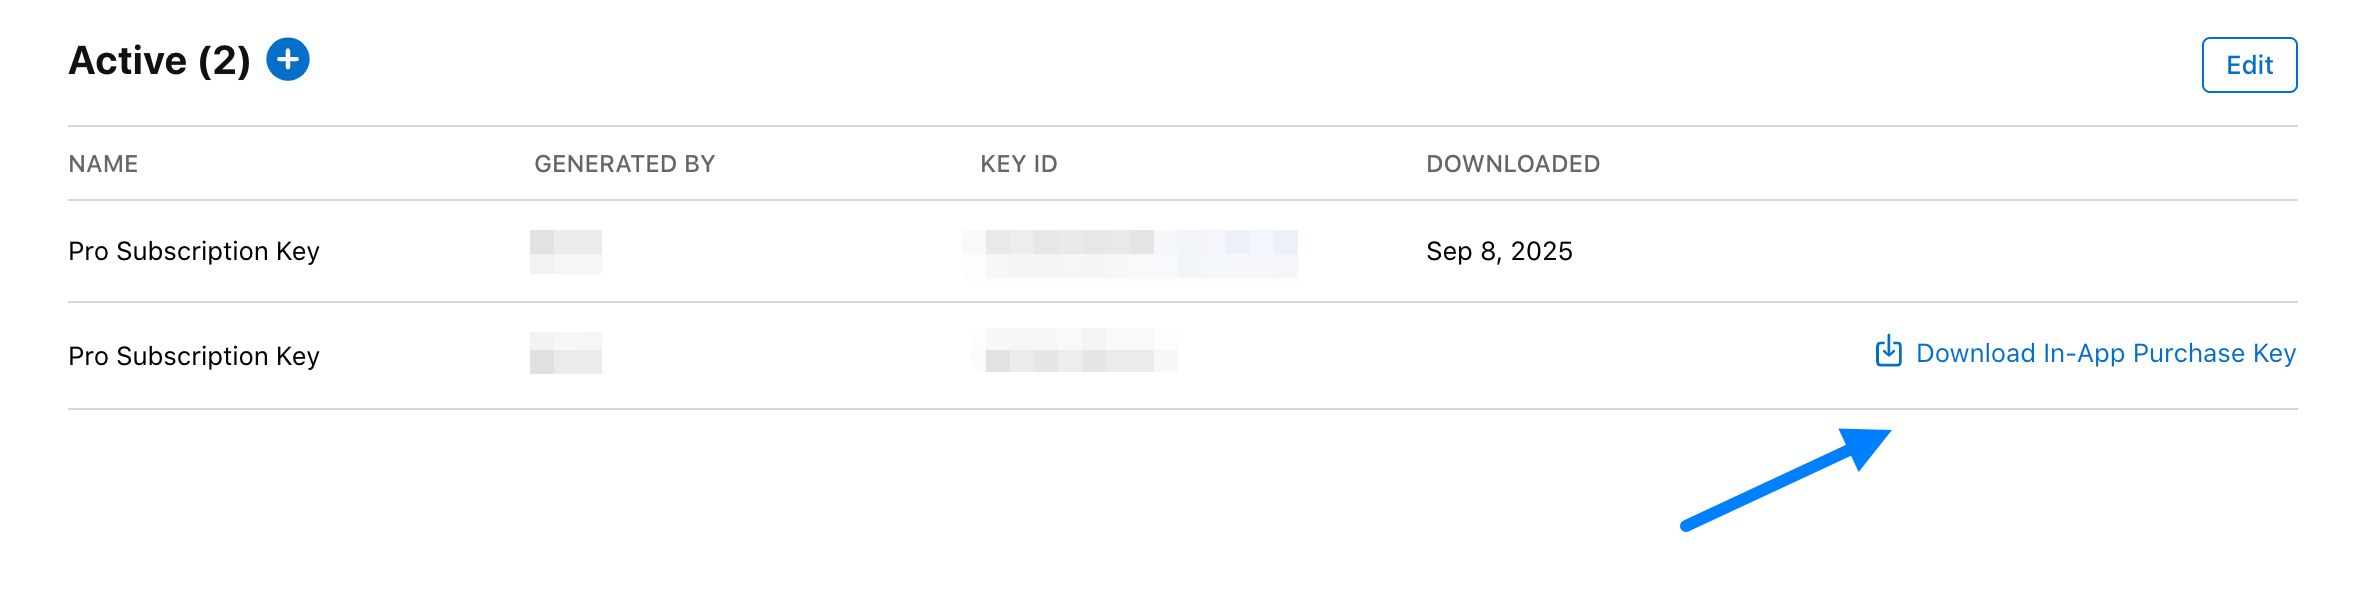
- Store this downloaded
.p8file securely, as you will need to upload it to RevenueCat.
- Uploading the In-App Purchase Key to RevenueCat:
- In the RevenueCat dashboard, select your App Store app from the Apps & providers page within your project settings.
- Within your app settings, go to the In-app purchase key configuration tab.
- Upload the
.p8file you downloaded from App Store Connect.
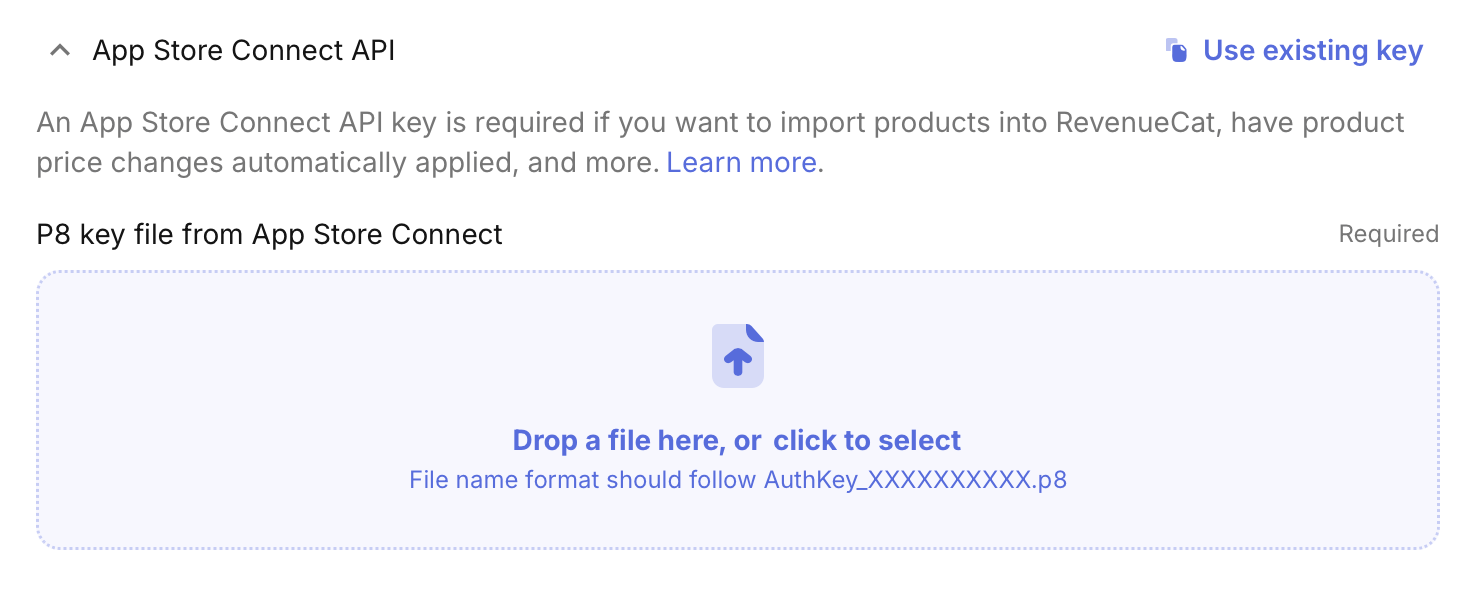
7. Add App Store Connect API

- Where to find your “App Store Connect API”:
- On App Store Connect, go to Users and Access → Integrations → App Store Connect API.
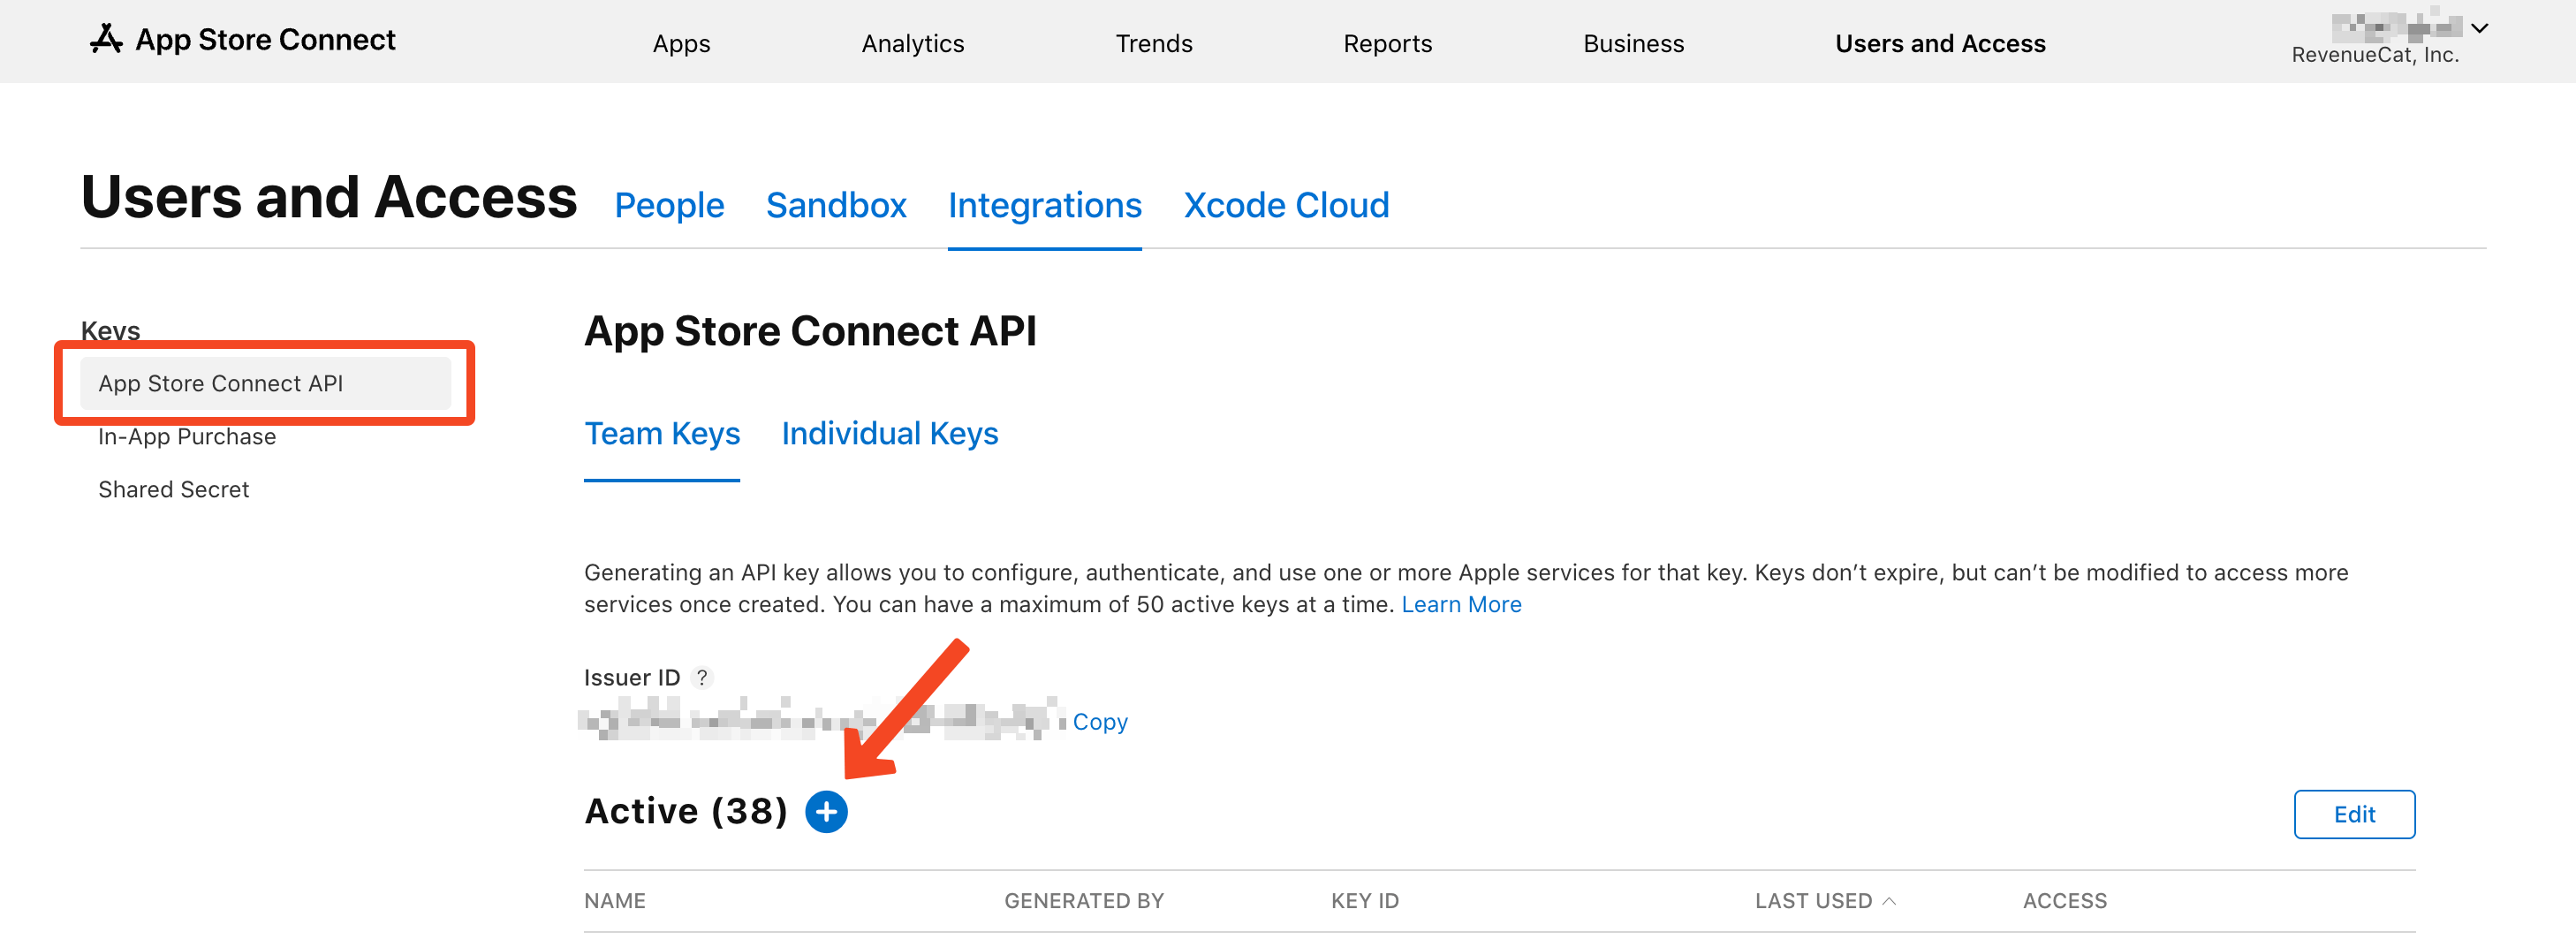
- Click to create a new App Store Connect API key.
- Ensure the newly created key has at least the App Manager access level.

- Download the API key (
.p8file) and save it securely.
- Uploading the App Store Connect API Key to RevenueCat:
- In the RevenueCat dashboard, select your iOS app from the Apps & providers page in the navigation.
- Within your app settings, go to the App Store Connect API tab.
- Upload the
.p8file you downloaded from App Store Connect. - You will then be prompted to input your Issuer ID, which you should have saved from when you created the API key.
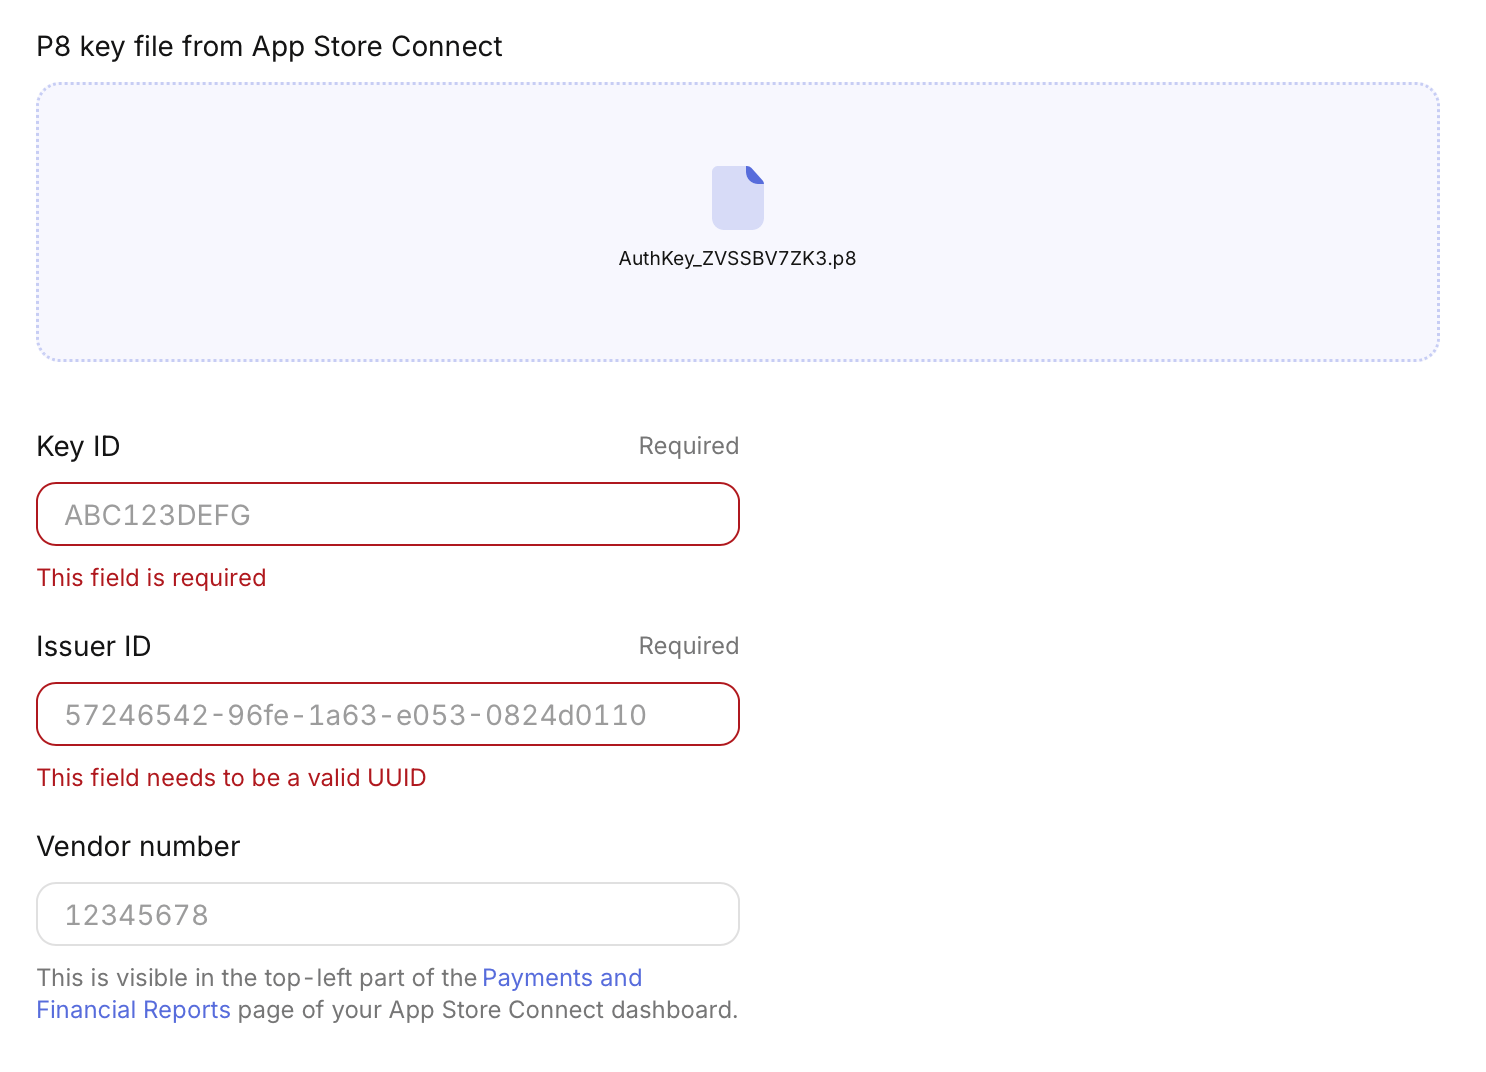
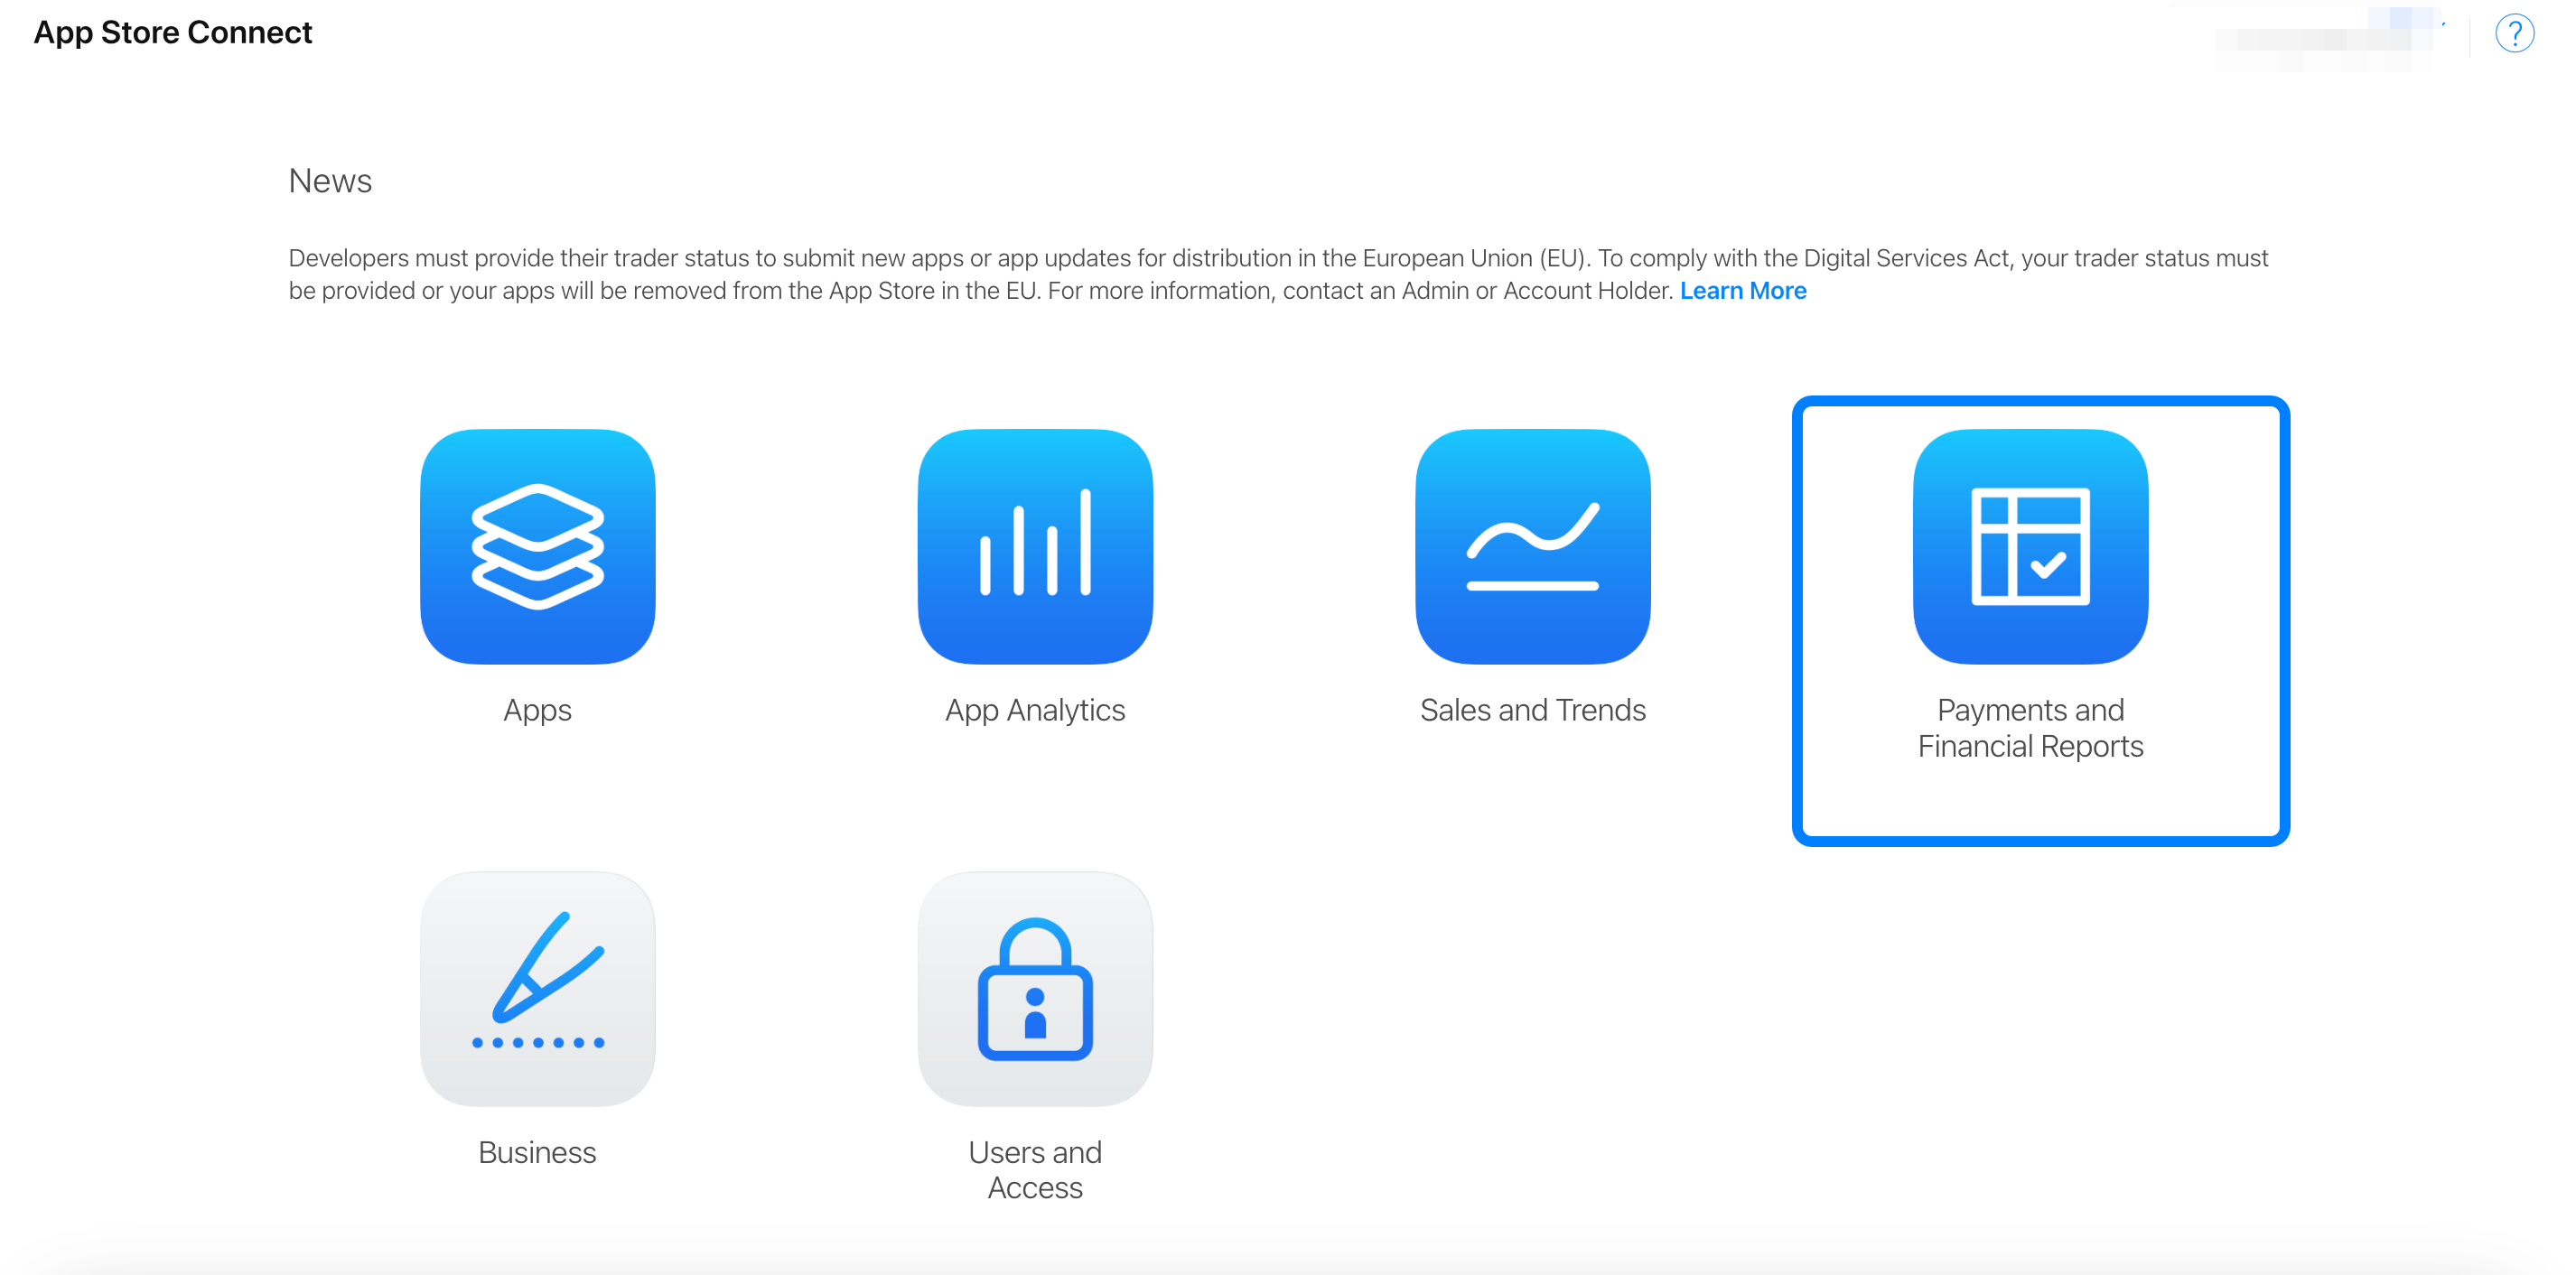
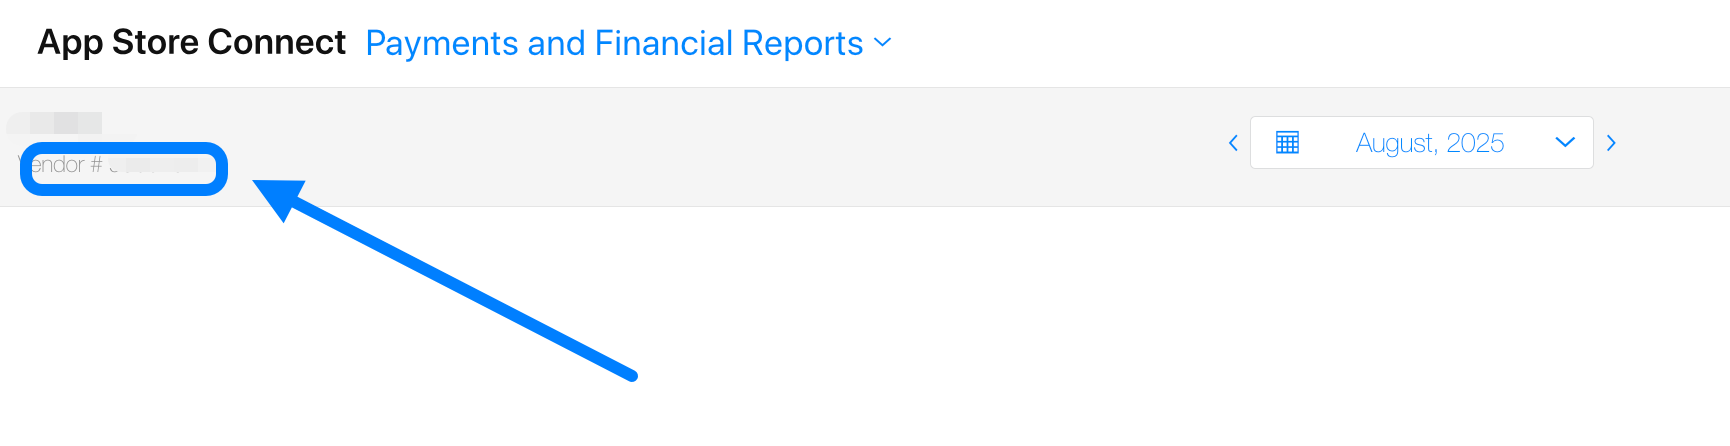
- You will also need to input your Vendor number. This can be found in App Store Connect under Payments and Financial Reports (typically in the top left corner of the page).
- Click Save Changes in the RevenueCat dashboard.
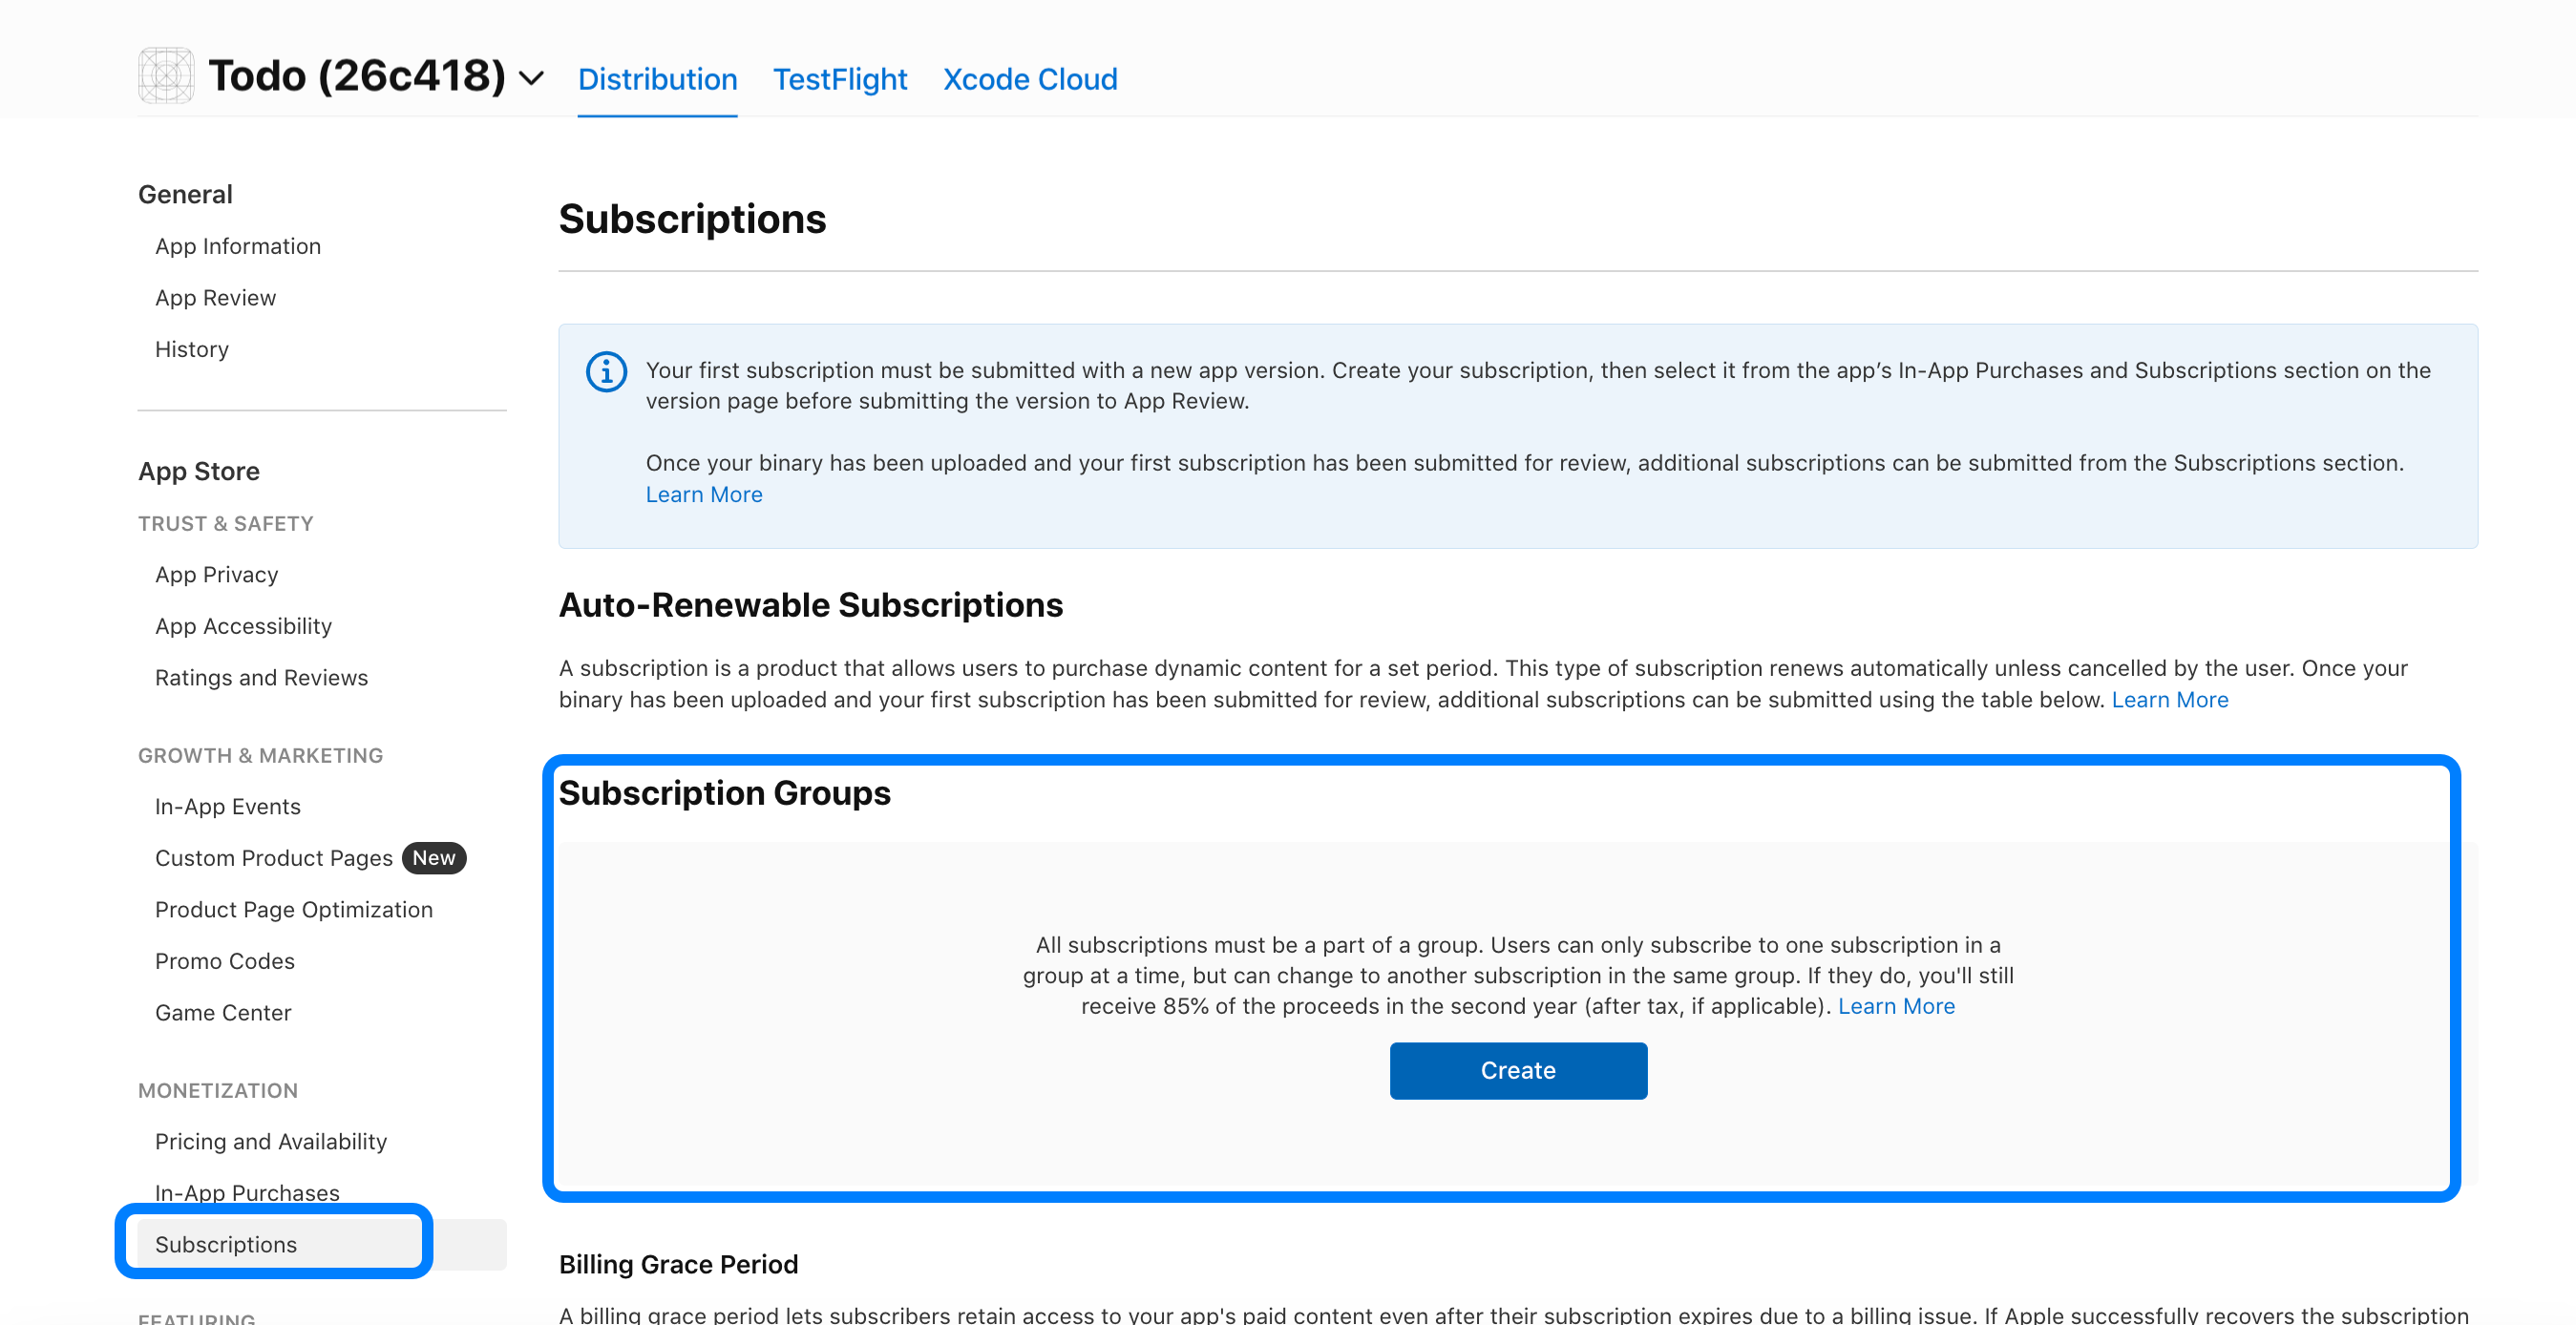
8. Create Subscriptions
- Setting up Subscriptions in App Store Connect:
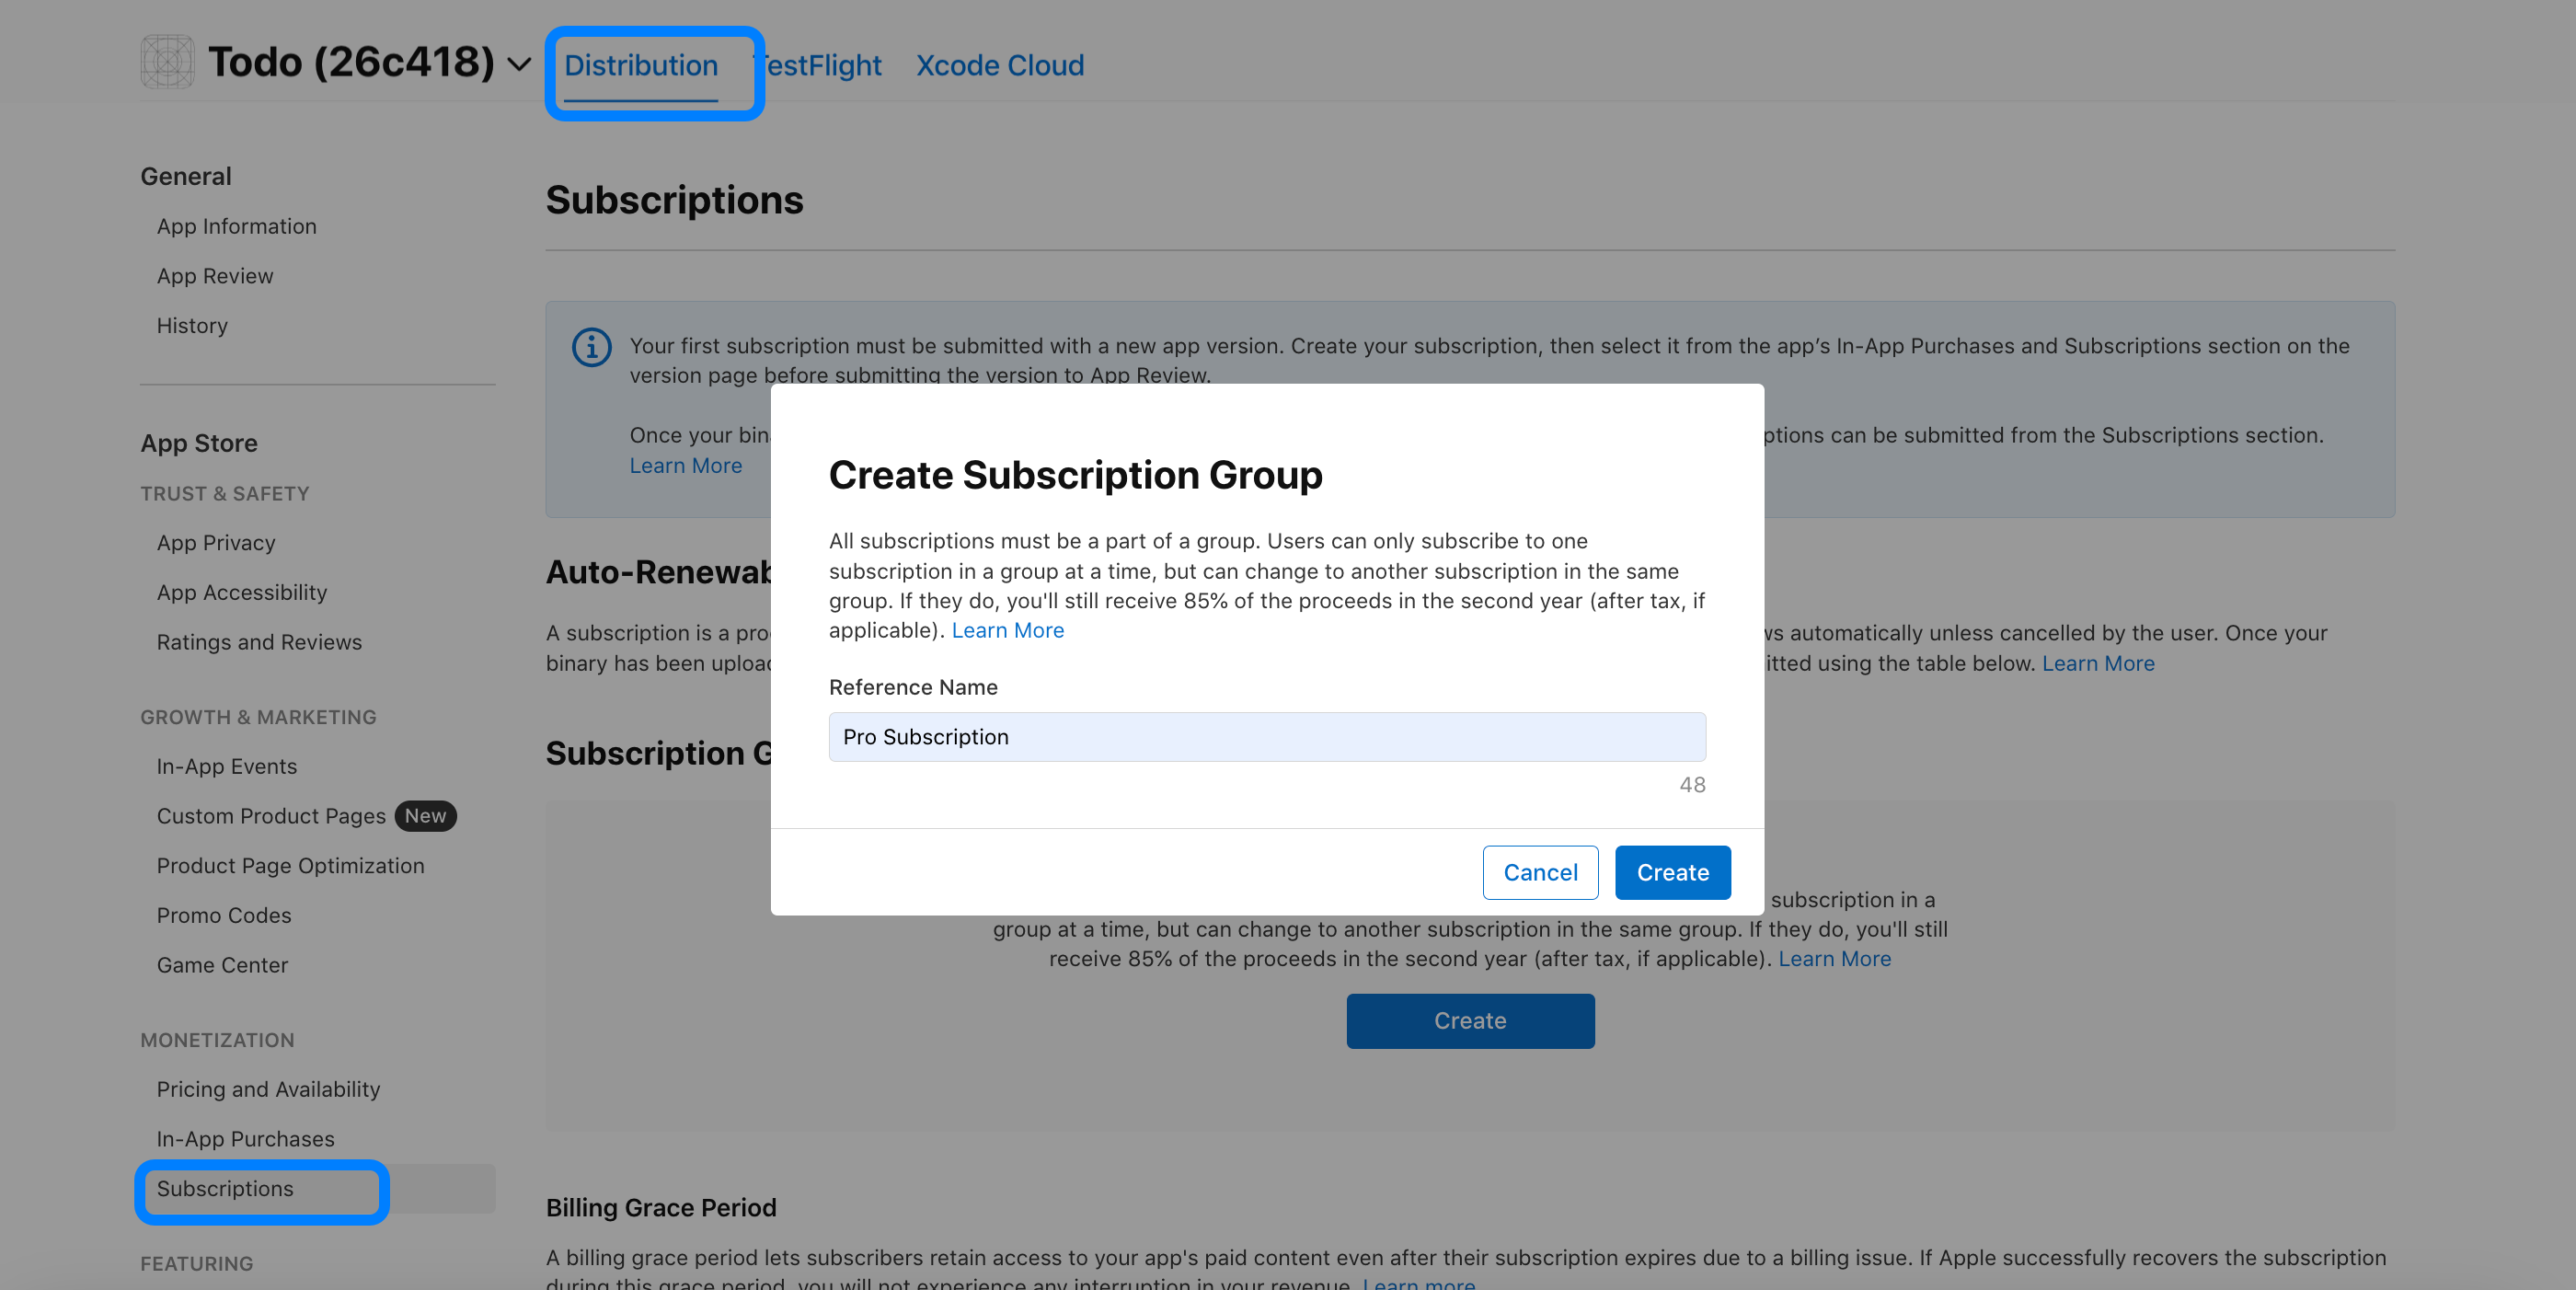
- Go to App Store Connect ➡️ Monetization ➡️ Subscriptions ➡️ Create.
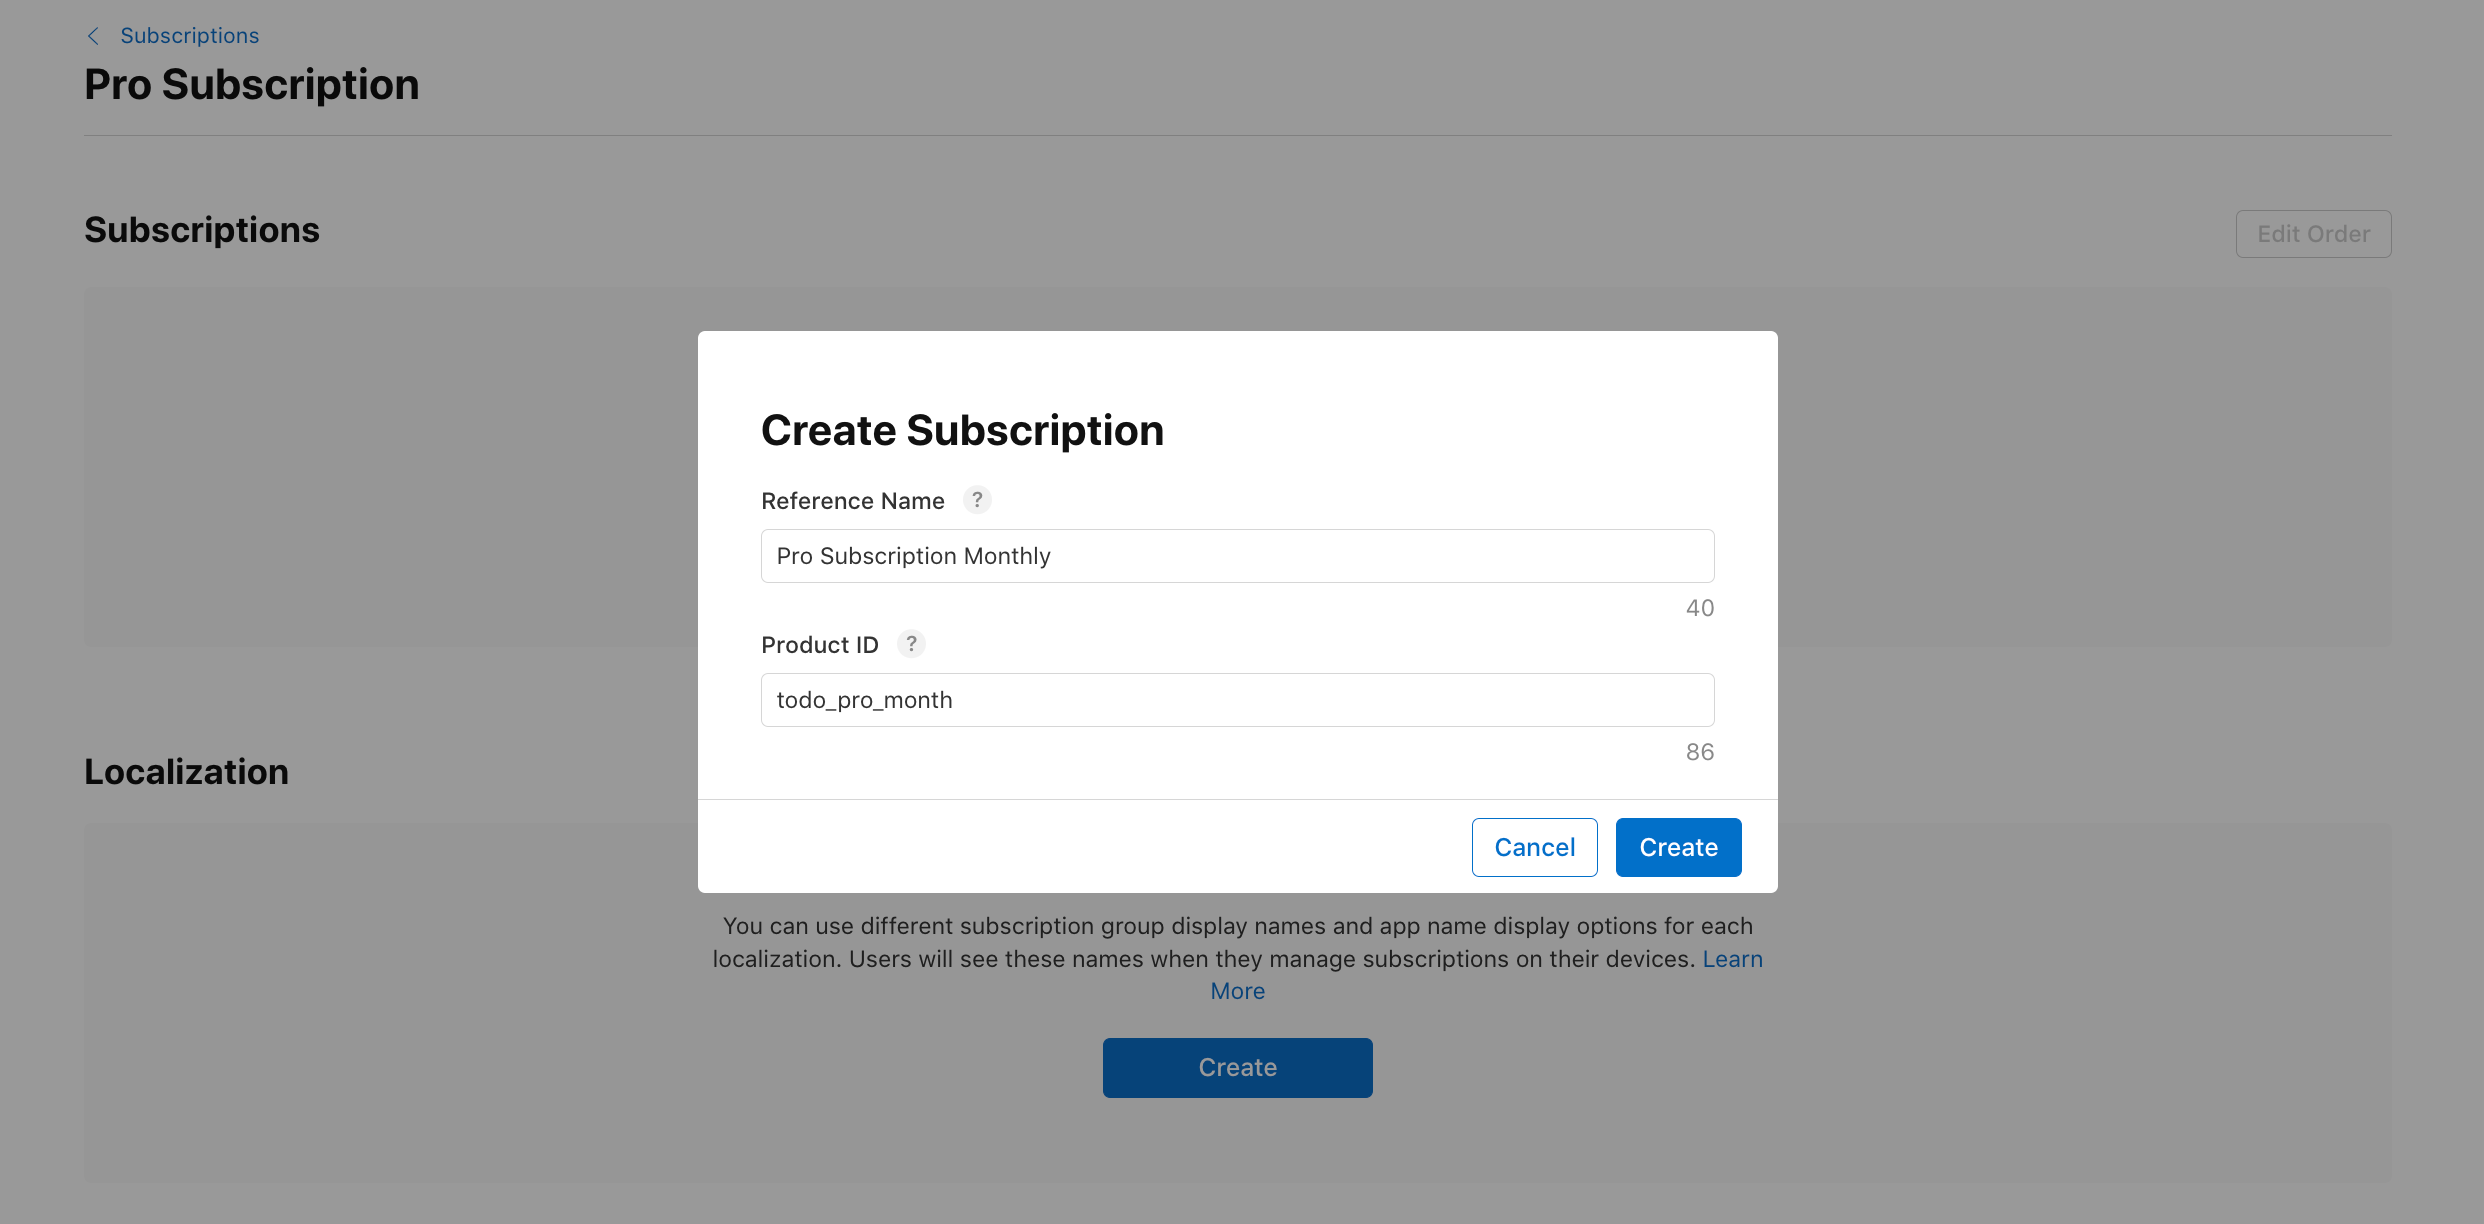
- Create Reference Name: This is an internal name for your subscription.
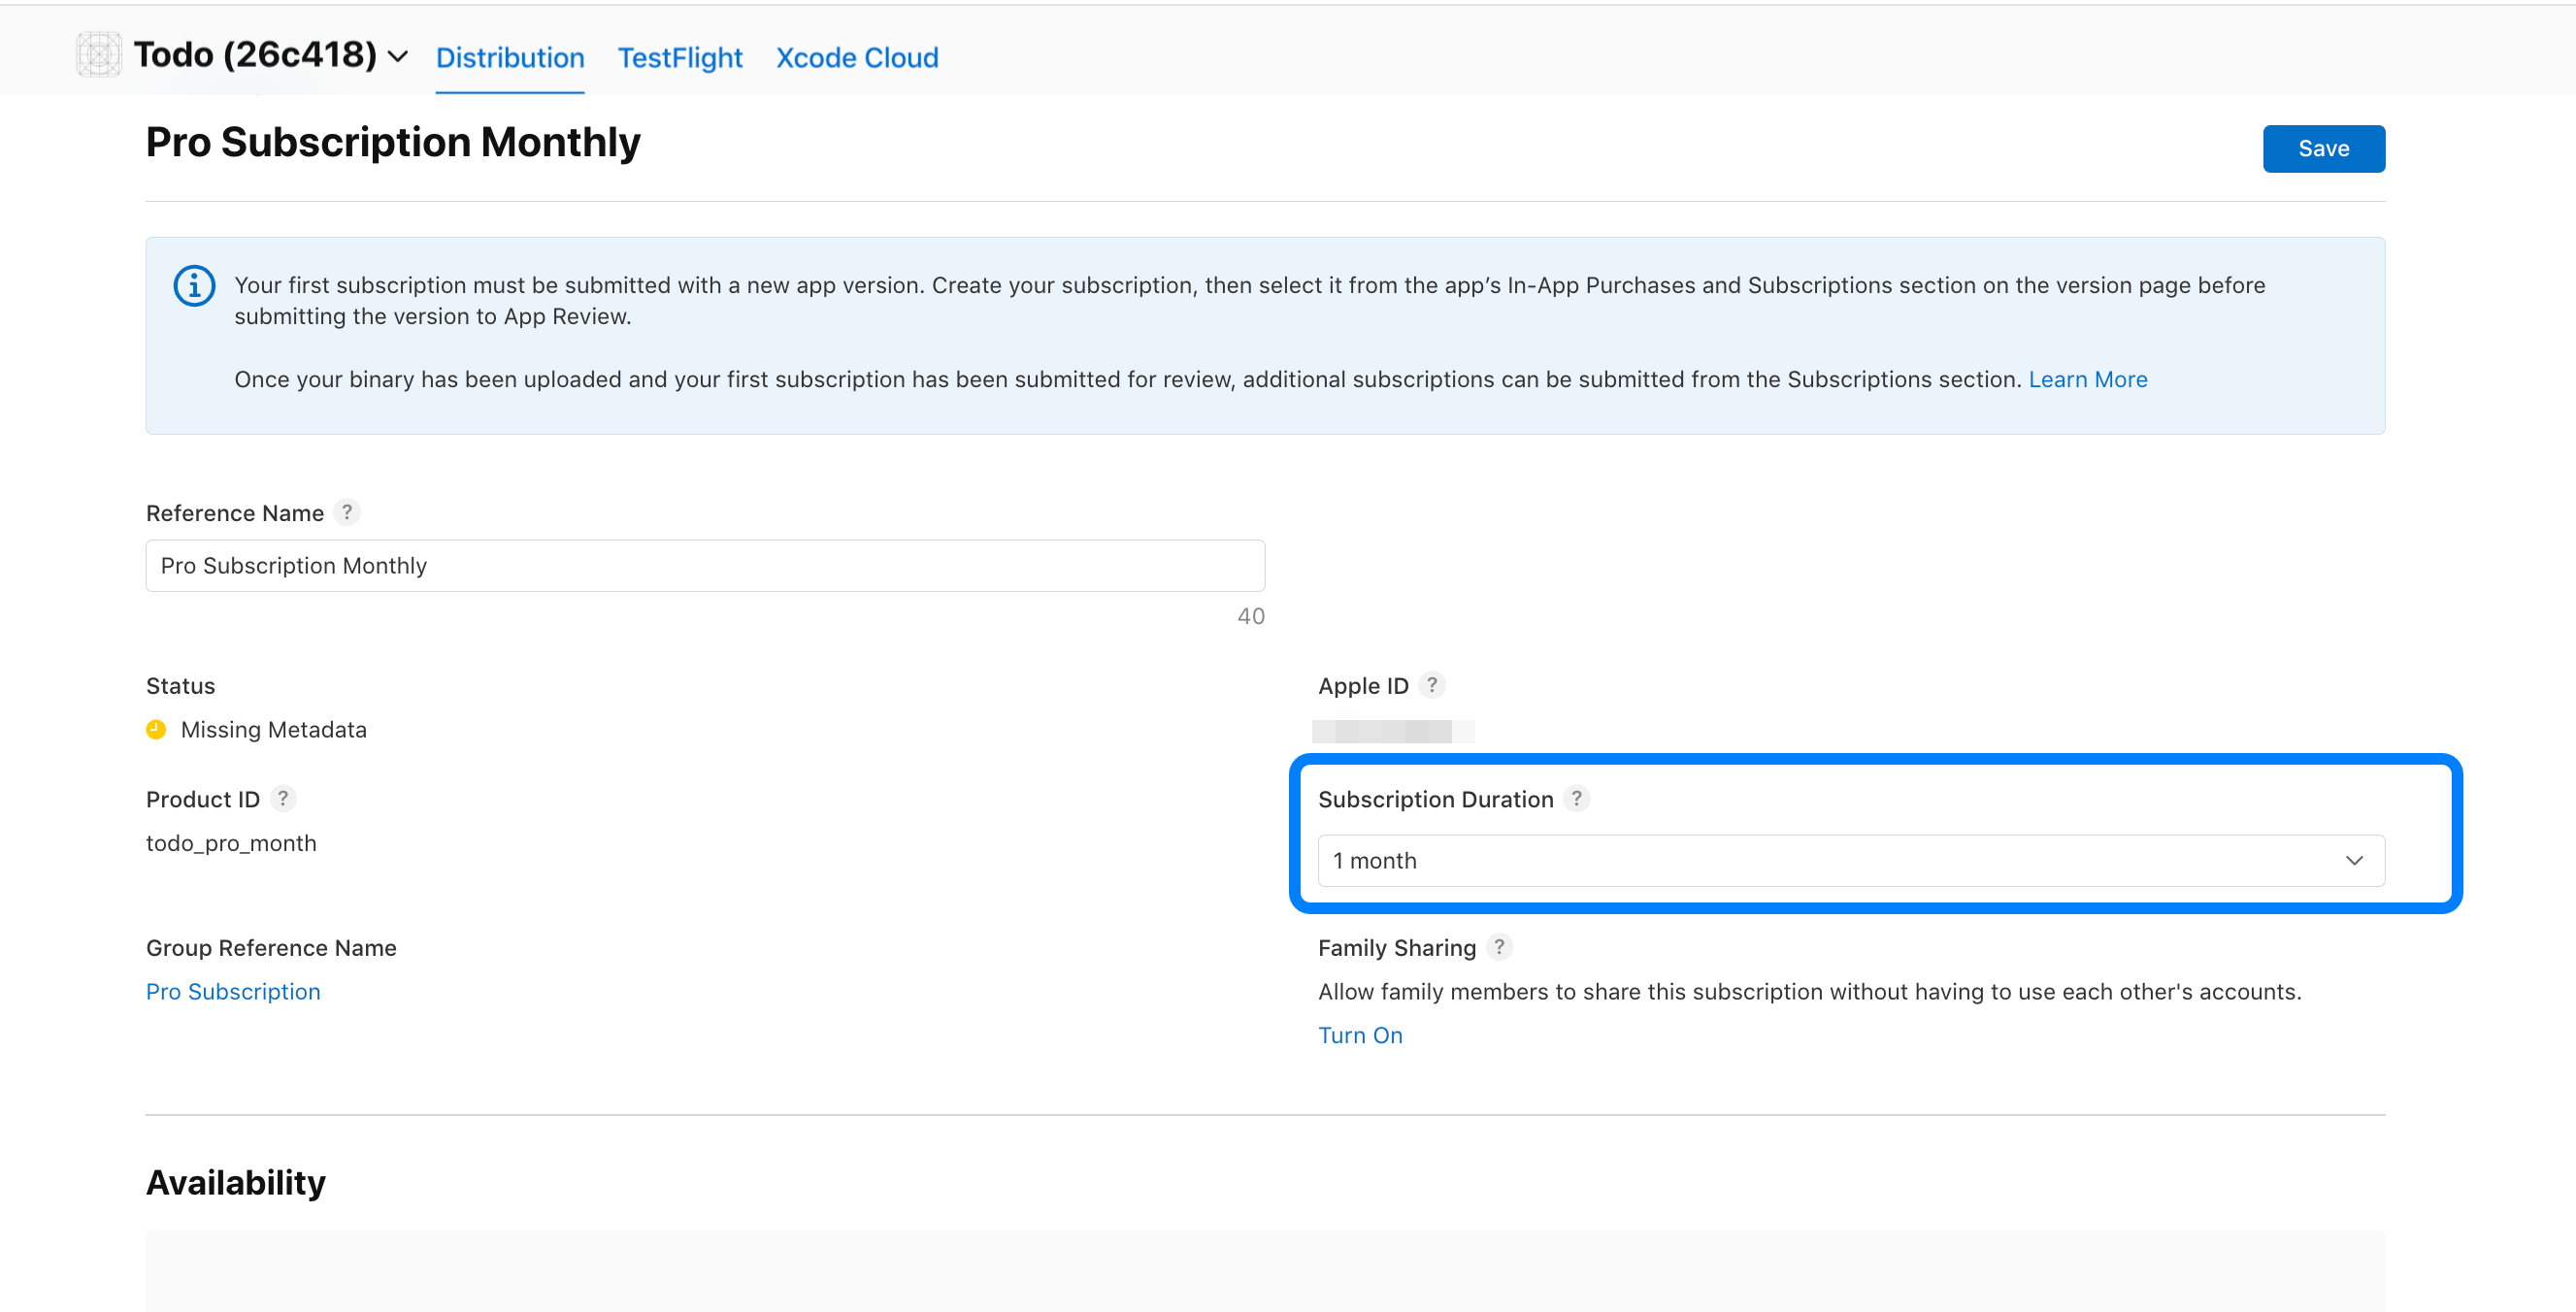
- Create Subscription: Fill in both the Reference Name and Product ID. For example, for a monthly subscription, you might name it “monthly_subscription” and set the Product ID accordingly.
- Ensure you Set Subscription Duration (e.g., Monthly).
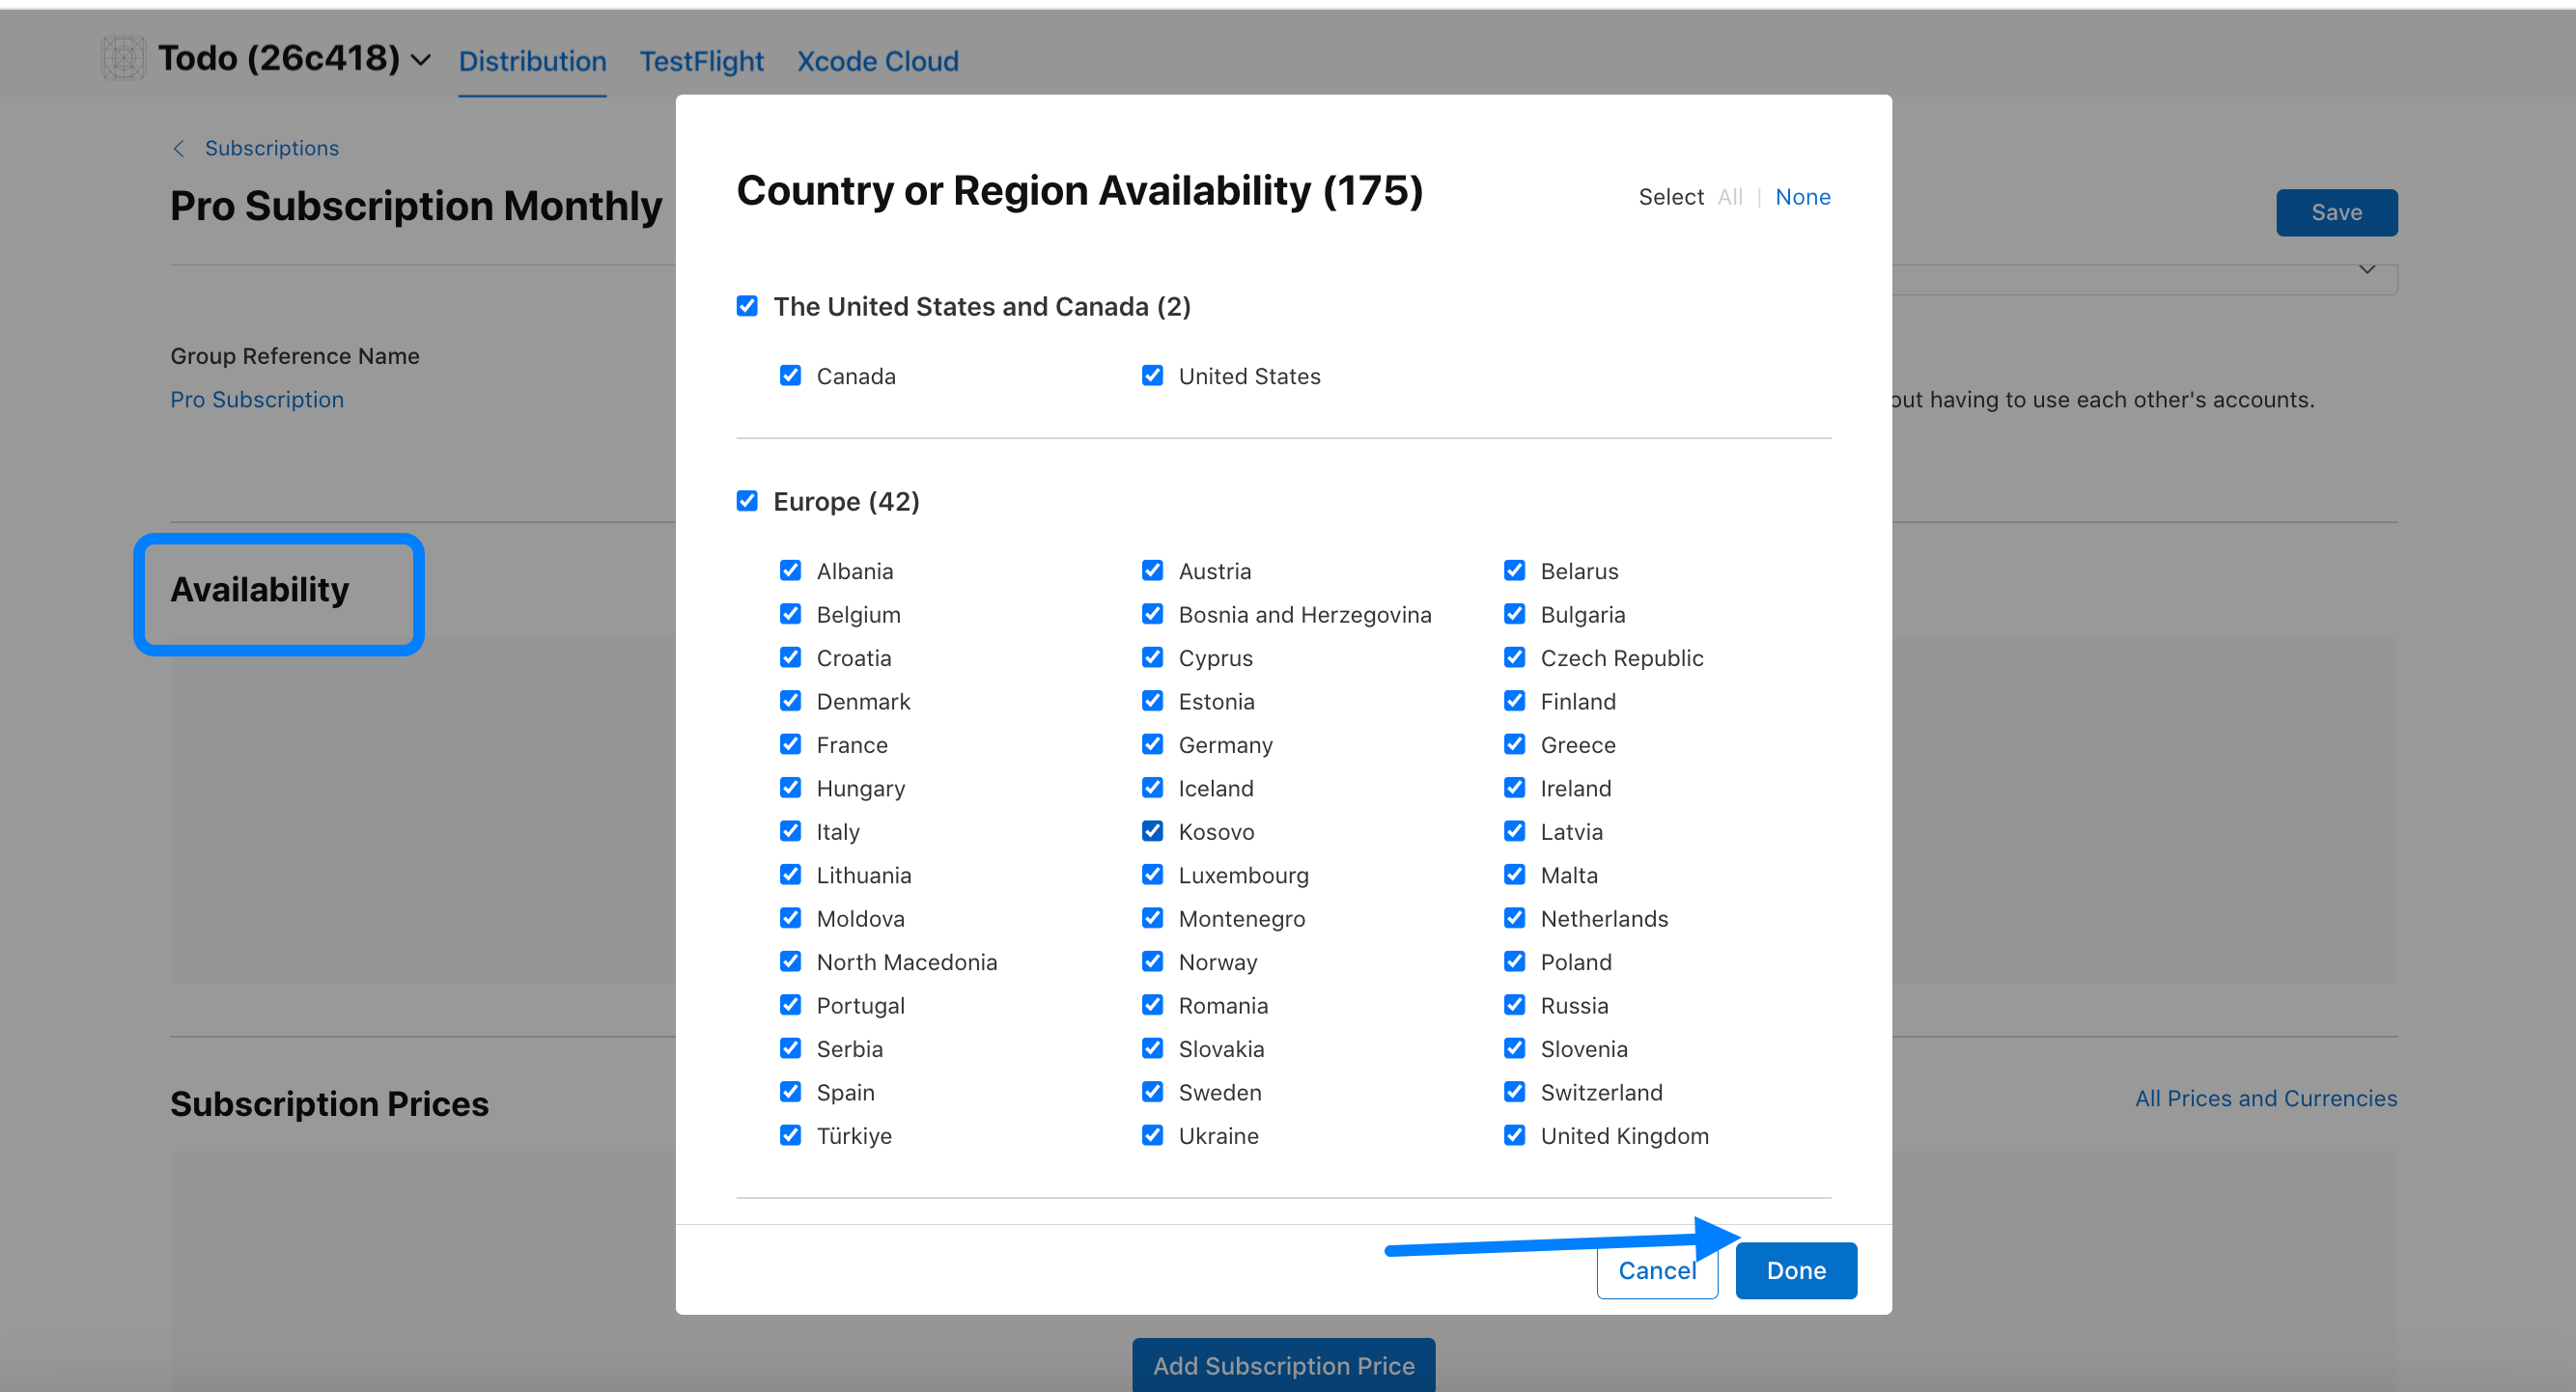
- Availability: By default, it will be set up globally.
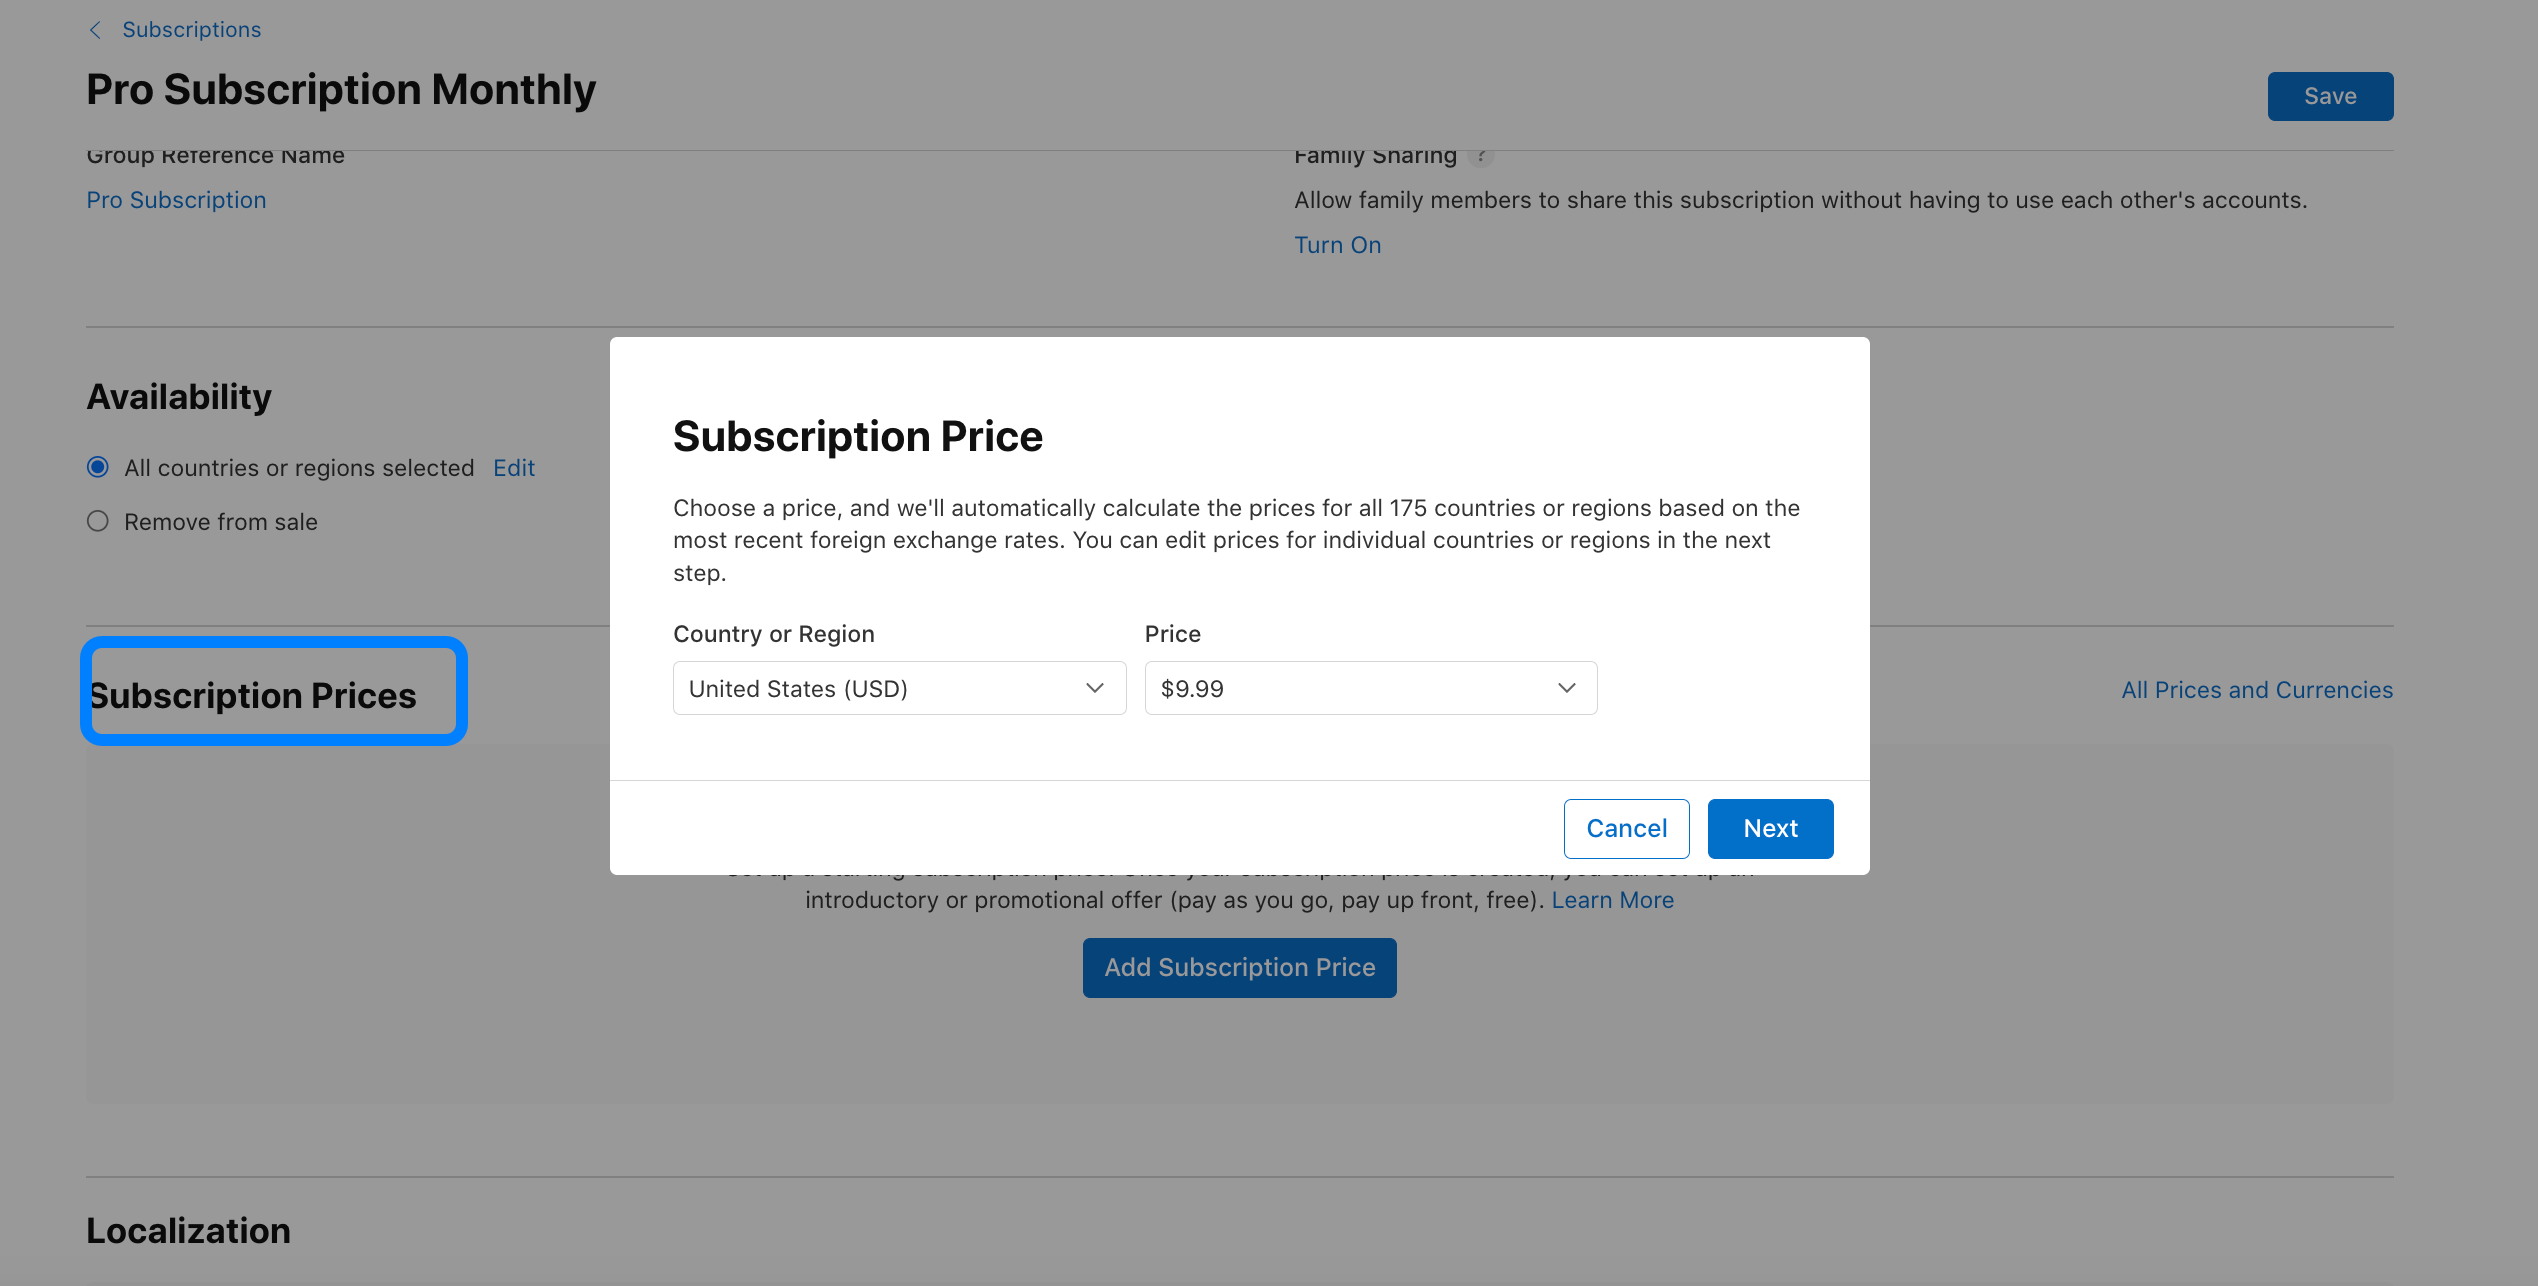
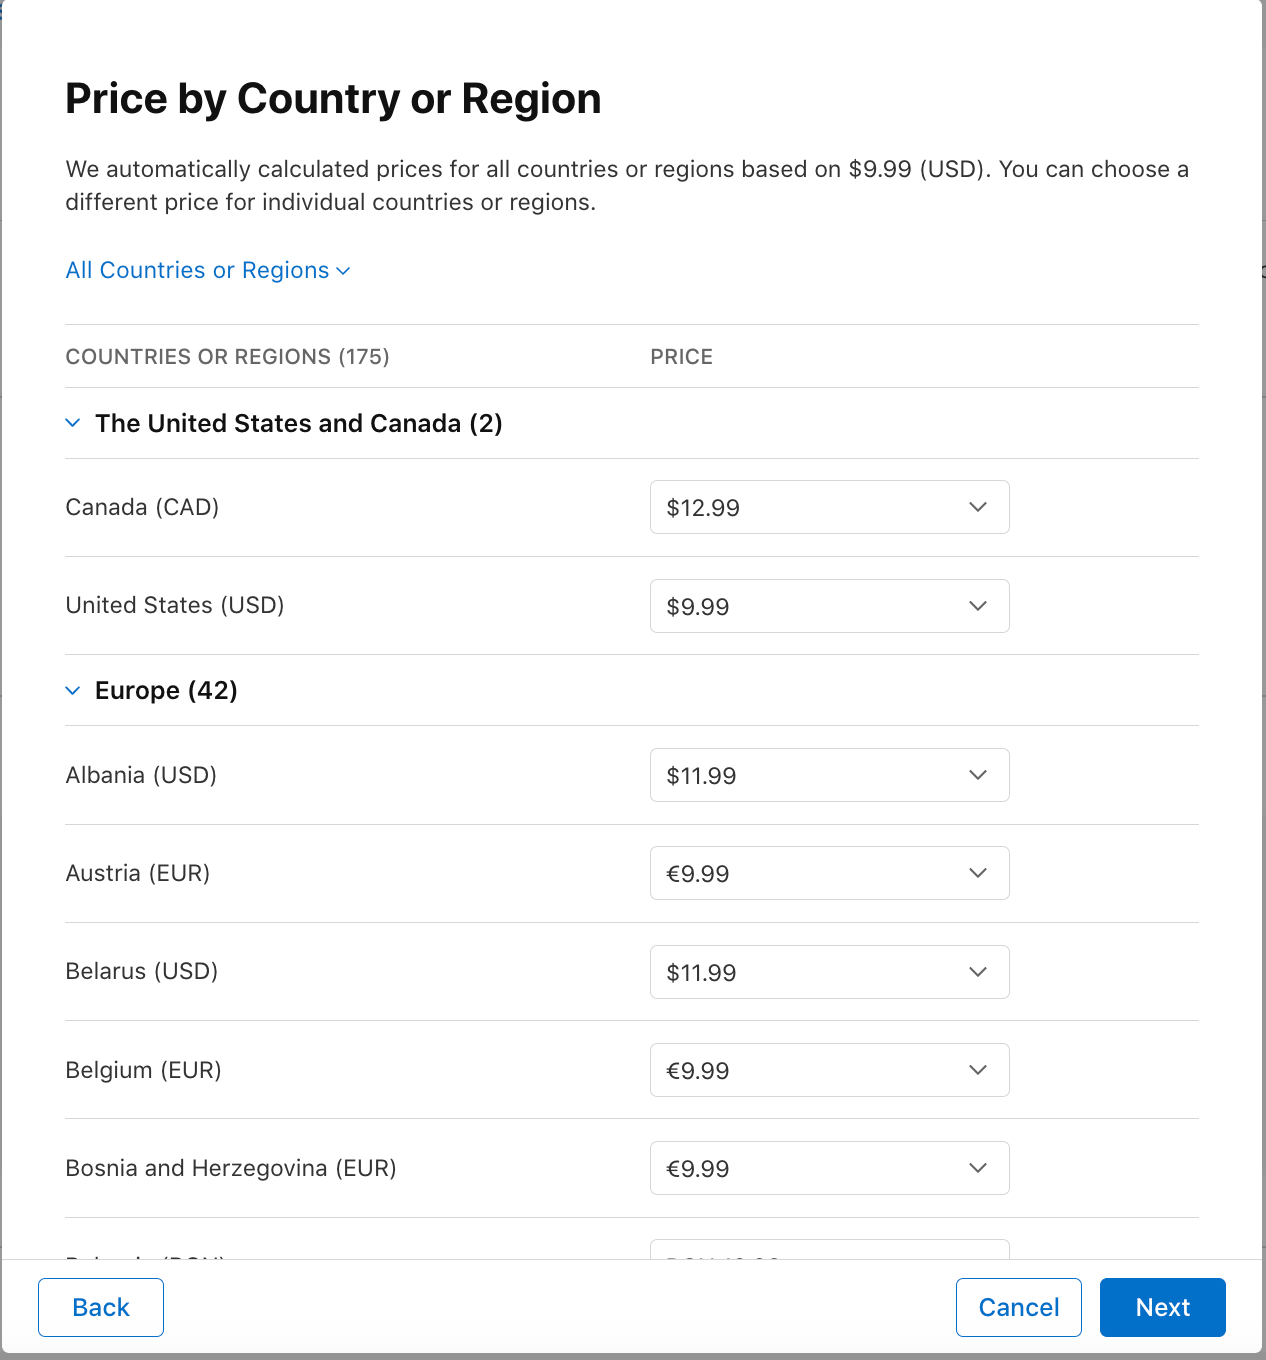
- Subscription Prices: Select the desired price from the dropdown. This will automatically convert to the global pricing table.
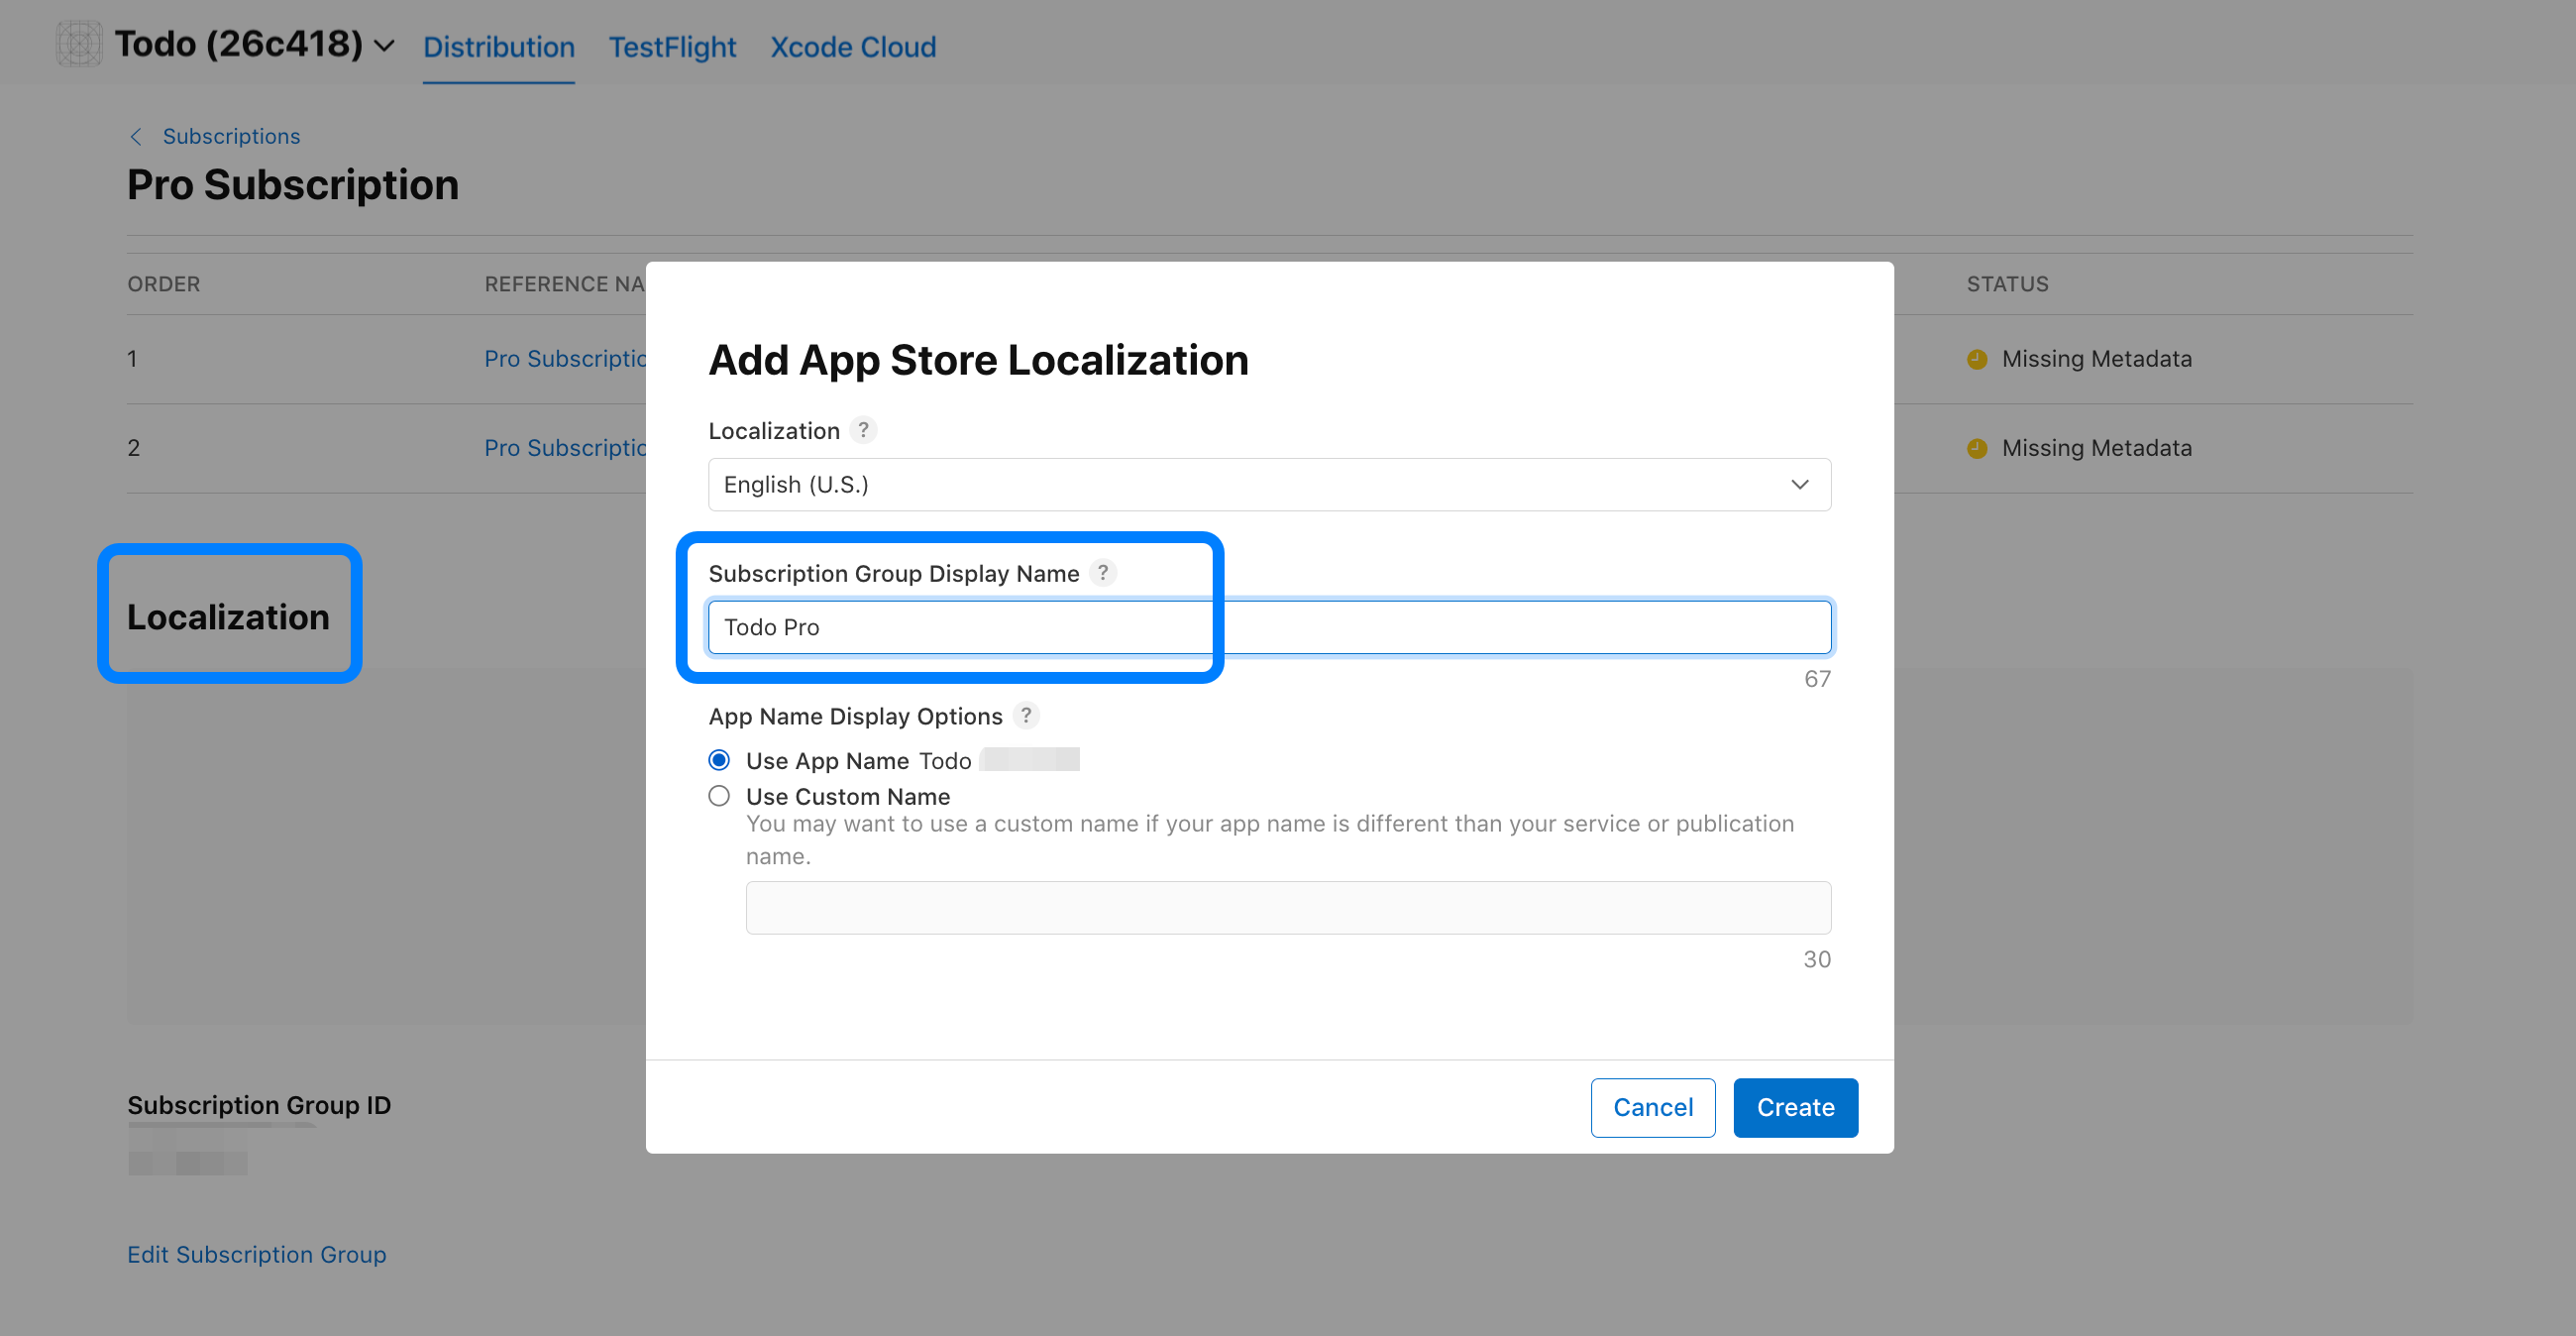
- Localization: Add a Subscription Group Display Name. This is what users will see.
- Review Information: Please ensure you include a screenshot of your app and your review notes in this section.
- Make sure to Save your subscription. Once you’ve done these, all statuses will automatically change to “Ready to Submit.”
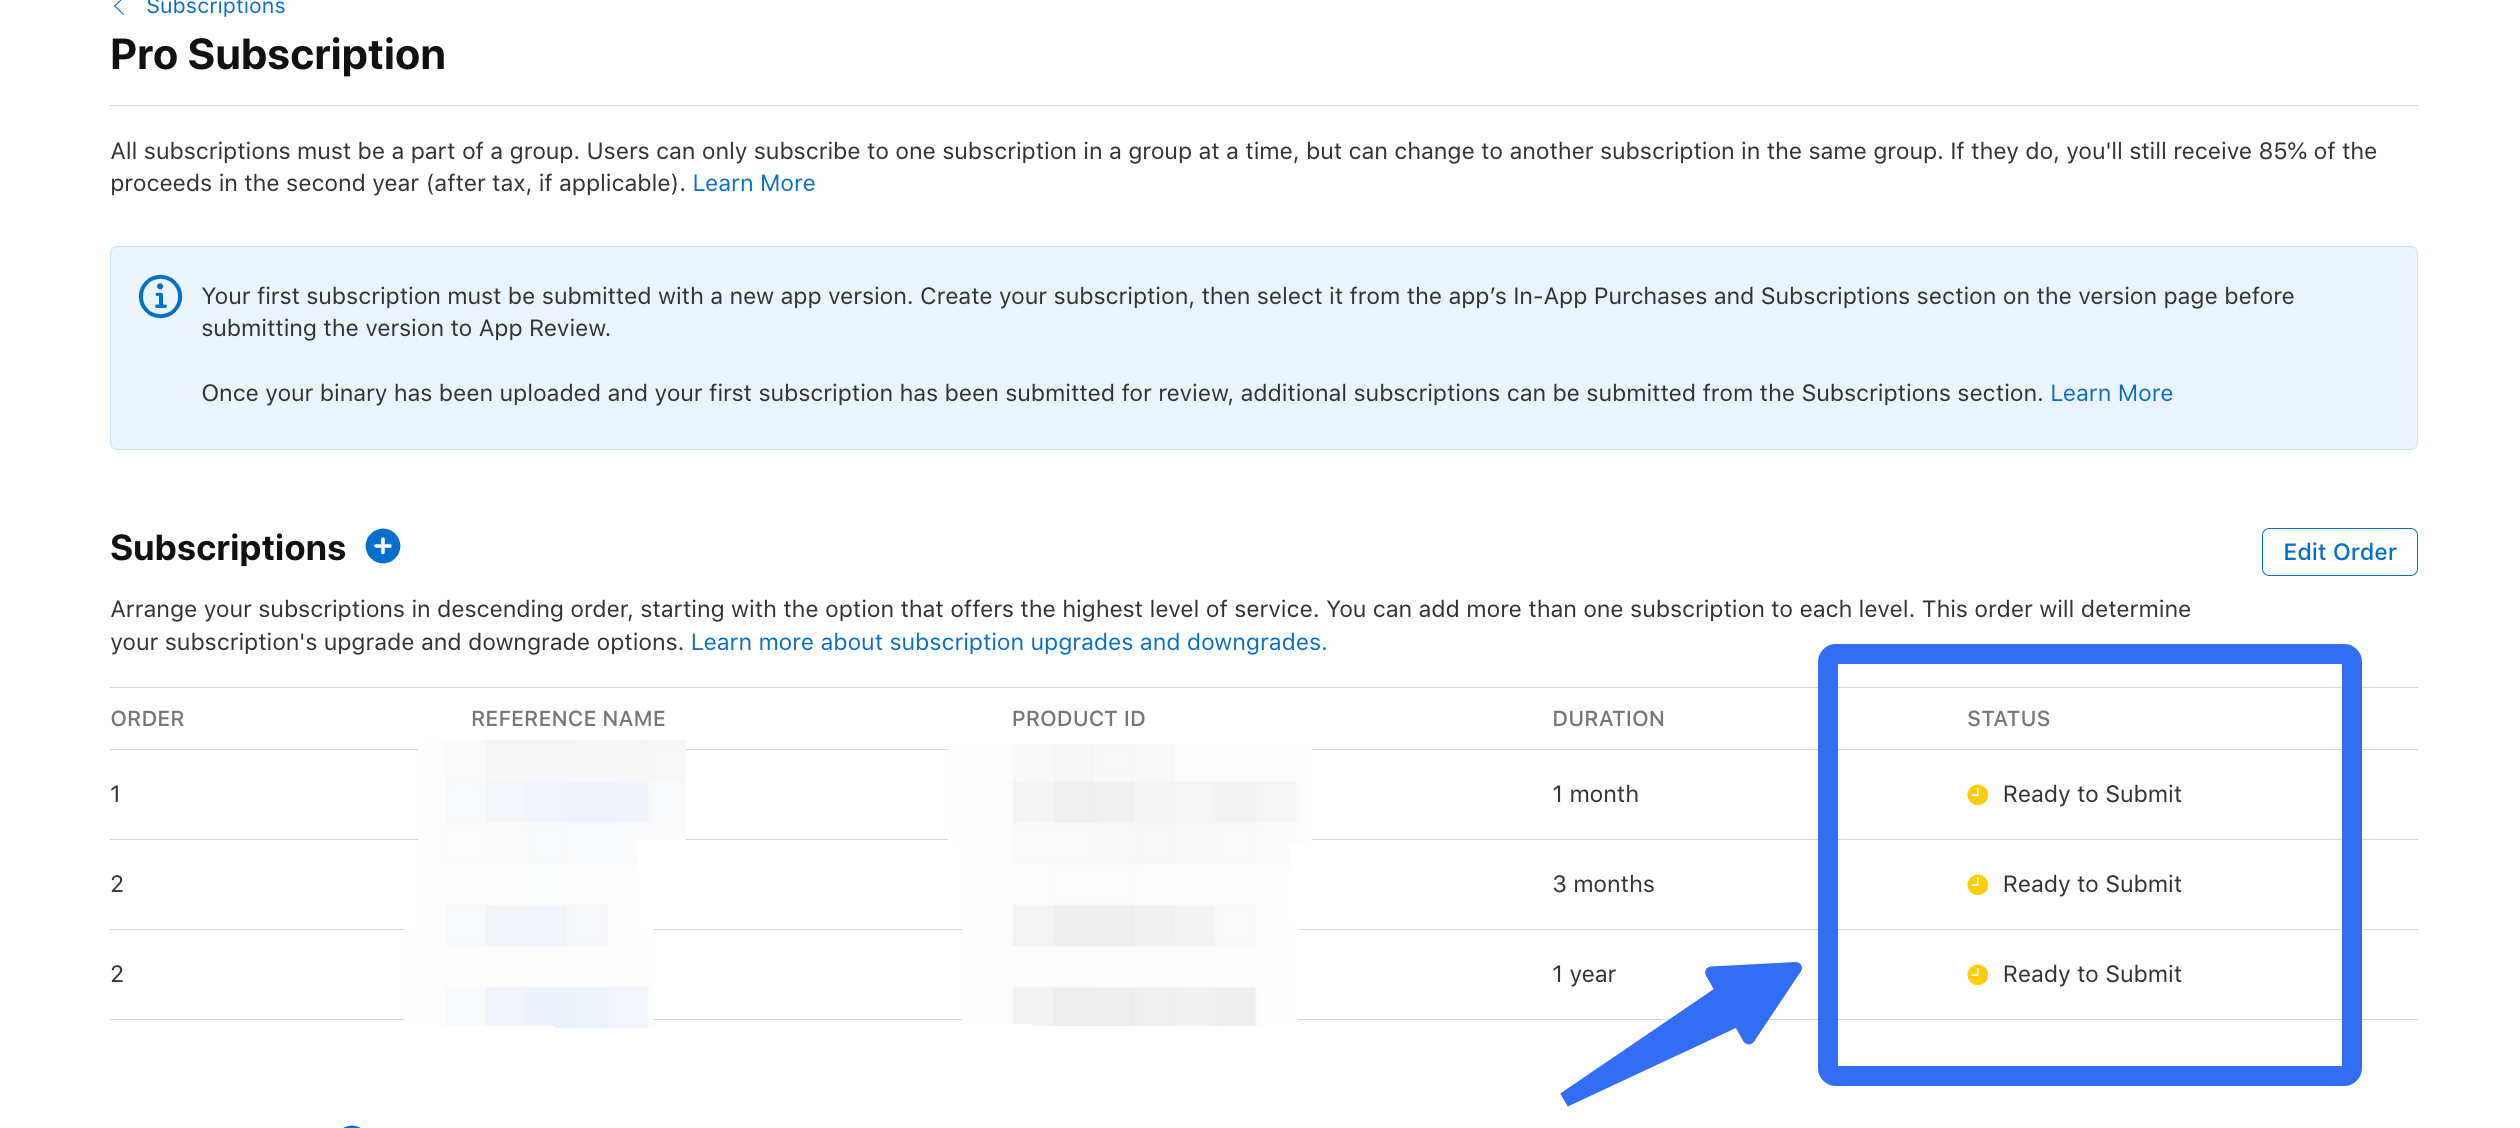
- Repeat this process for any other subscription durations (e.g., yearly).
- Localization: You can use different subscription group display names and app name display options for each localization.

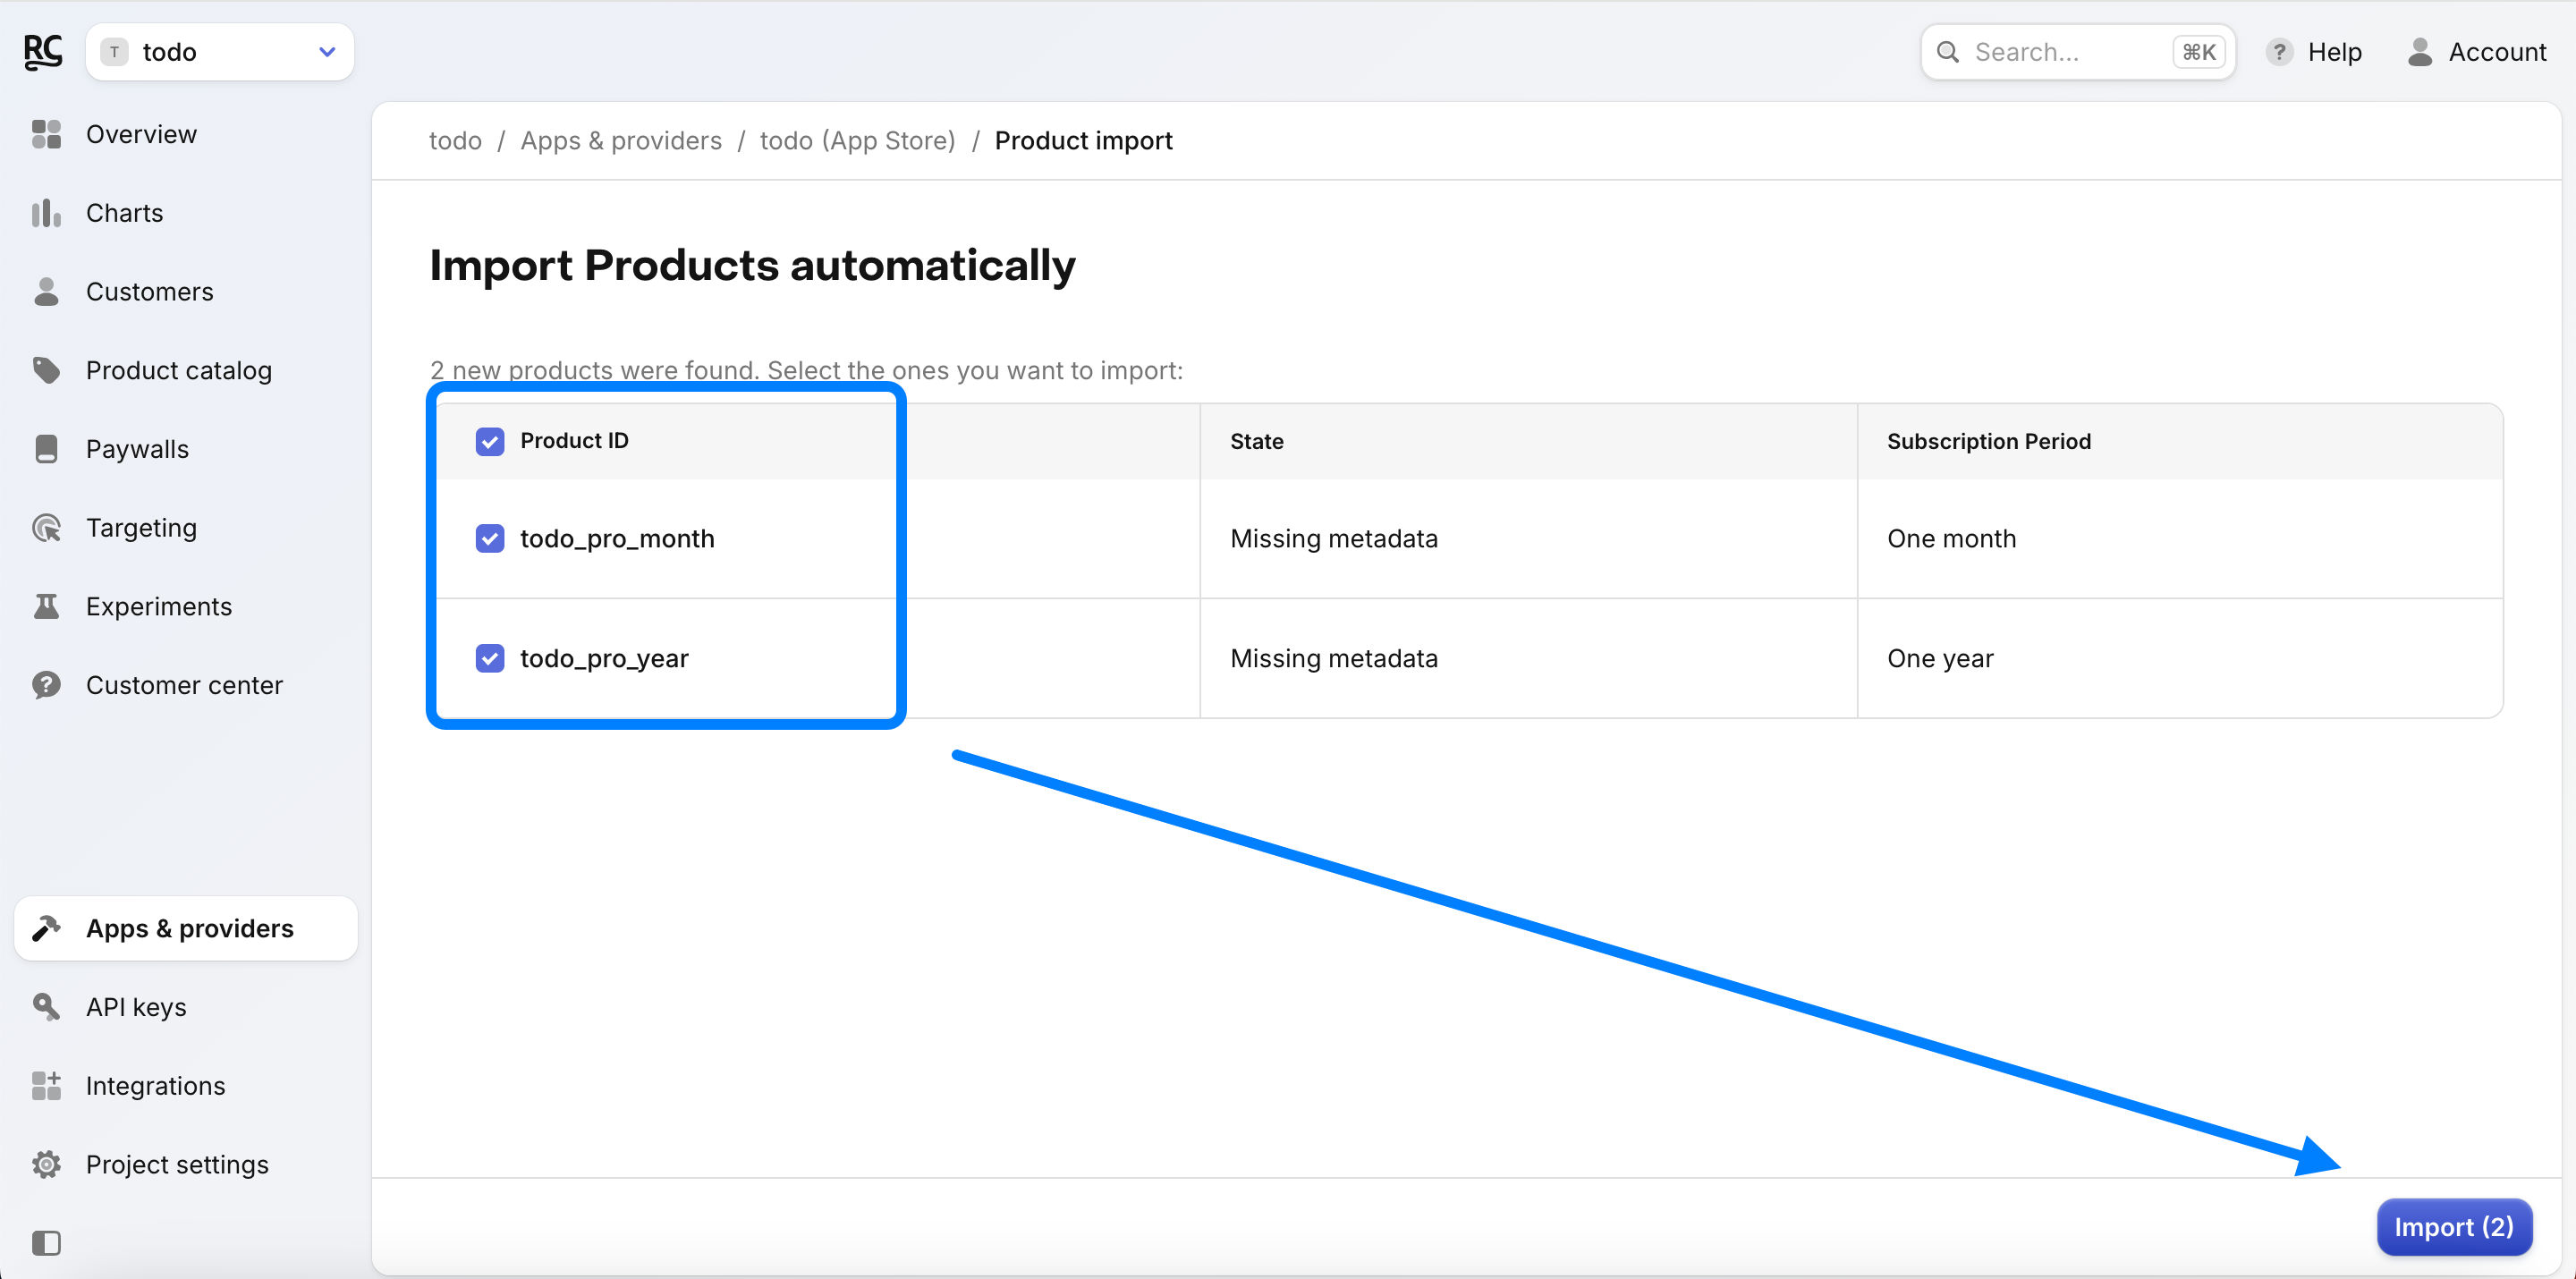
- Importing Products into RevenueCat:
- Navigate back to RevenueCat.
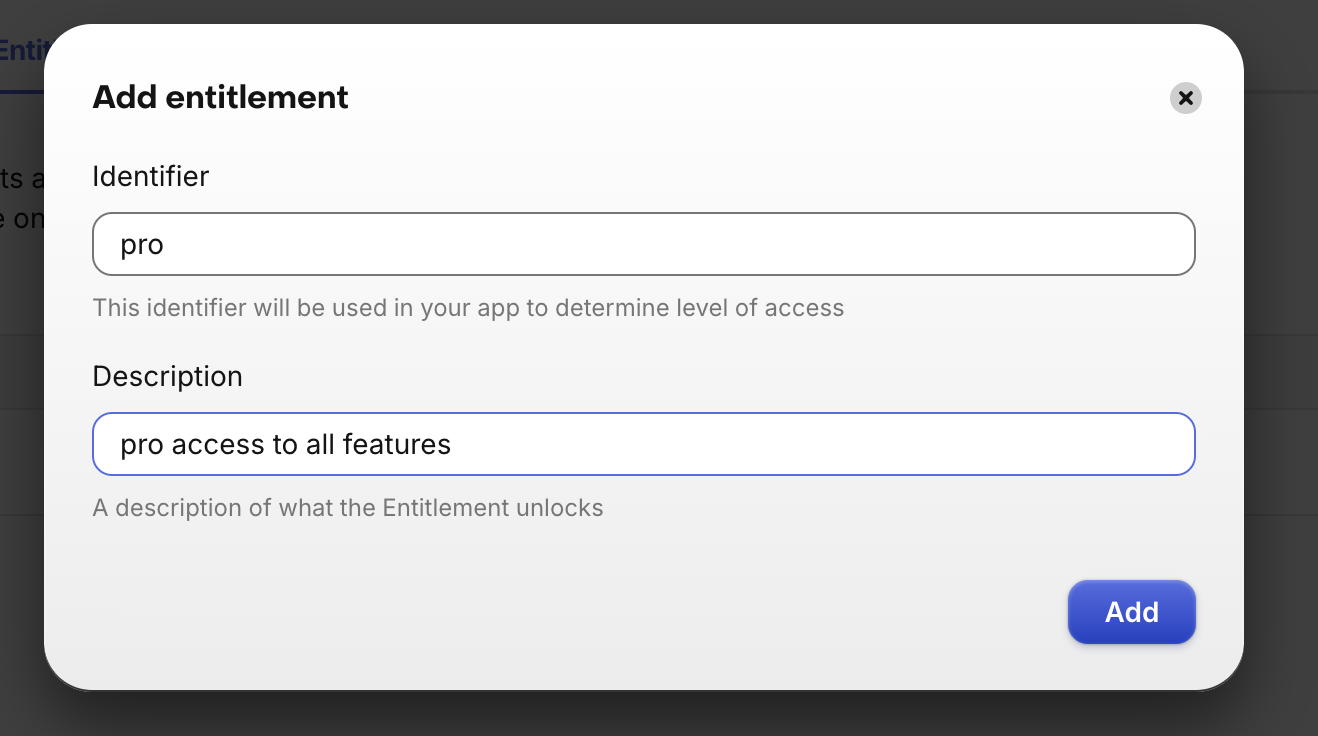
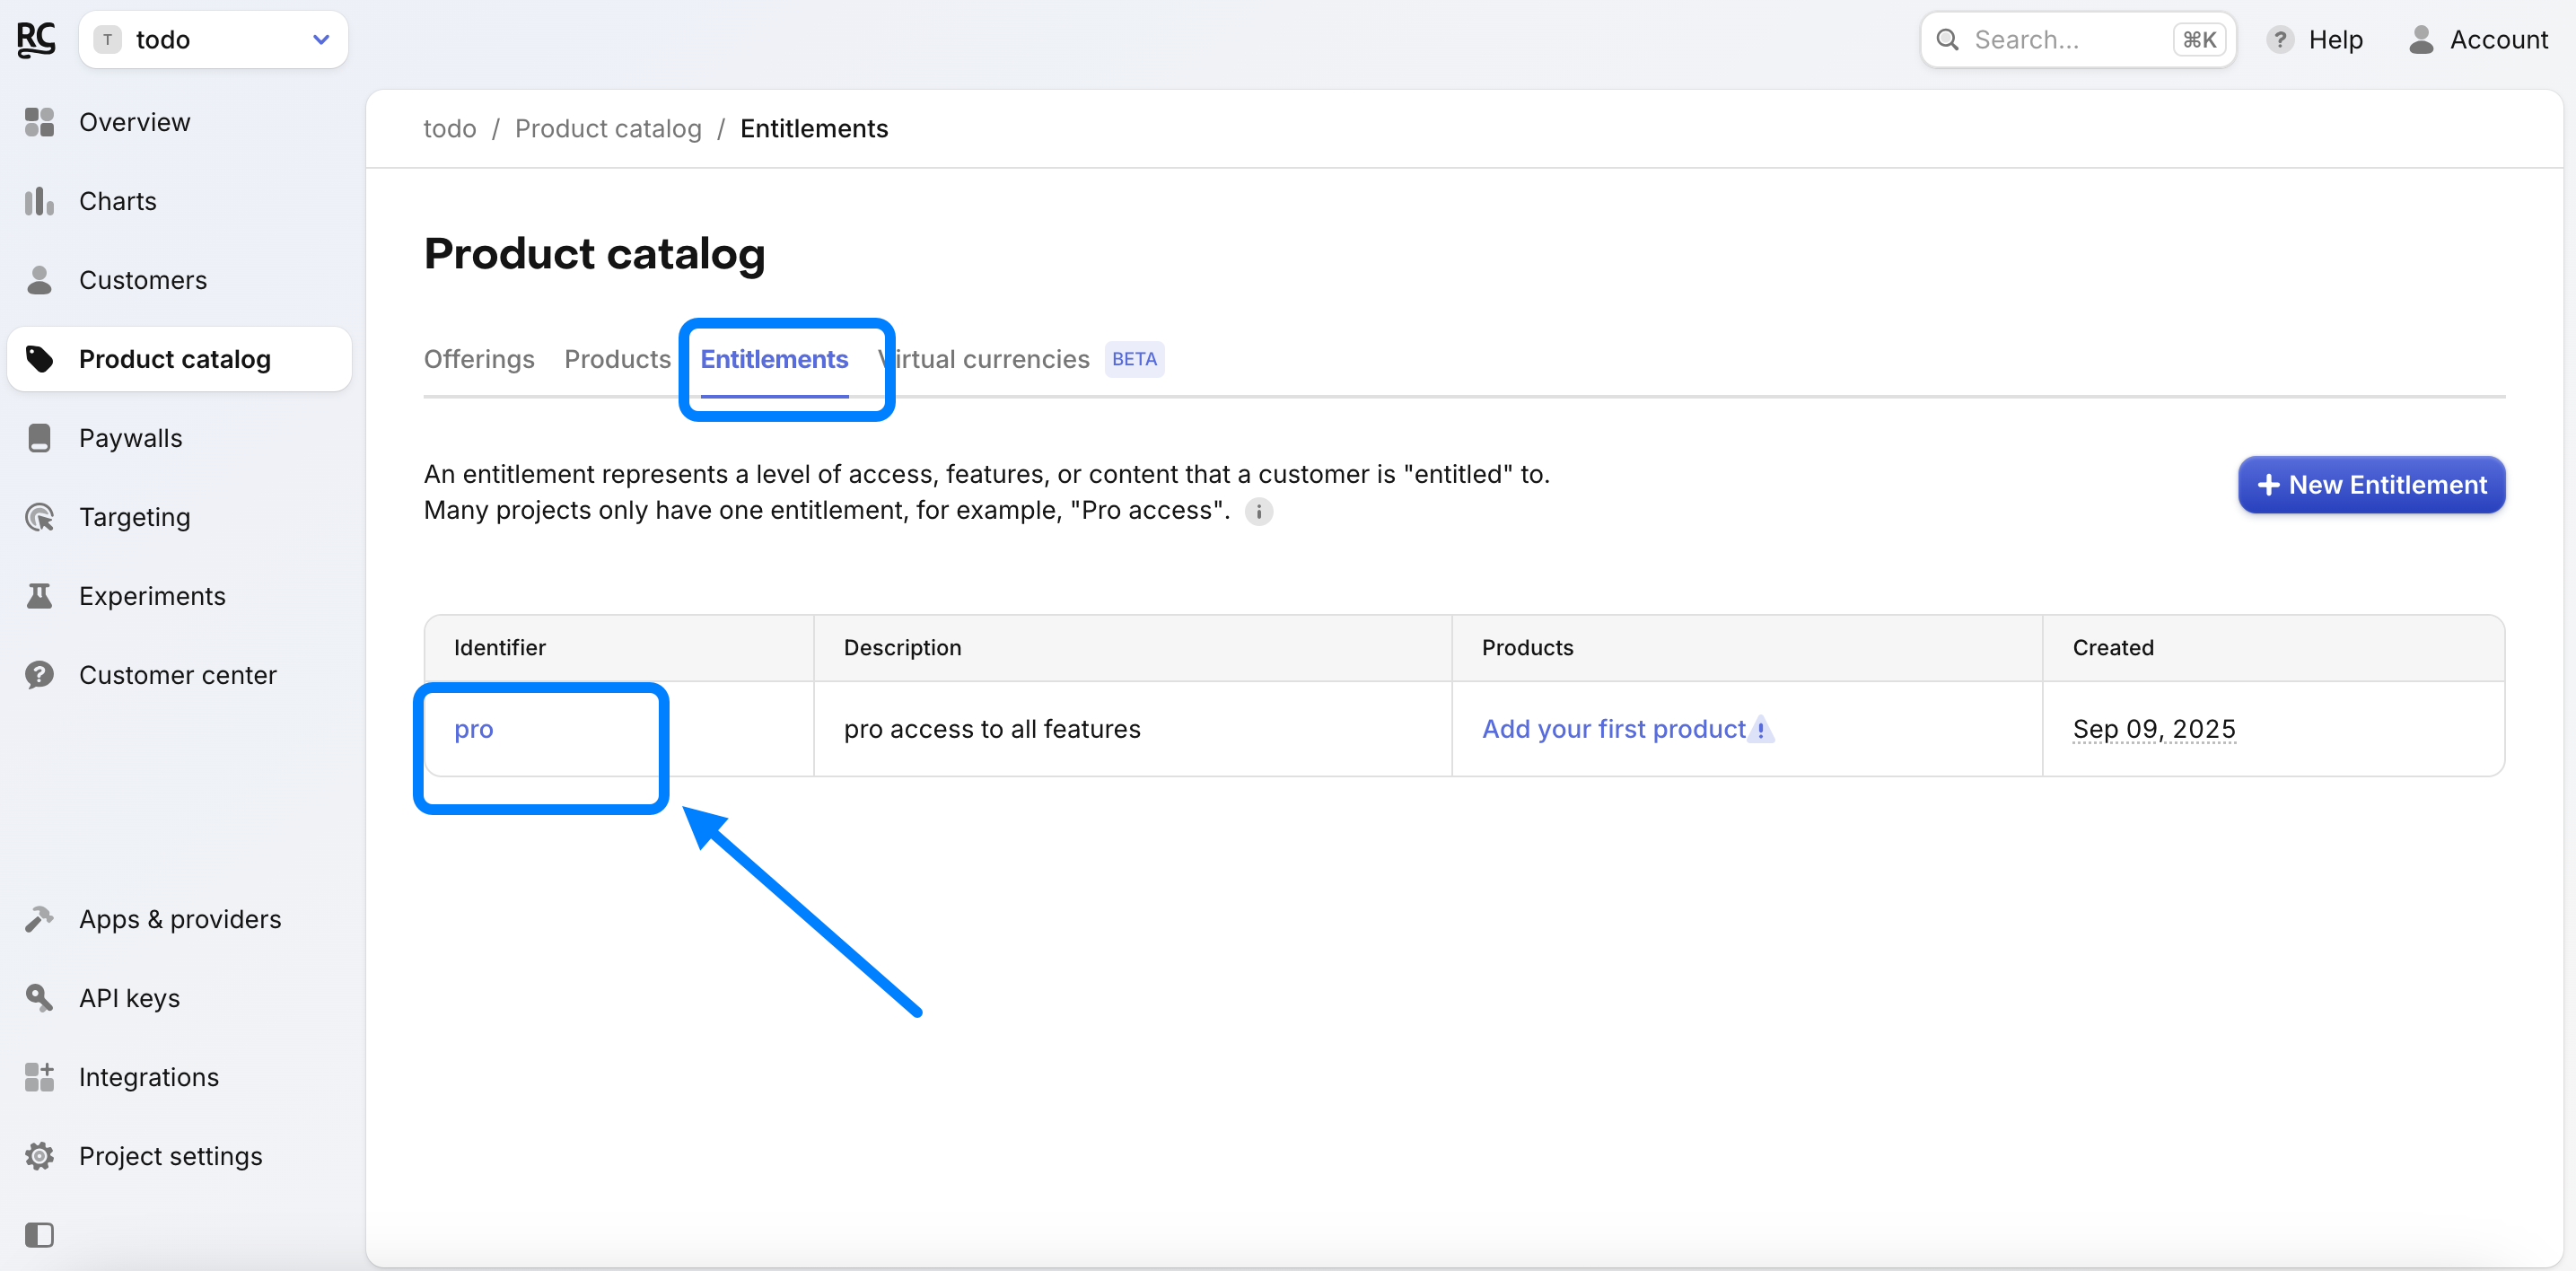
- Go to Product Catalog ➡️ Entitlements.
- Click New Entitlement (e.g., “pro”).
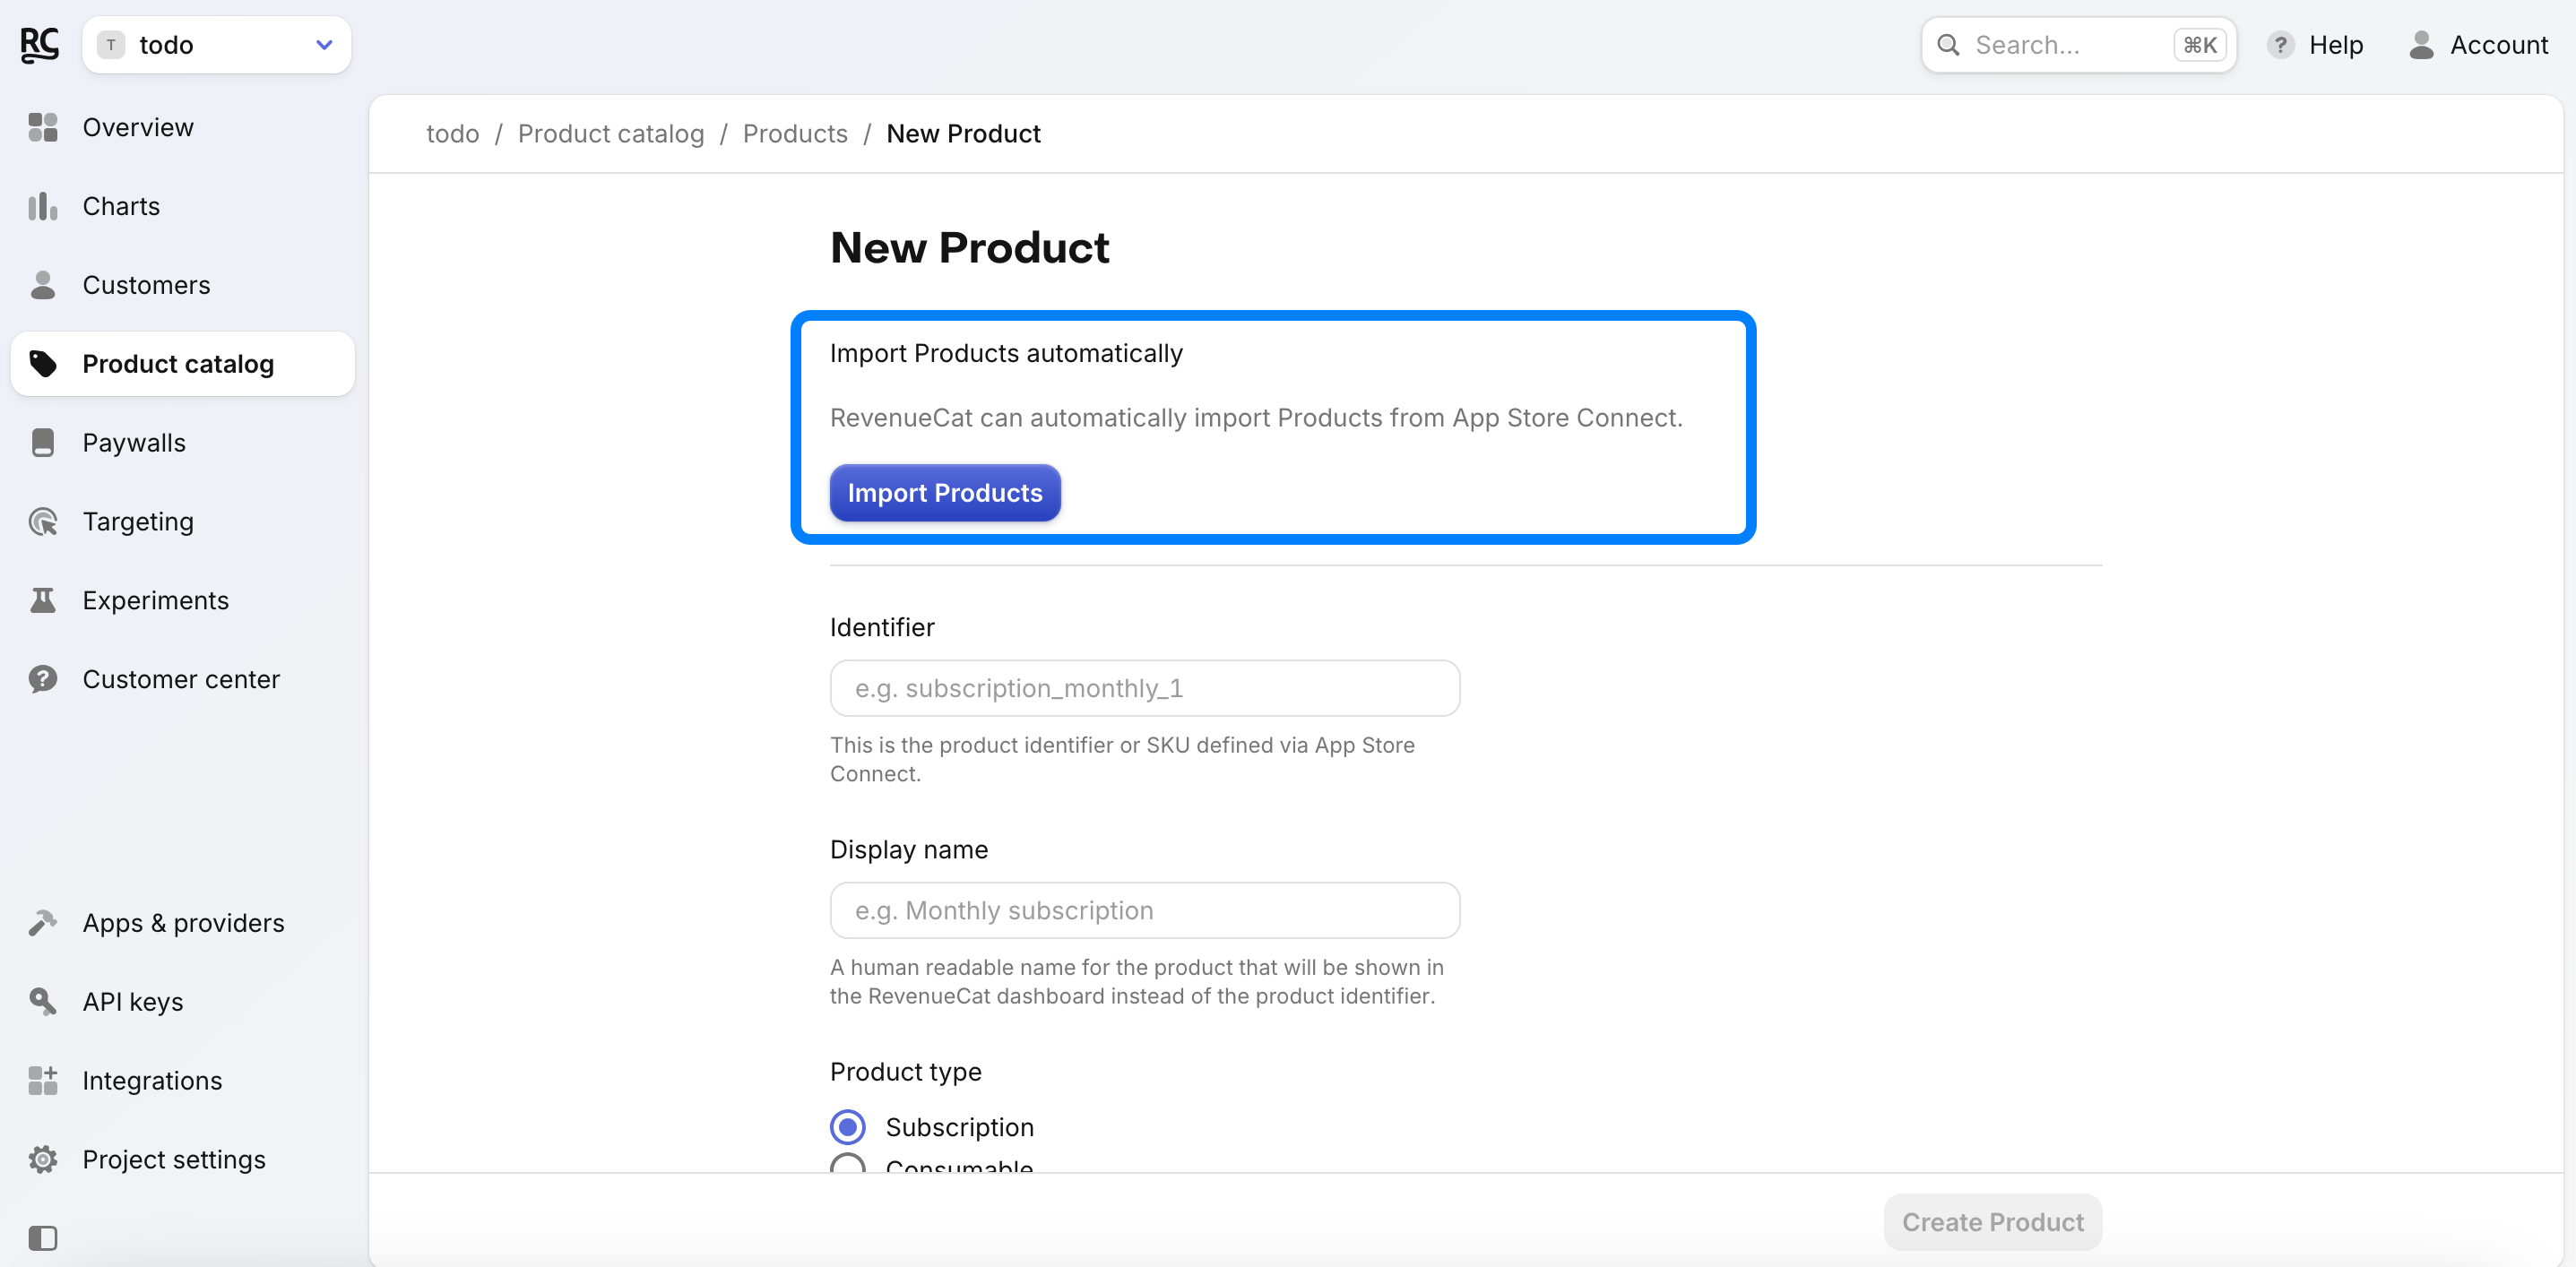
- Next, go to Product Catalog ➡️ Products.

- Select the app you want to add products to.
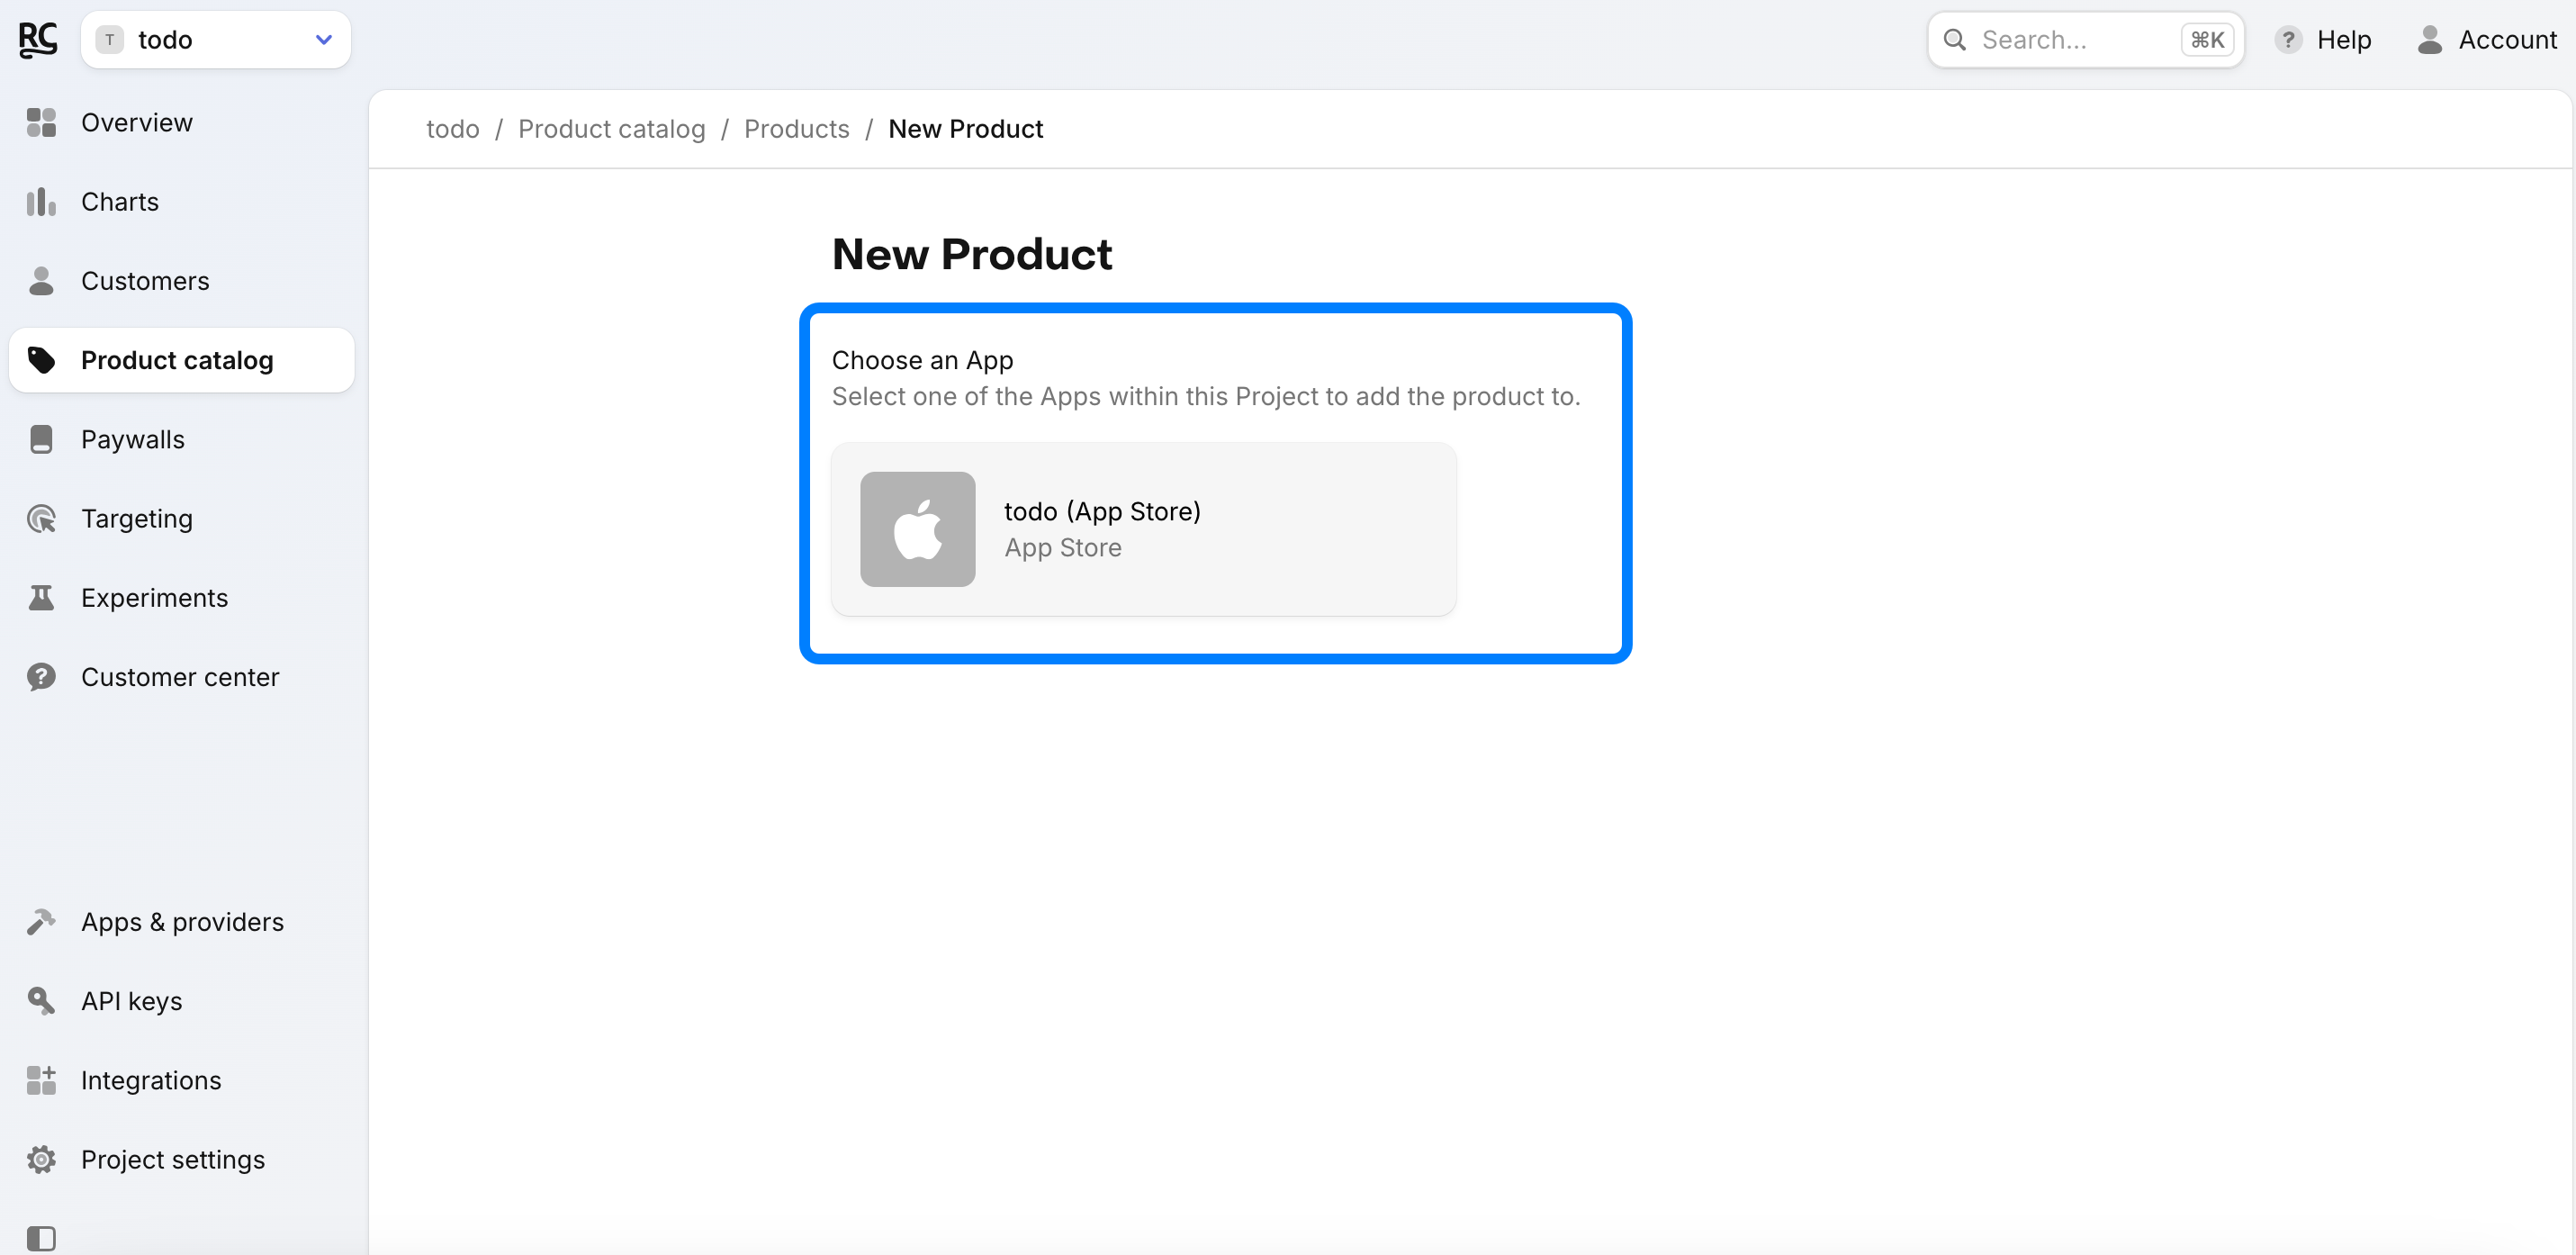
- Choose Import Products from App Store Connect. RevenueCat will pull the product data directly.
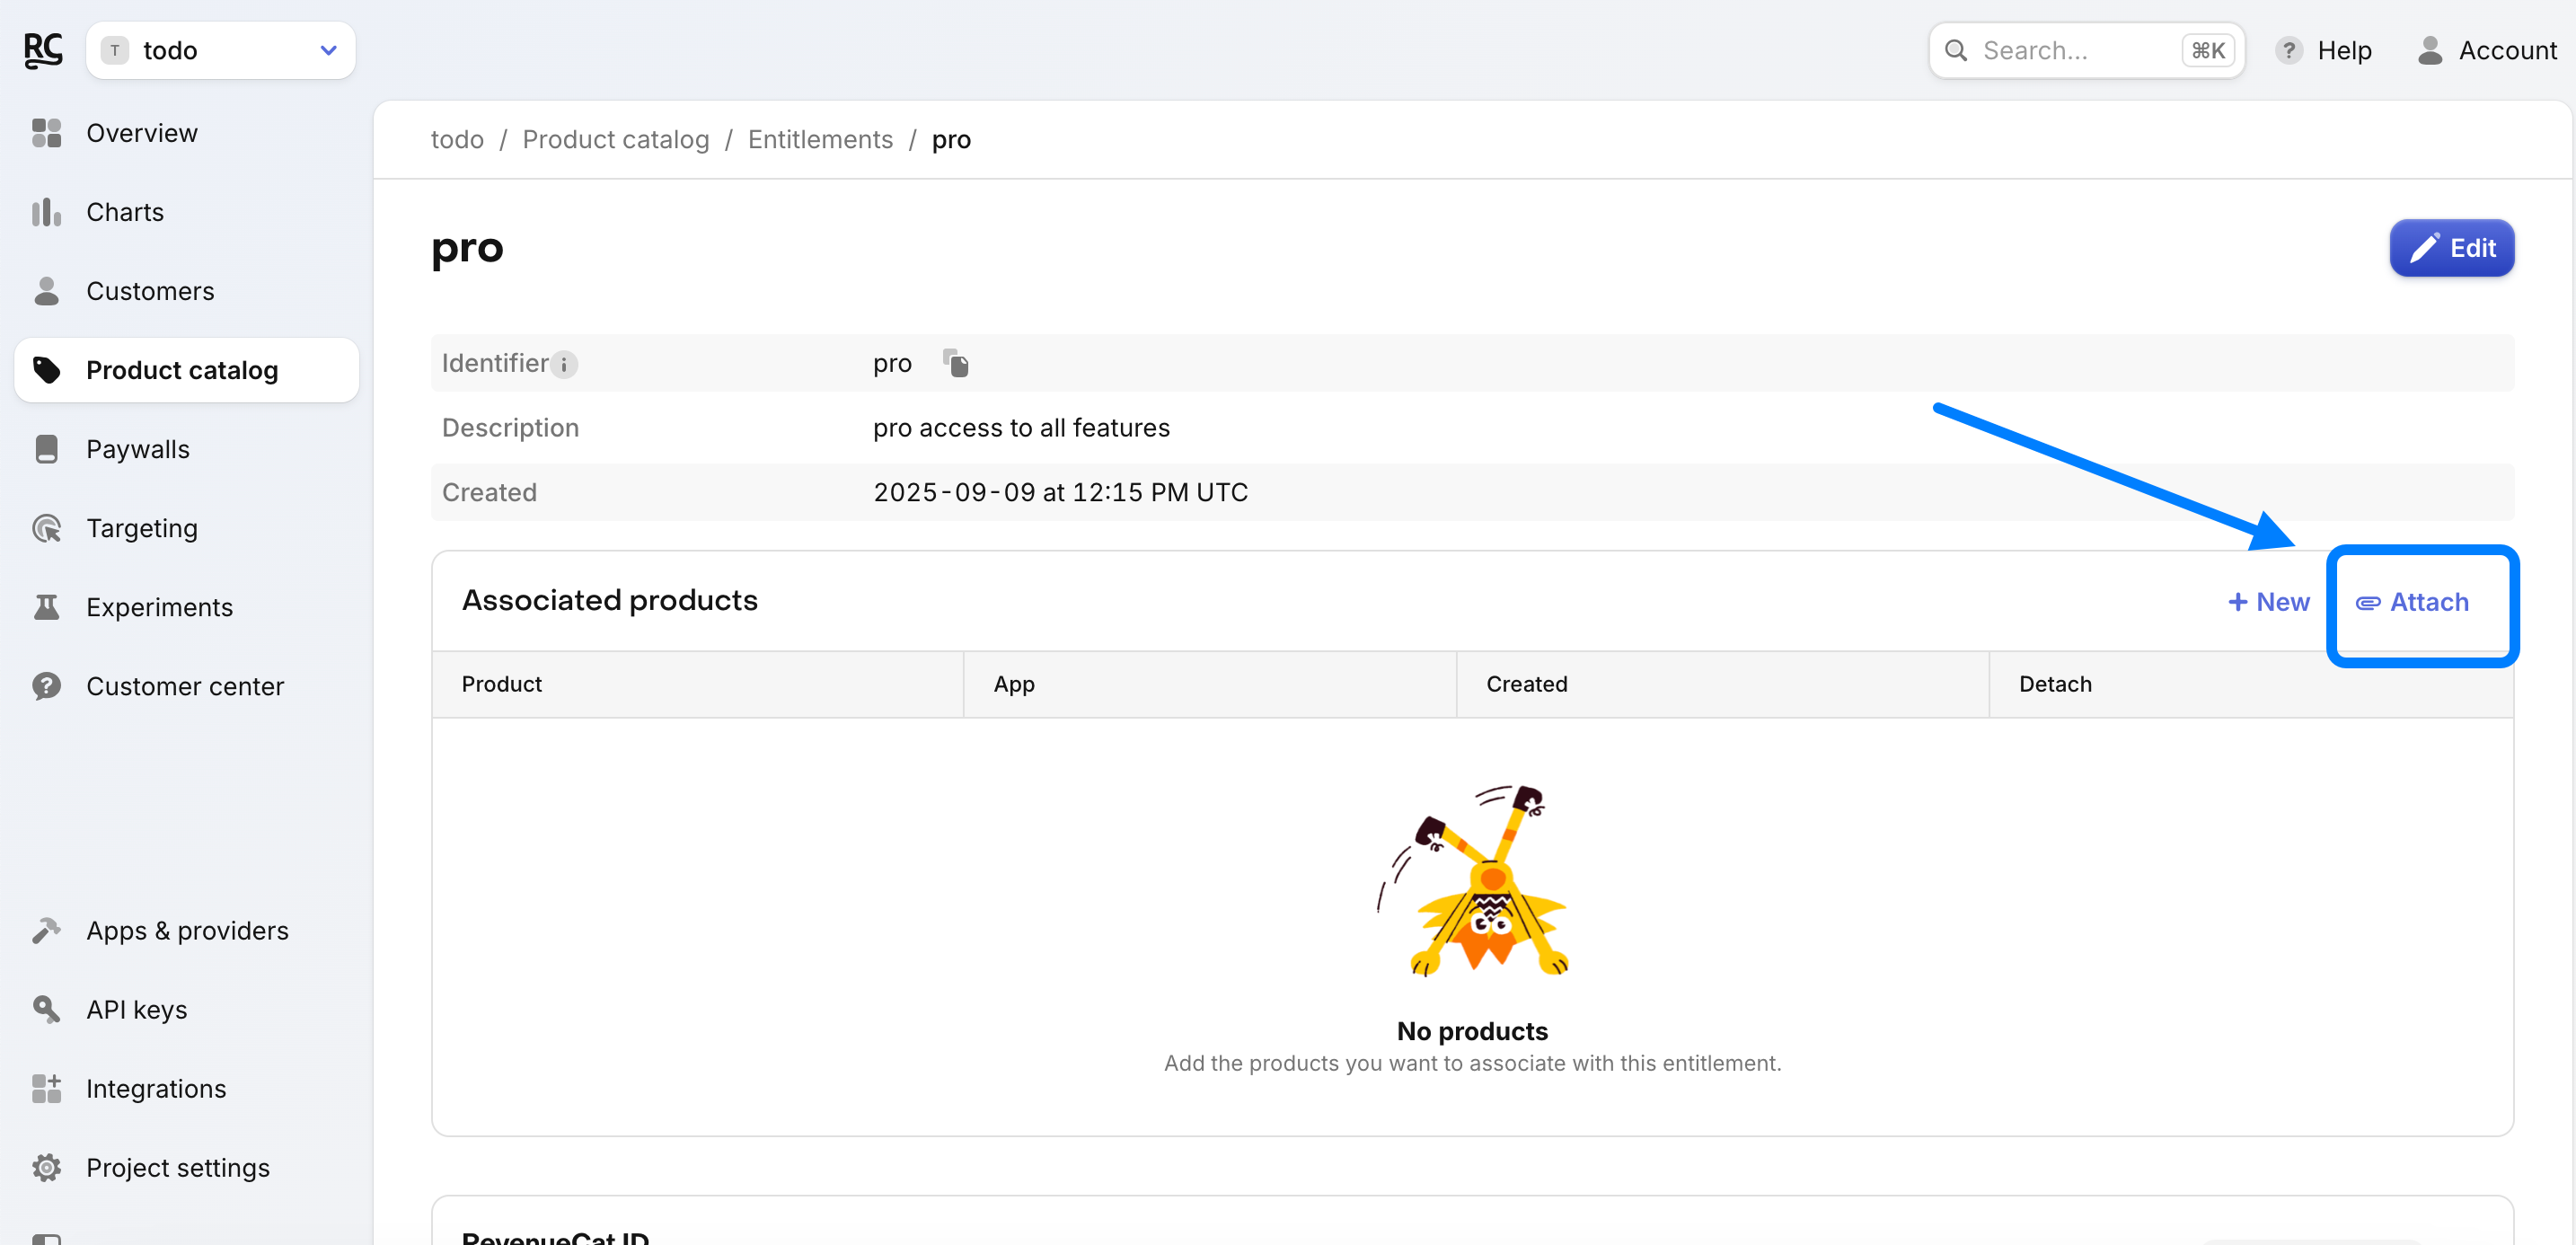
- Go back to Entitlements, click on the entitlement you created (e.g., “pro”).
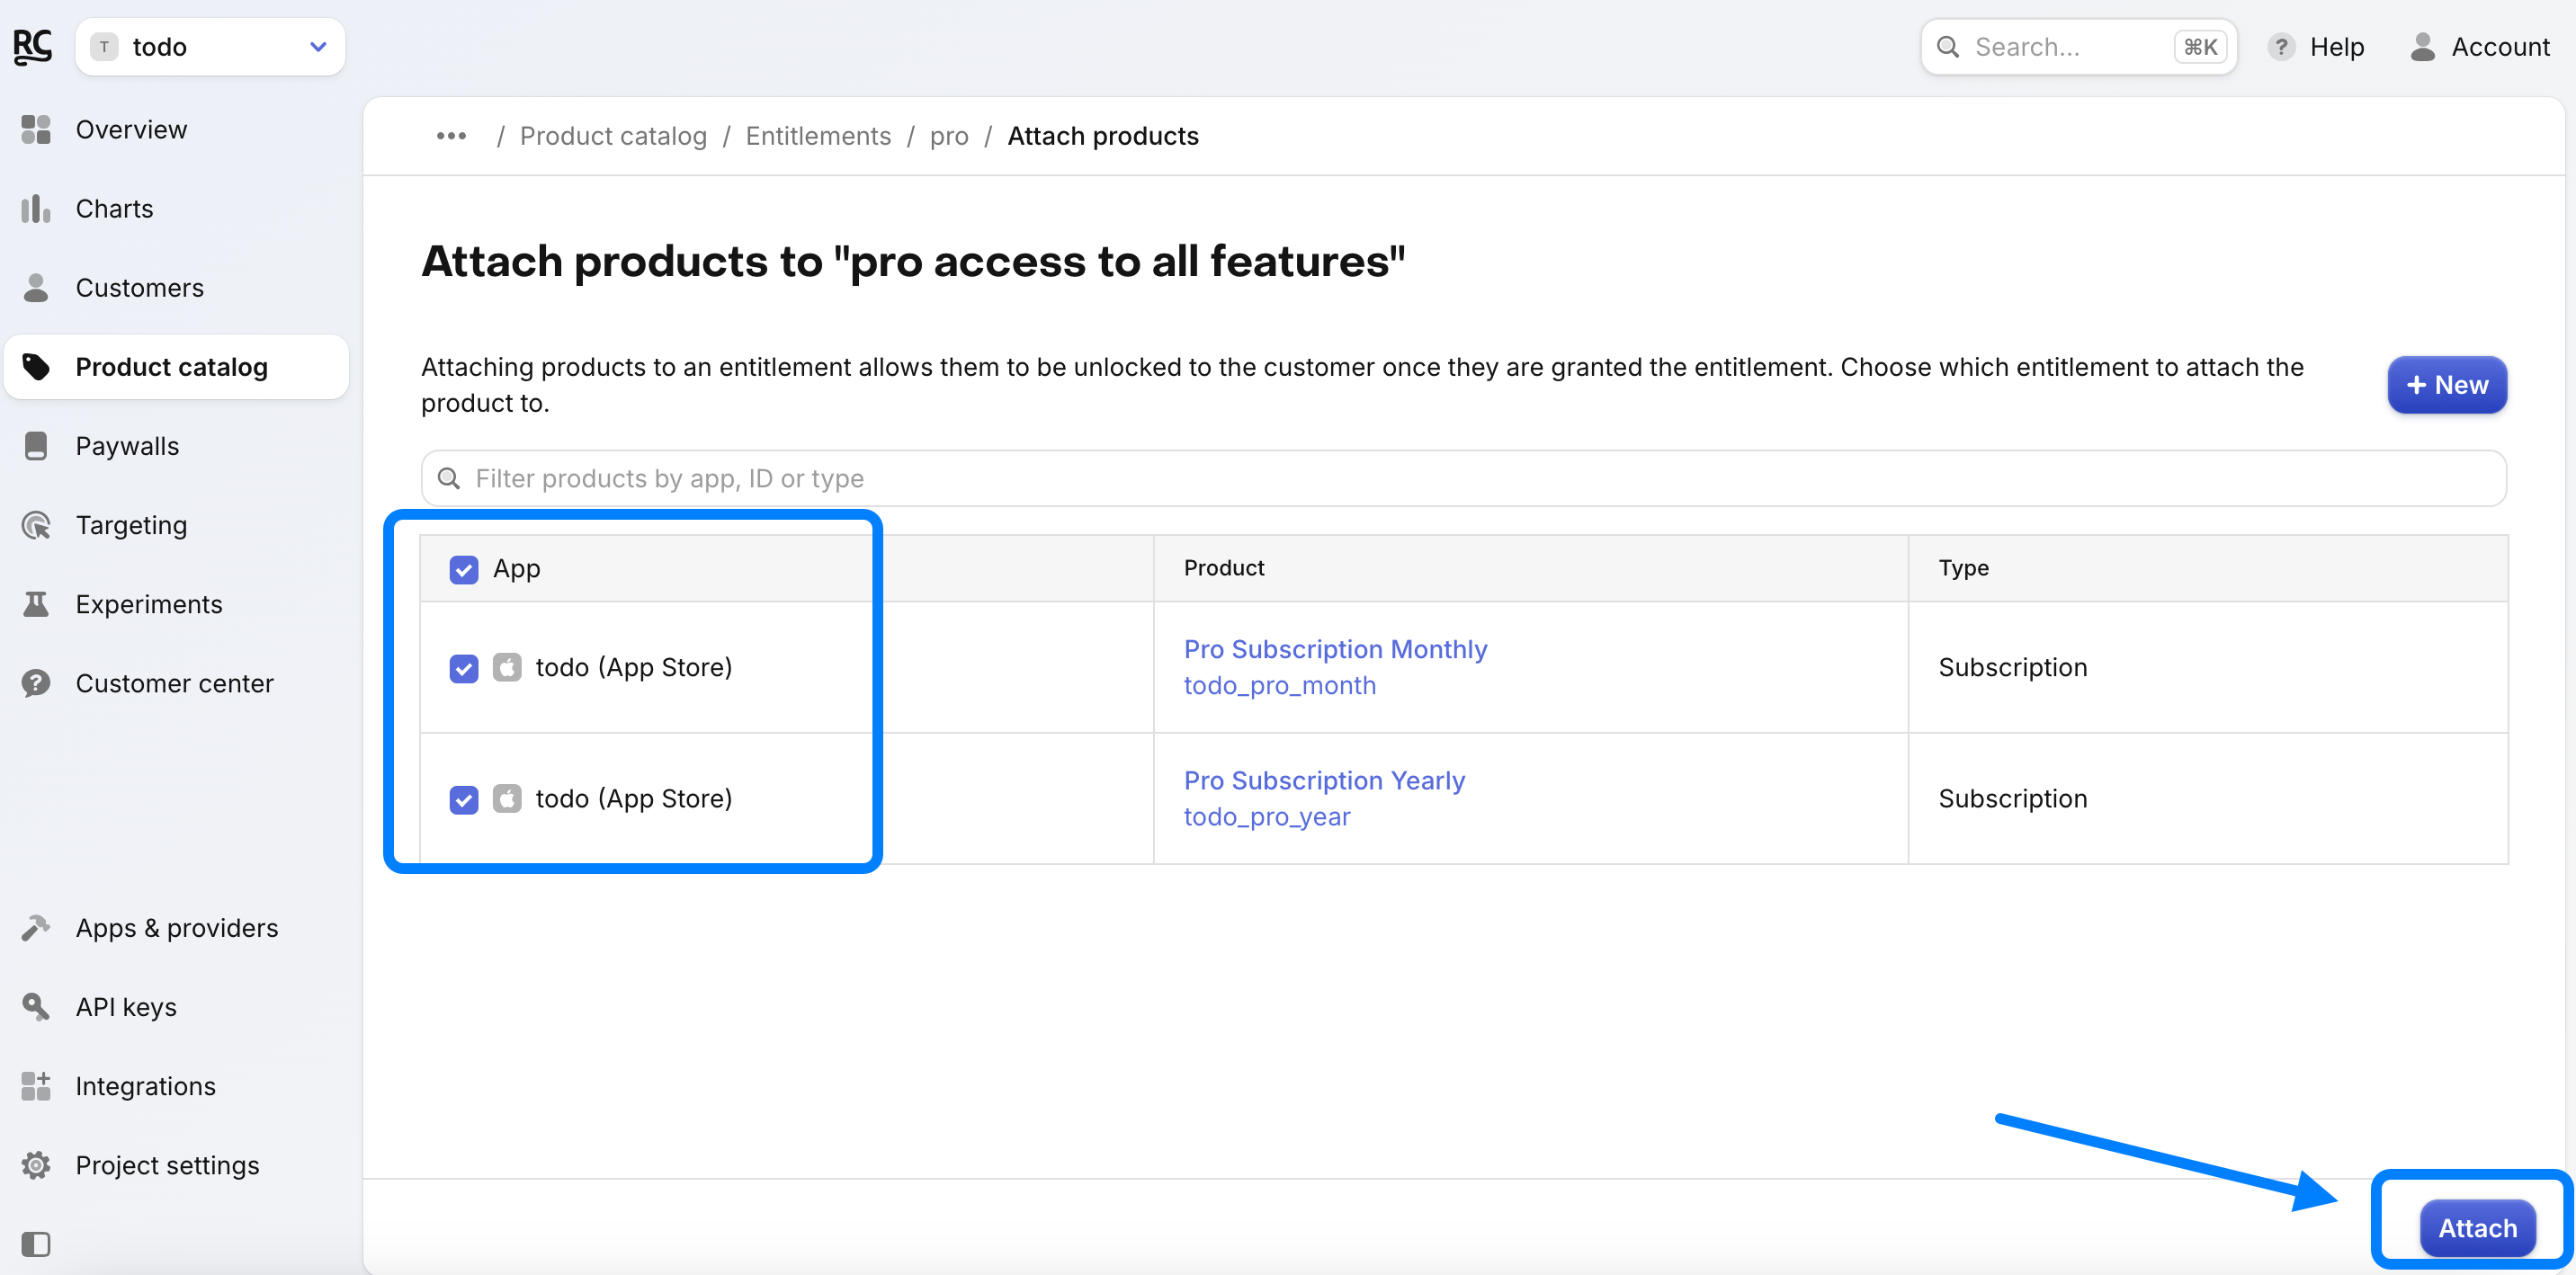
- Click Attach to link your products to the entitlement.
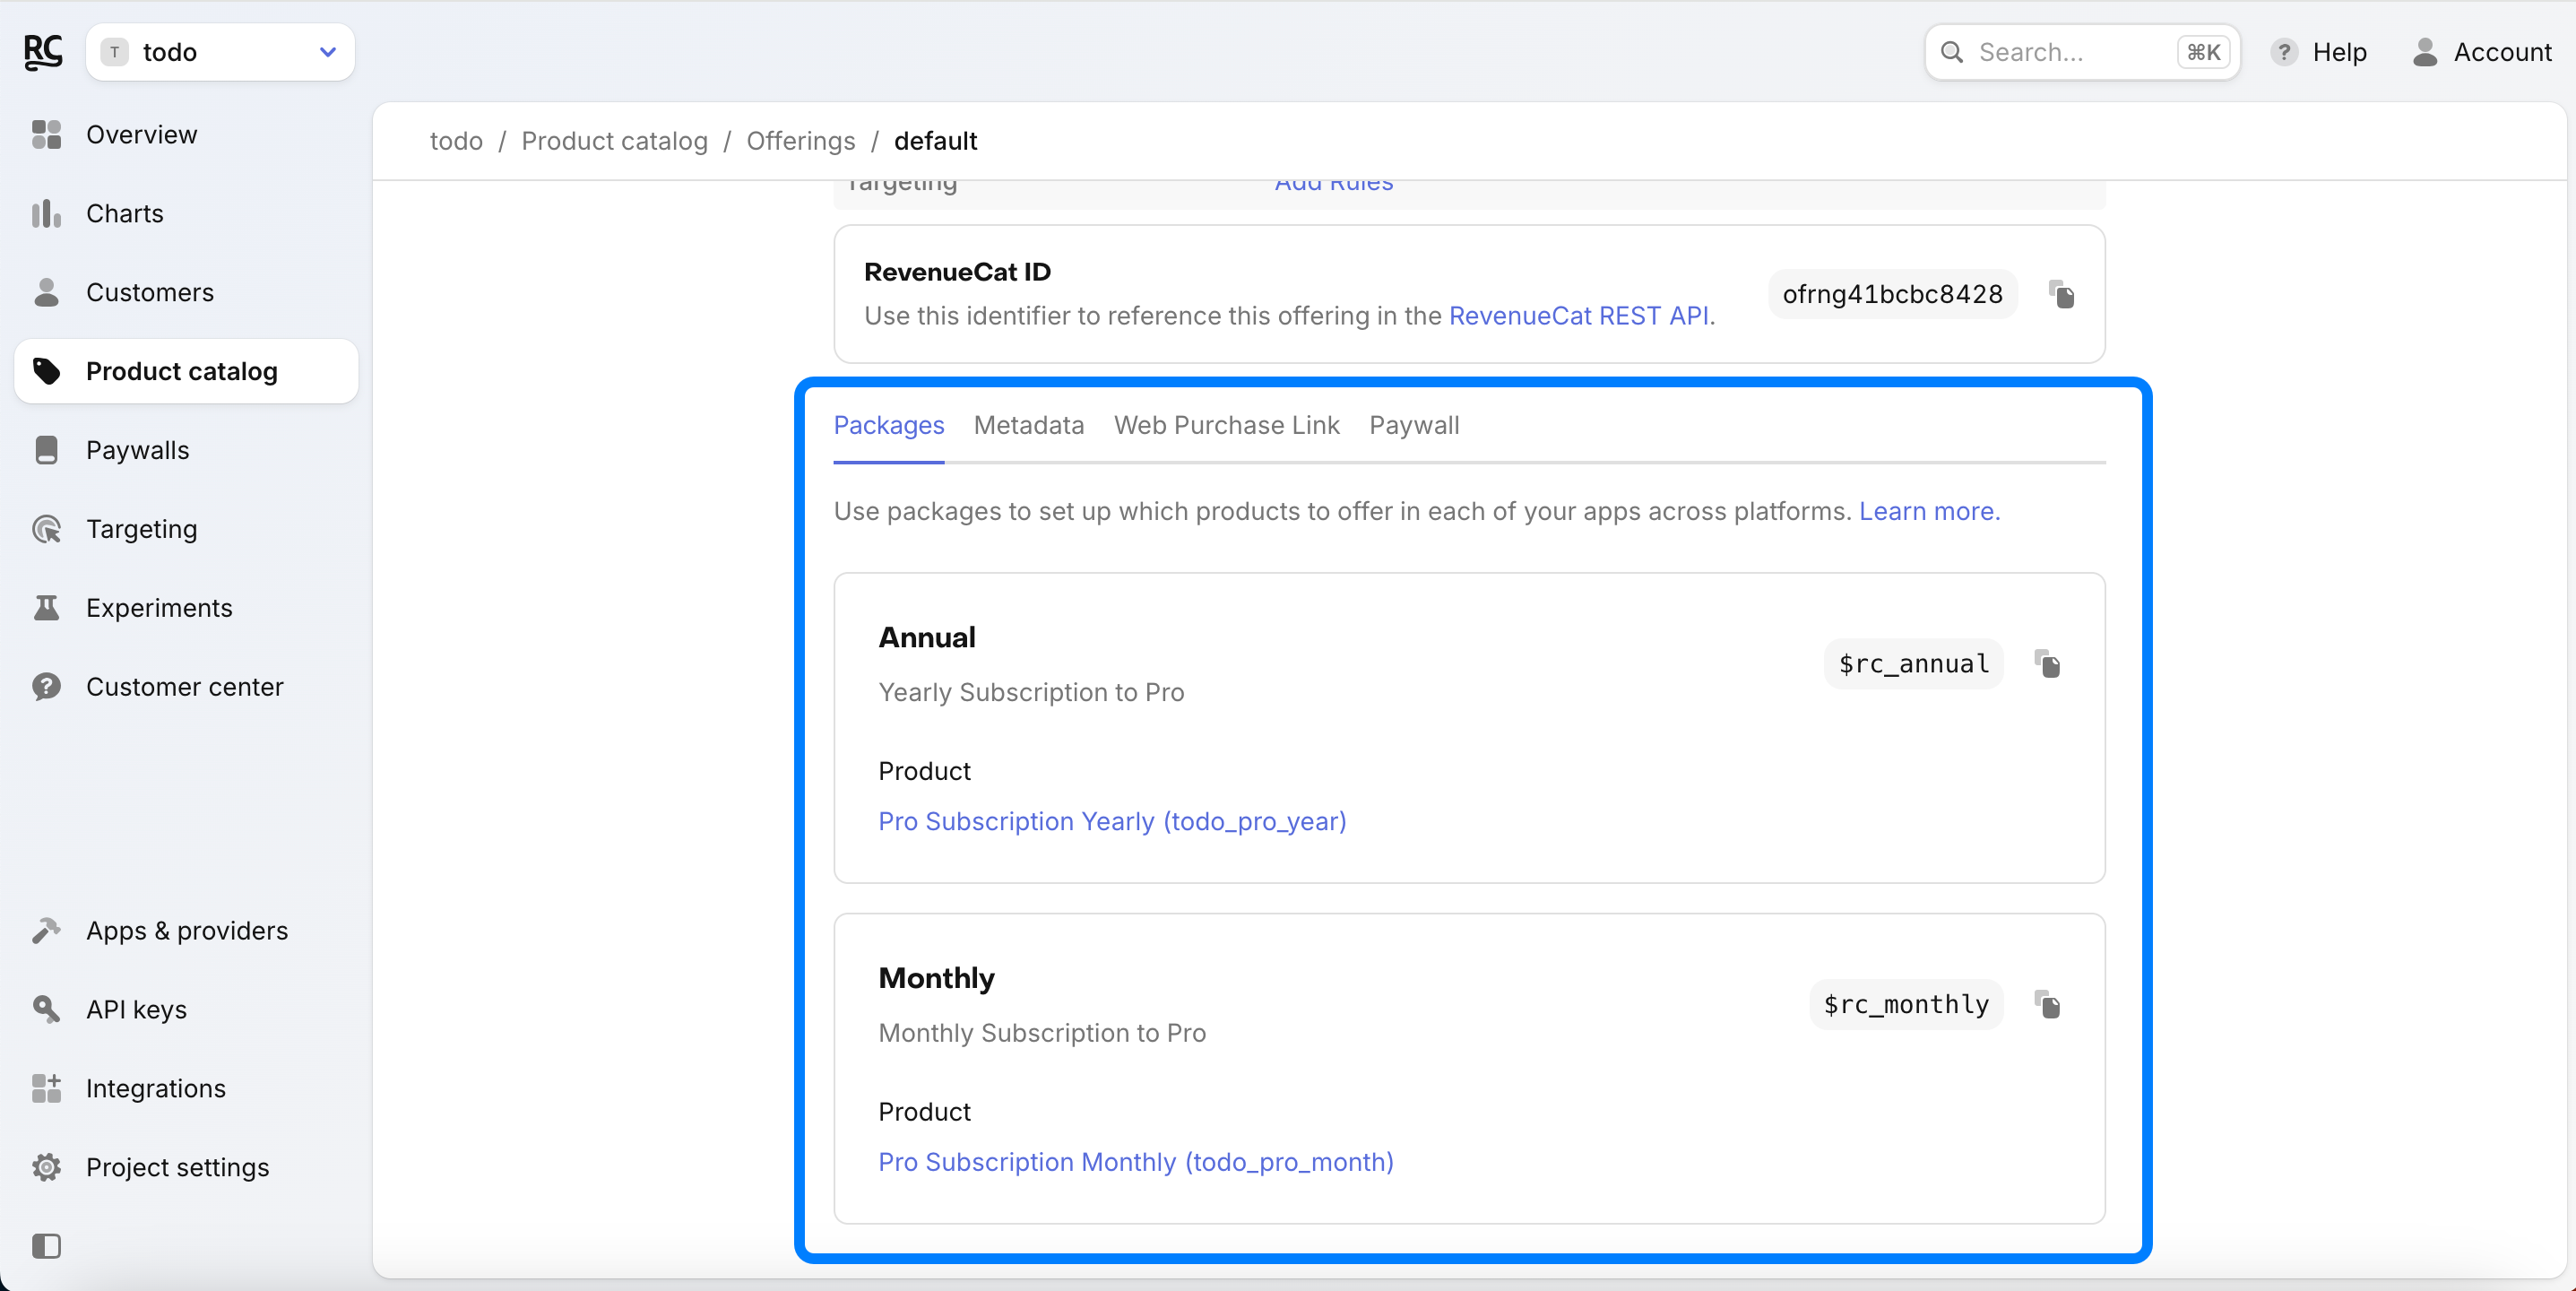
- Setting Up Offerings in RevenueCat:
- Go to Product Catalog ➡️ Offerings.
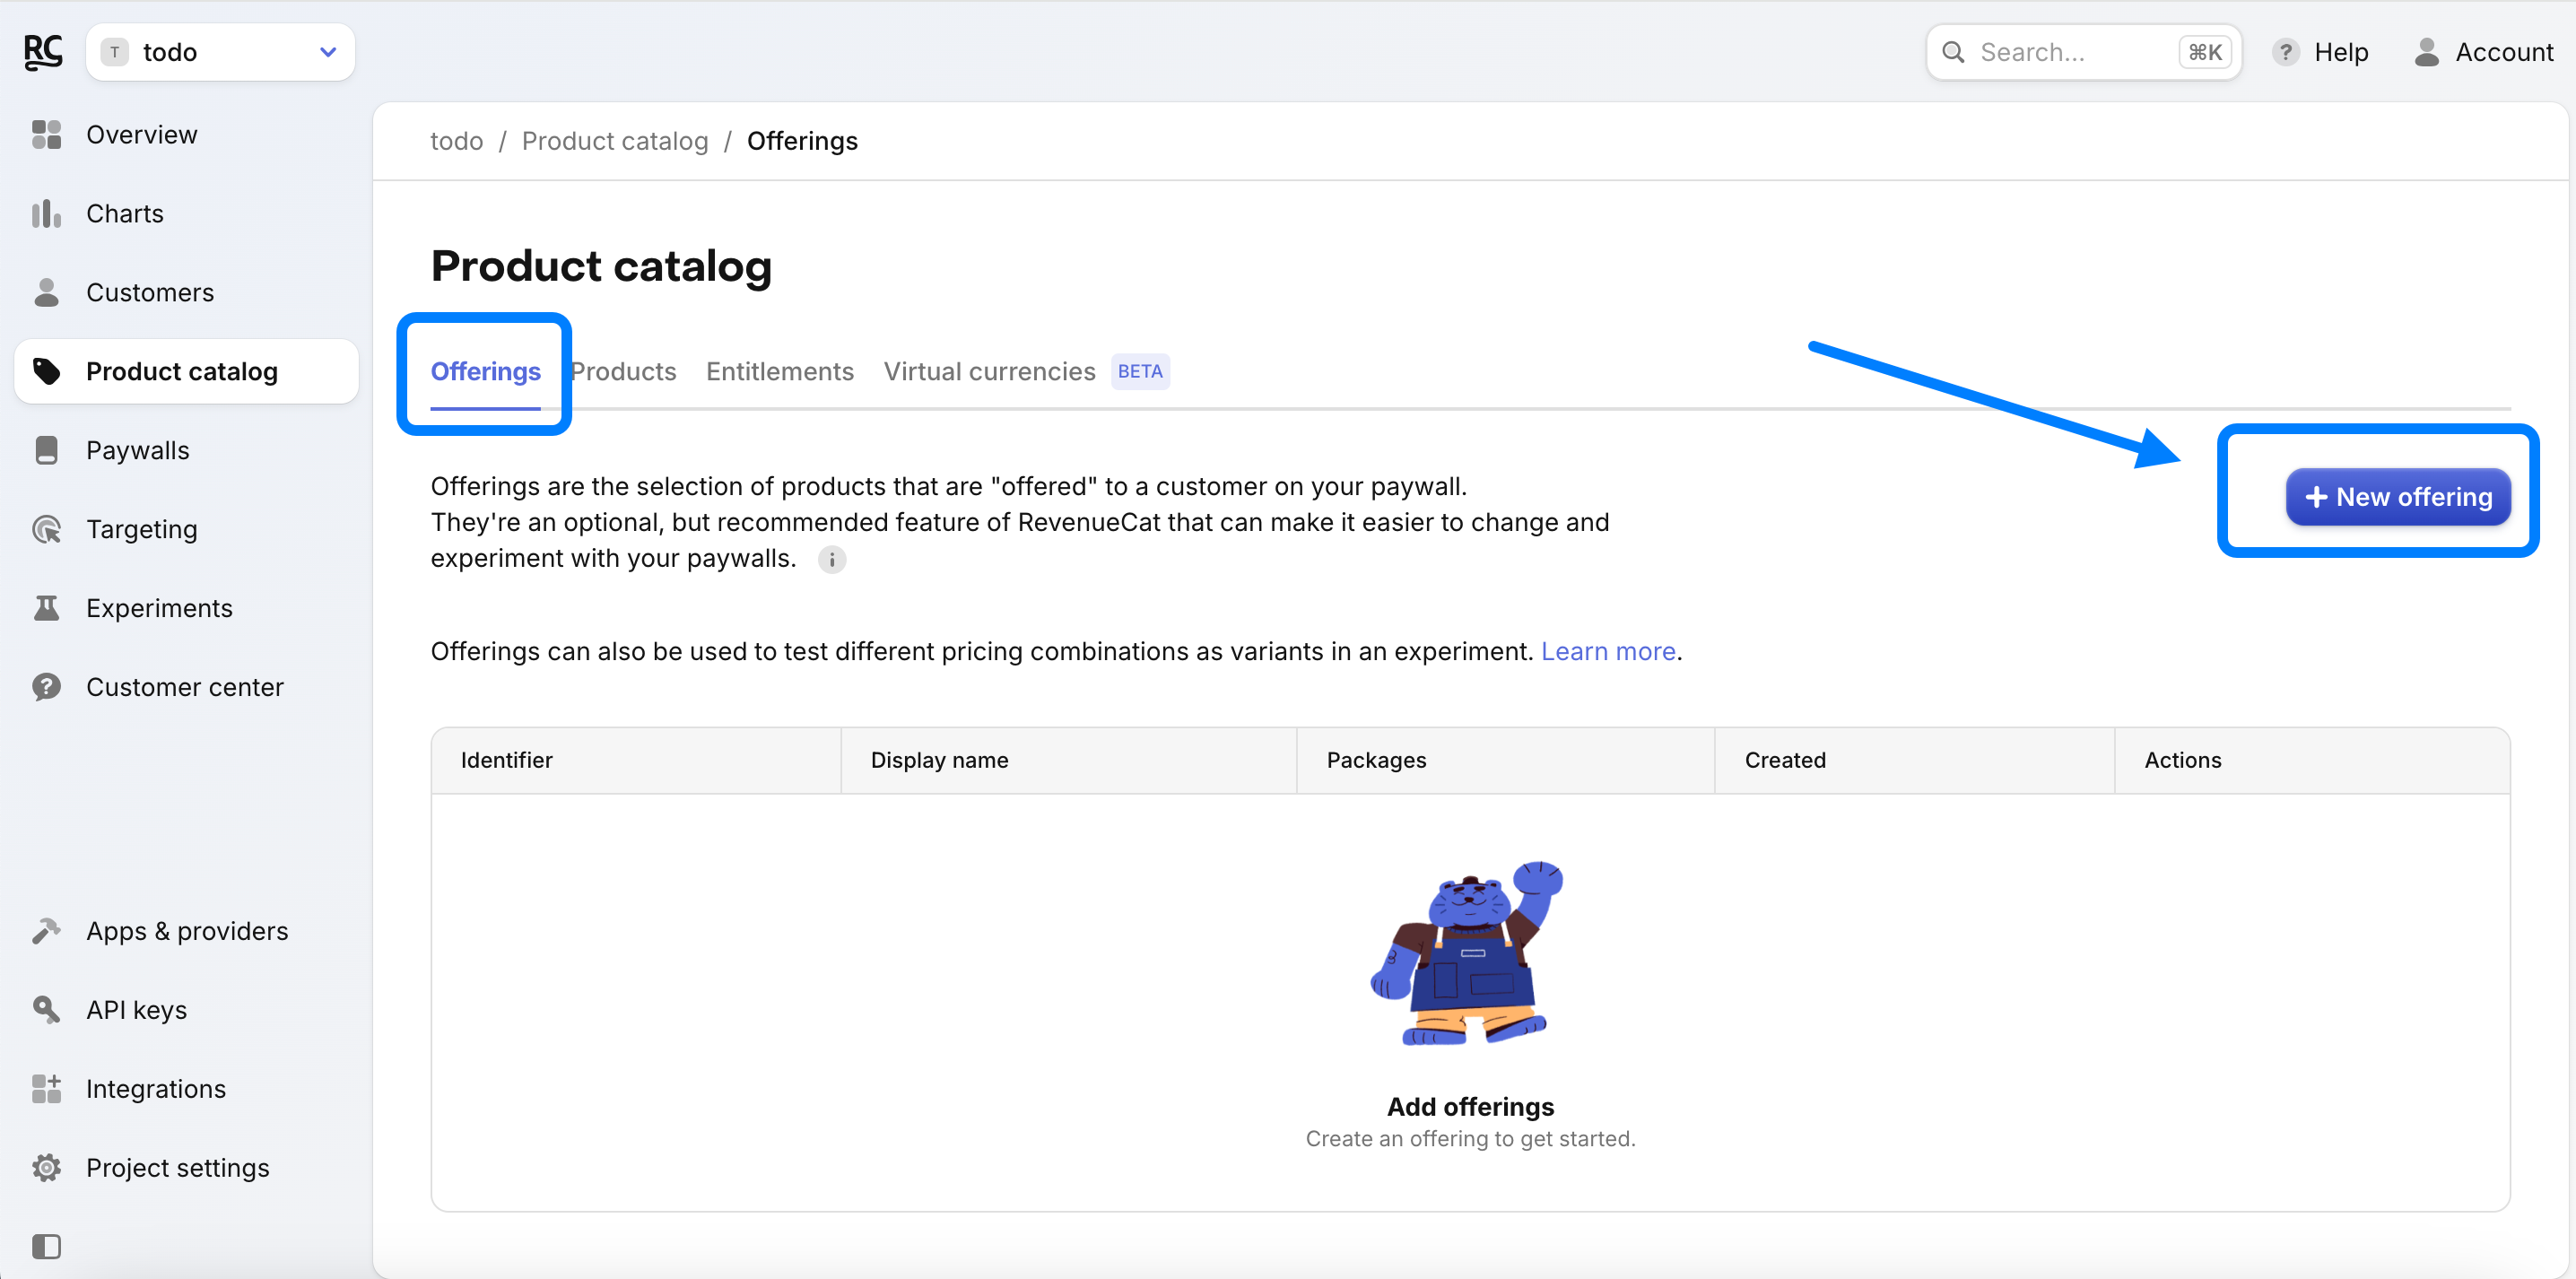
- Set up a New Offering.
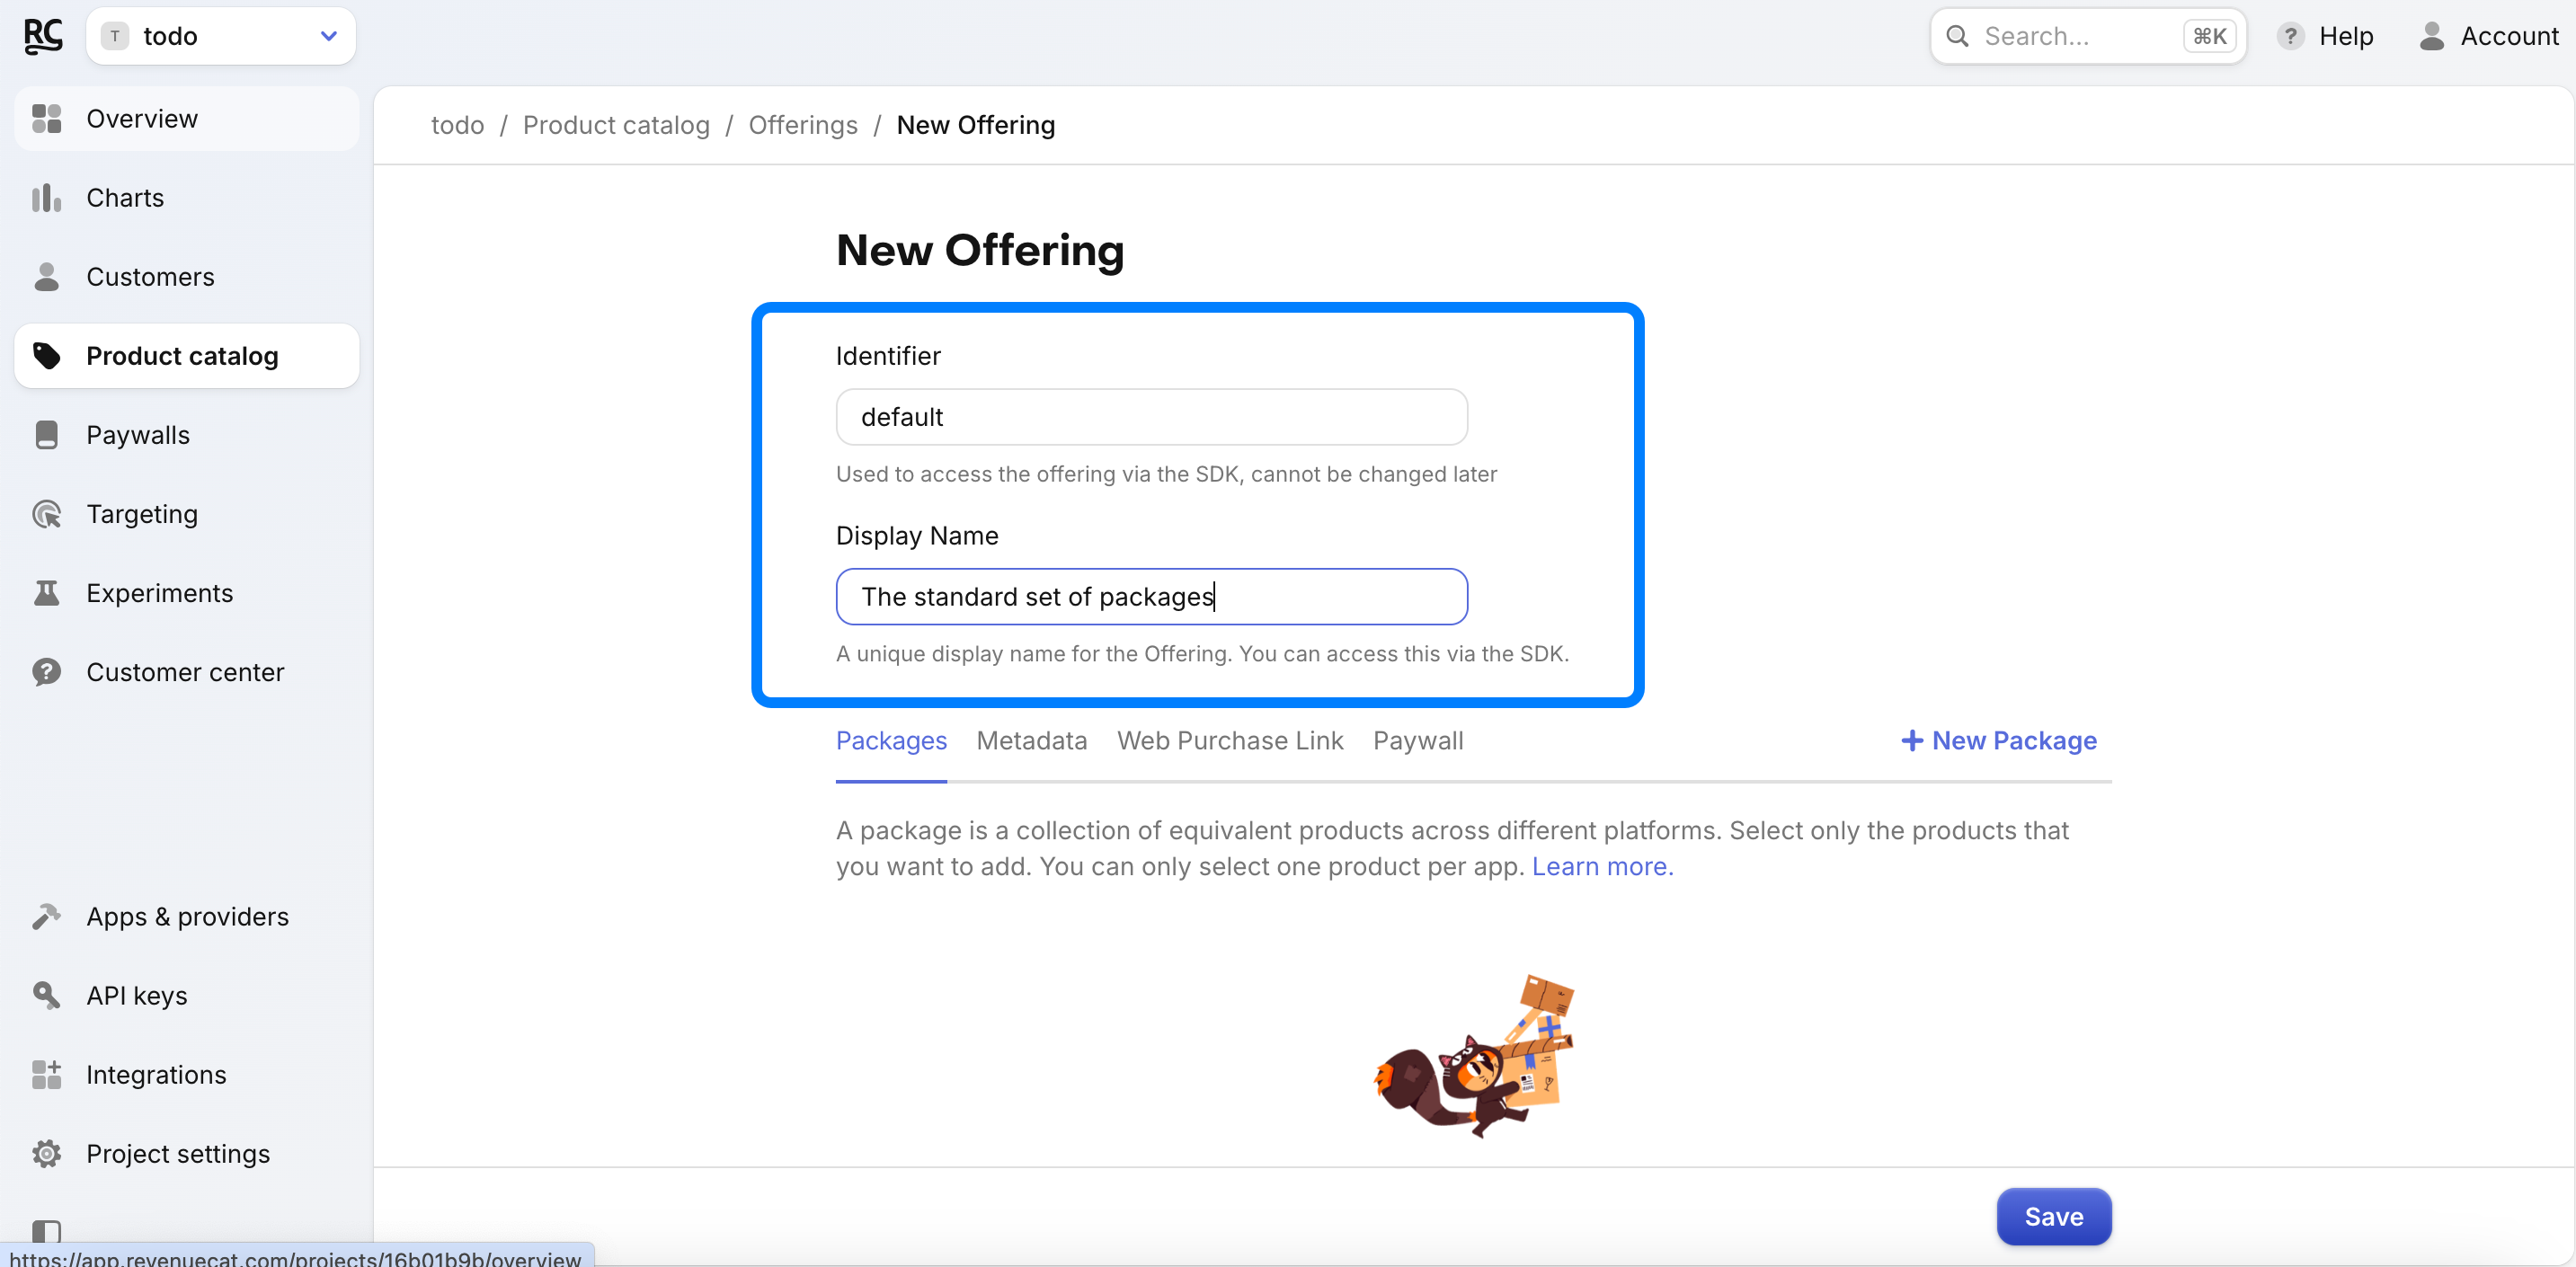
- Create a New Package within the offering.
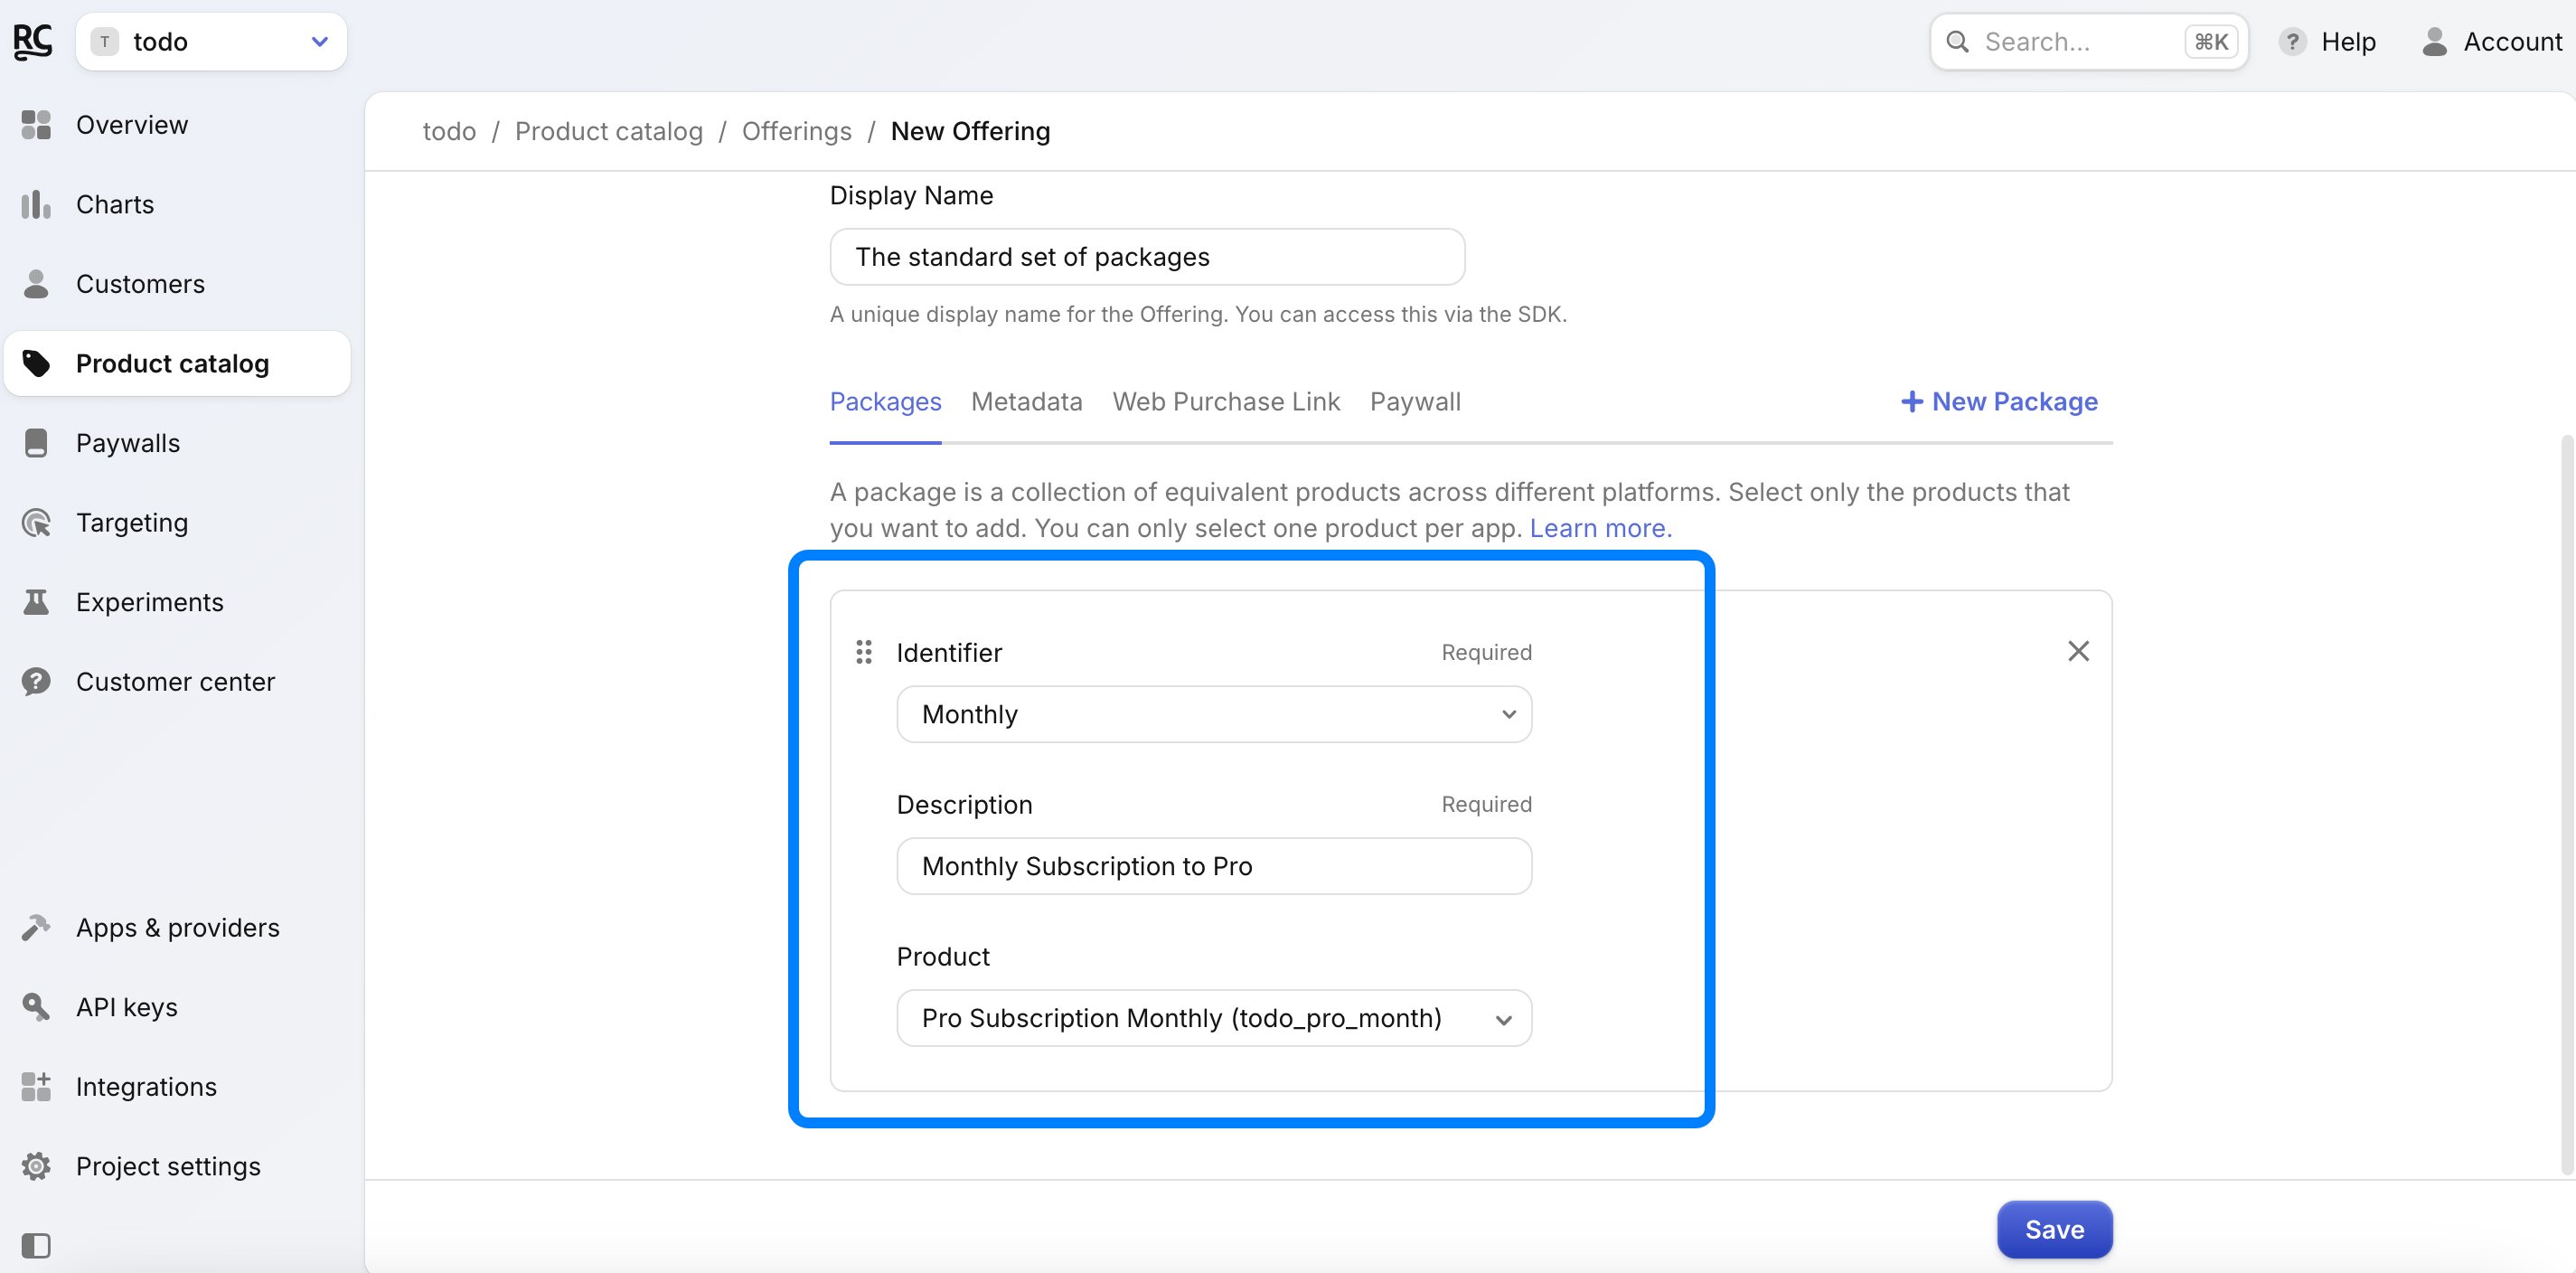
- Add packages for your different subscription durations (e.g., “Annual” and “Monthly”).