> ## Documentation Index
> Fetch the complete documentation index at: https://docs.onspace.ai/llms.txt
> Use this file to discover all available pages before exploring further.
# Stripe Integration
> Set up payments in your app using our Stripe integration
### **What's New**
OnSpace now lets you integrate Stripe payments directly into your projects through our AI-powered setup. No complex webhooks or manual configuration required.
 ### **How It Works**
Simply connect your Stripe account and describe what payment features you need. OnSpace AI generates all the necessary payment logic, components, and backend integration automatically.
### **Requirements**
Before integrating Stripe, ensure:
* Your project is active in OnSpace (Select ”OnSpace Cloud“)
* A **Stripe account** with test mode enabled
* Clear idea of your payment flow (one-time payments, subscriptions, etc.)
**Testing Note** Always test in Stripe Test Mode first. Use test card: 4242 4242 4242 4242, any 3-digit CVC, and any future date.
### **Quick Setup Steps**
1. **Describe Your Payment Needs**
* Tell OnSpace AI what you want: "Add subscription tiers at \$9.99/month"
* Or: "Create one-time payment for \$29.99 digital product"
* Be specific about your pricing and payment flow
2. **AI Generates Everything**
* Payment screens and components
* Stripe SDK integration
* Backend payment processing
* Success/failure handling
3. **Test & Deploy**
* Test payments in your preview
* Deploy when ready for production
### **Configure Tool Permissions**
You can control how OnSpace AI interacts with your Stripe account by configuring tool permissions:
### **How It Works**
Simply connect your Stripe account and describe what payment features you need. OnSpace AI generates all the necessary payment logic, components, and backend integration automatically.
### **Requirements**
Before integrating Stripe, ensure:
* Your project is active in OnSpace (Select ”OnSpace Cloud“)
* A **Stripe account** with test mode enabled
* Clear idea of your payment flow (one-time payments, subscriptions, etc.)
**Testing Note** Always test in Stripe Test Mode first. Use test card: 4242 4242 4242 4242, any 3-digit CVC, and any future date.
### **Quick Setup Steps**
1. **Describe Your Payment Needs**
* Tell OnSpace AI what you want: "Add subscription tiers at \$9.99/month"
* Or: "Create one-time payment for \$29.99 digital product"
* Be specific about your pricing and payment flow
2. **AI Generates Everything**
* Payment screens and components
* Stripe SDK integration
* Backend payment processing
* Success/failure handling
3. **Test & Deploy**
* Test payments in your preview
* Deploy when ready for production
### **Configure Tool Permissions**
You can control how OnSpace AI interacts with your Stripe account by configuring tool permissions:
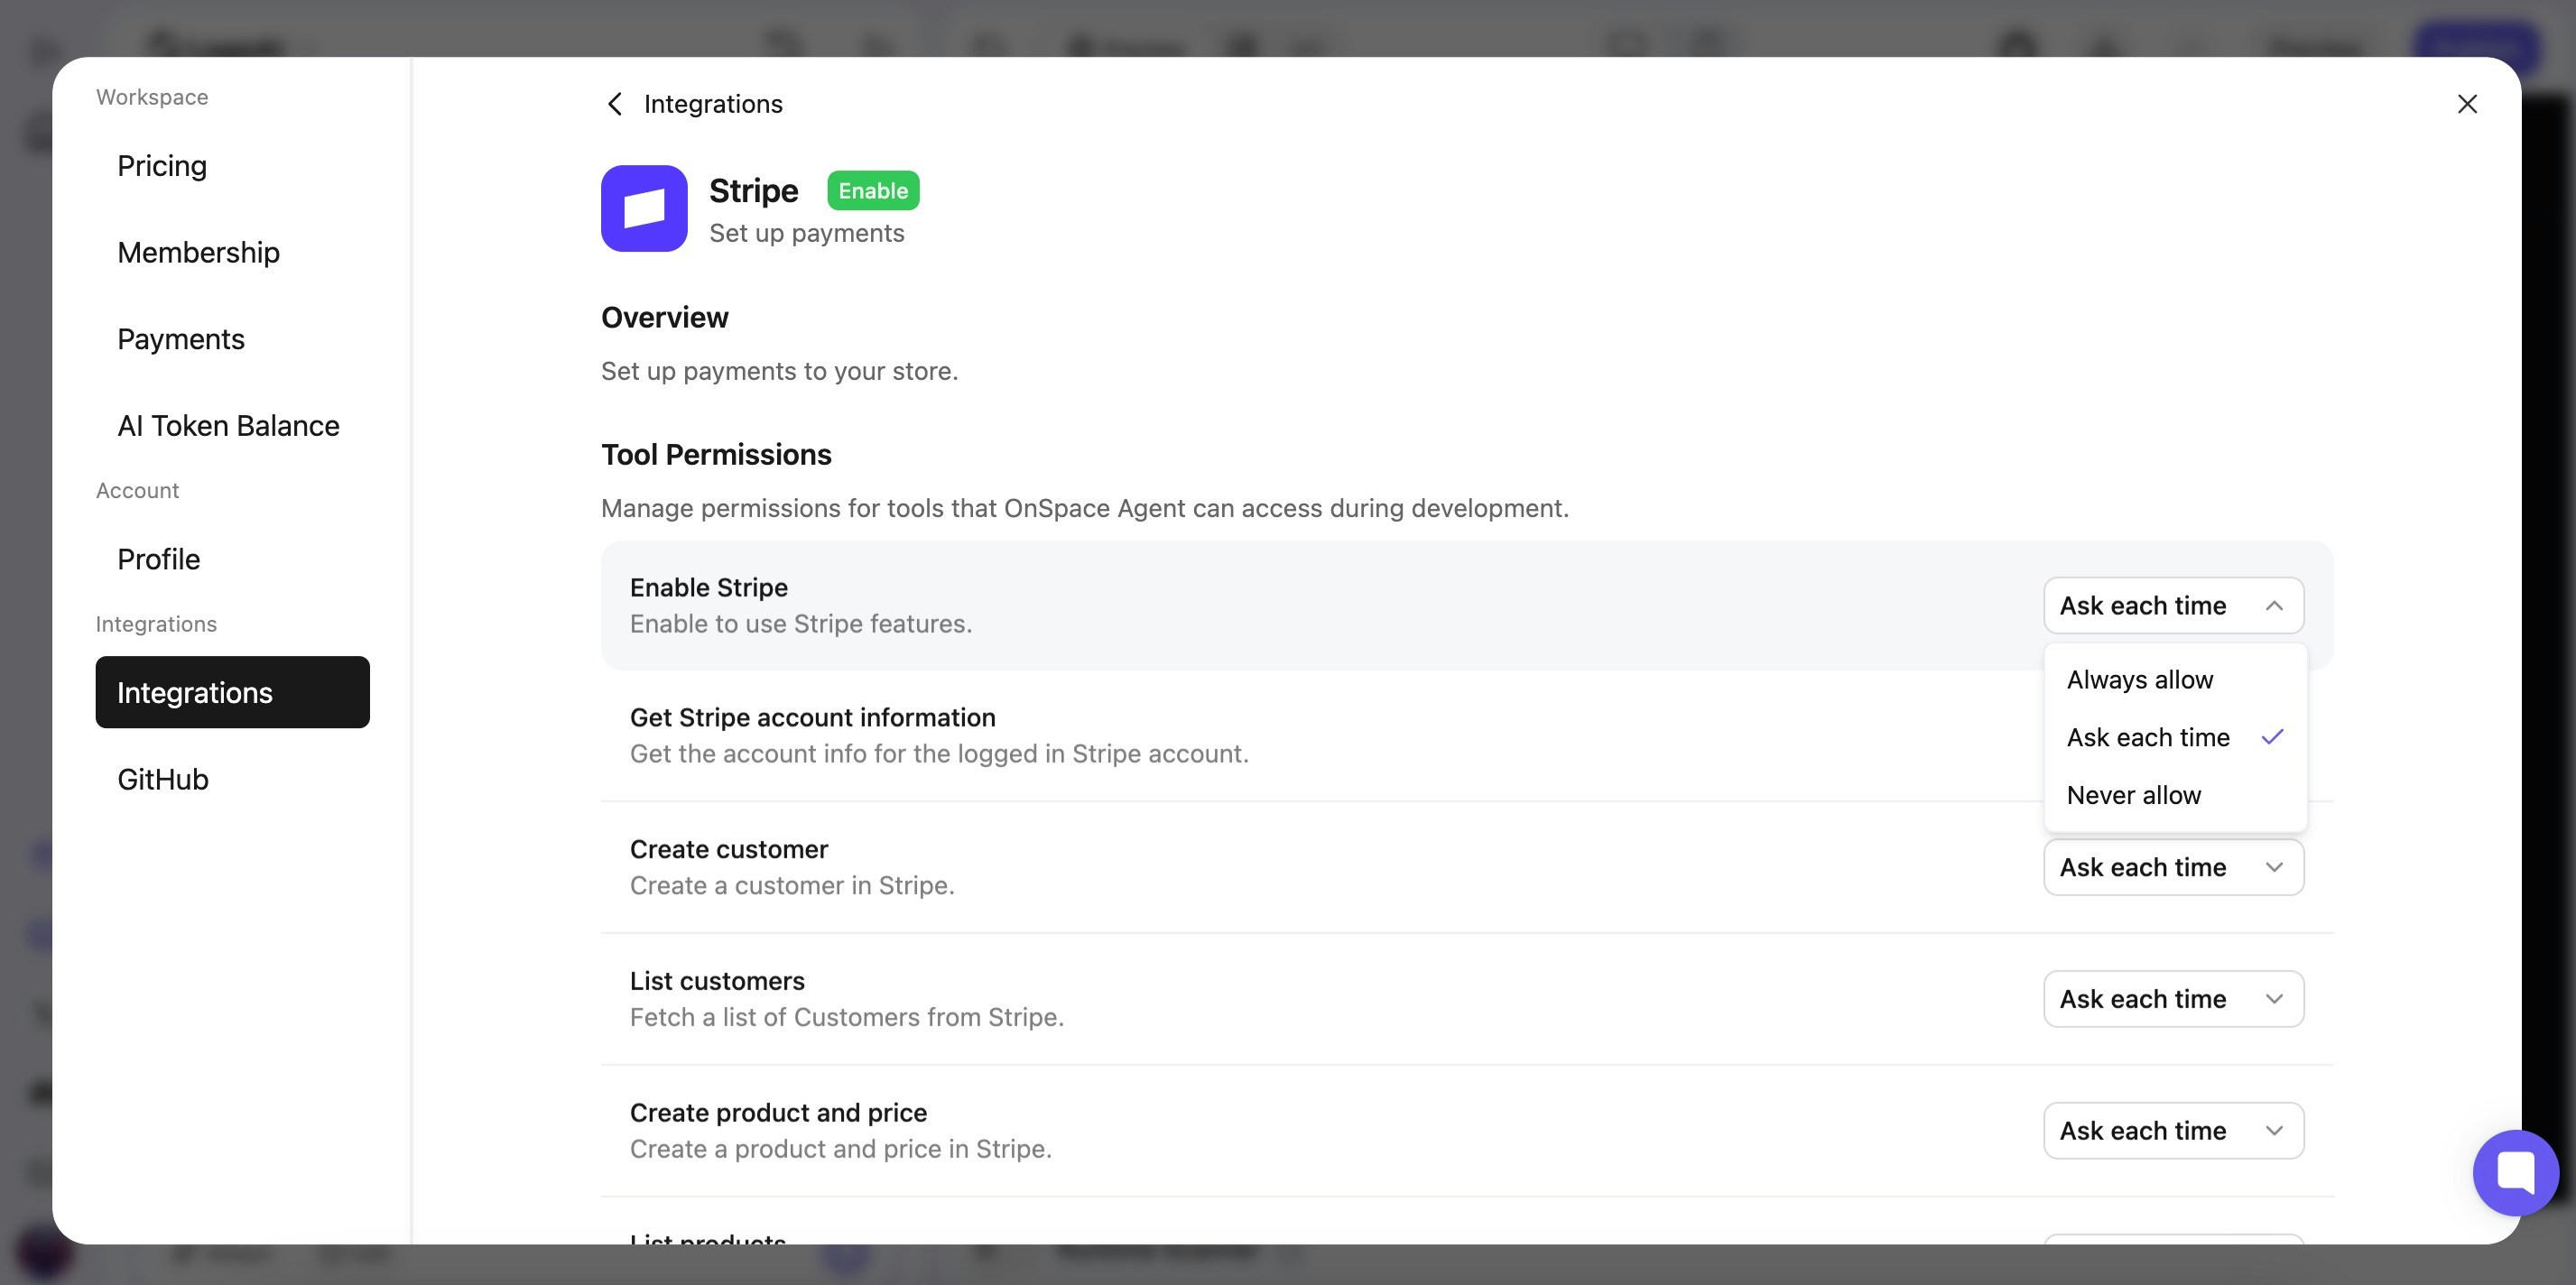 1. **Access Settings**
* Click your profile avatar in the bottom-left corner
* Select "Settings" from the dropdown
* Navigate to "Integrations"
* Select "Stripe"
2. **Set Permission Levels** For each Stripe operation, choose your preferred permission level:
* **Ask each time** - OnSpace will request permission before each action
* **Always allow** - OnSpace can perform actions automatically
* **Never allow** - Block specific Stripe operations
3. **Available Permissions**
* Enable Stripe features
* Get Stripe account information
* Create customers
* List customers
* Create products and prices
* List products and prices
### **What OnSpace AI Creates**
* **Customer Management** - Create and list customers in Stripe automatically
* **Product & Pricing Setup** - Generate products and prices directly in your Stripe account
* **Account Integration** - Get Stripe account information and enable all Stripe features
* **Payment Components** - Pre-built checkout flows and payment screens
* **Backend Logic** - Secure payment processing with proper error handling
* **User Management** - Links payments to user accounts seamlessly
**Security First** All sensitive payment data is processed securely through Stripe. OnSpace never stores payment information directly.
1. **Access Settings**
* Click your profile avatar in the bottom-left corner
* Select "Settings" from the dropdown
* Navigate to "Integrations"
* Select "Stripe"
2. **Set Permission Levels** For each Stripe operation, choose your preferred permission level:
* **Ask each time** - OnSpace will request permission before each action
* **Always allow** - OnSpace can perform actions automatically
* **Never allow** - Block specific Stripe operations
3. **Available Permissions**
* Enable Stripe features
* Get Stripe account information
* Create customers
* List customers
* Create products and prices
* List products and prices
### **What OnSpace AI Creates**
* **Customer Management** - Create and list customers in Stripe automatically
* **Product & Pricing Setup** - Generate products and prices directly in your Stripe account
* **Account Integration** - Get Stripe account information and enable all Stripe features
* **Payment Components** - Pre-built checkout flows and payment screens
* **Backend Logic** - Secure payment processing with proper error handling
* **User Management** - Links payments to user accounts seamlessly
**Security First** All sensitive payment data is processed securely through Stripe. OnSpace never stores payment information directly.