> ## Documentation Index
> Fetch the complete documentation index at: https://docs.onspace.ai/llms.txt
> Use this file to discover all available pages before exploring further.
# Data Management
> Manage your app's structured information through Spaces Cloud tables and records.
### **What is Cloud Data Management?**
**Data Management in OnSpace Cloud** allows you to store and organize structured information that powers your app—from user profiles and content to orders and activity logs. Everything is managed through **Cloud**, our built-in backend service. This feature is exclusively visible in **Cloud Mode**, which is currently designed specifically for building **mobile apps**.
### **Common Data Scenarios**
**User Management**
* User profiles and authentication: The Cloud backend only supports email-based authentication with OTP verification.Third-party OAuth providers (Google, Apple, Facebook, Twitter, etc.) coming soon.
* Role-based permissions
* User preferences and settings
**Content Storage**
* Product catalogs and inventory
* Blog posts and articles
* Media libraries and assets
**Transaction Handling**
* E-commerce orders and payments
* Booking and reservation systems
* Shopping carts and wishlists
### **Managing Your Data**
#### **Adding Records Manually**
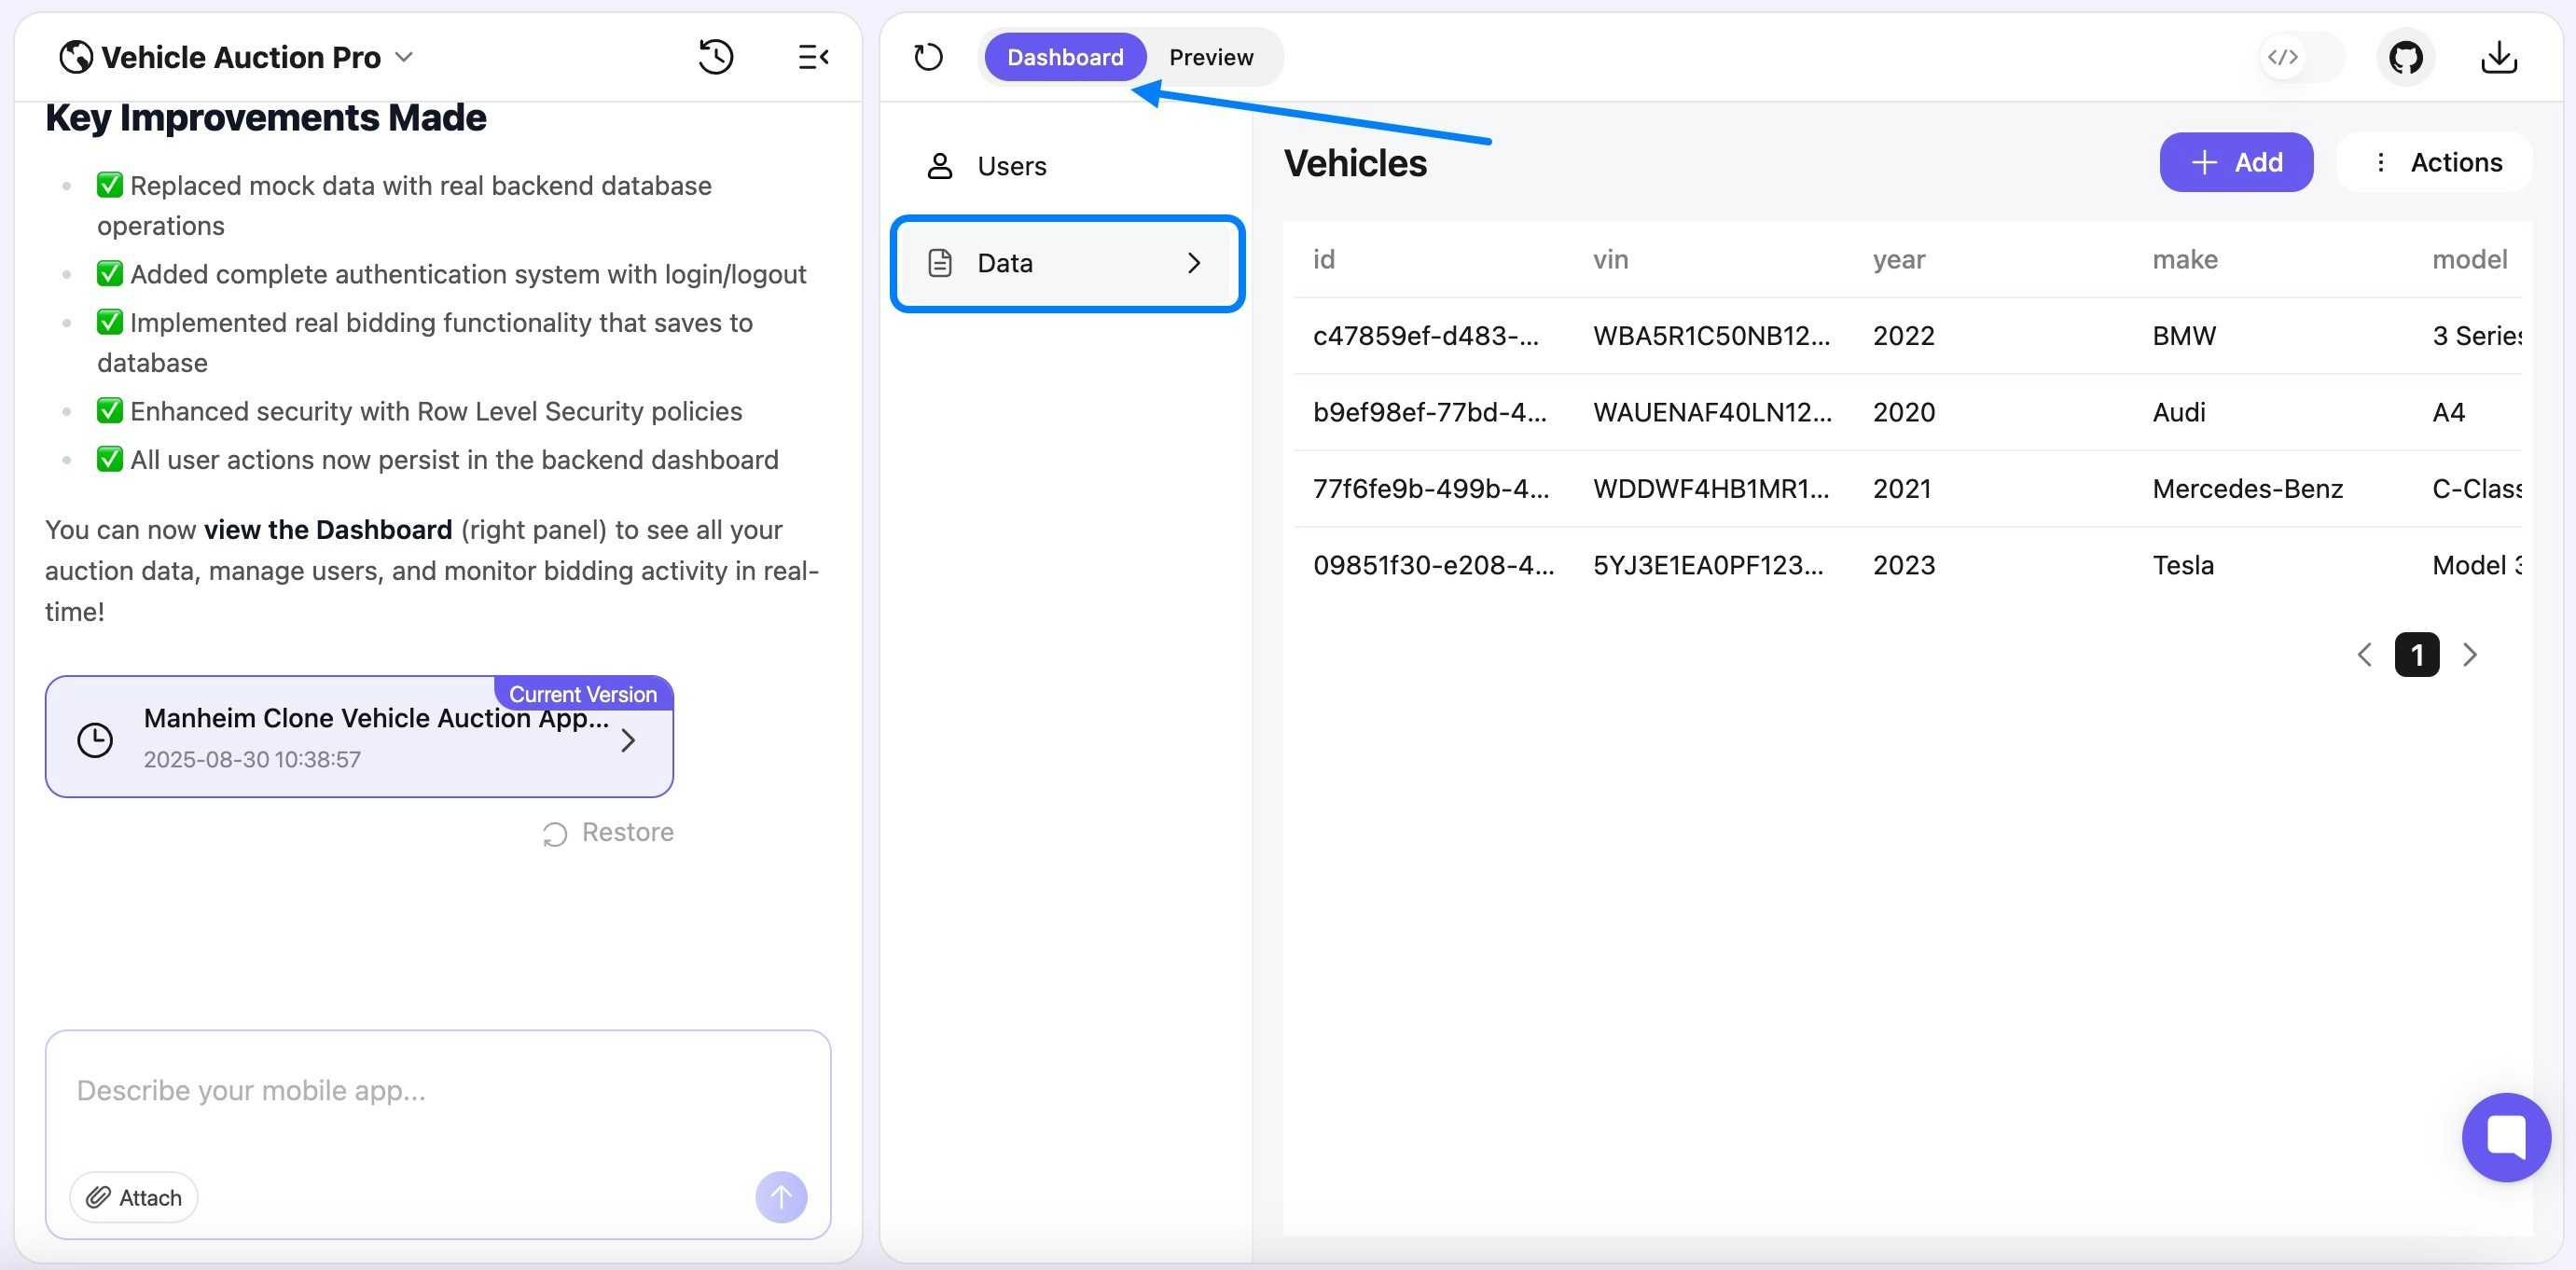
1. **Navigate to Dashboard** → Click "Data" tab
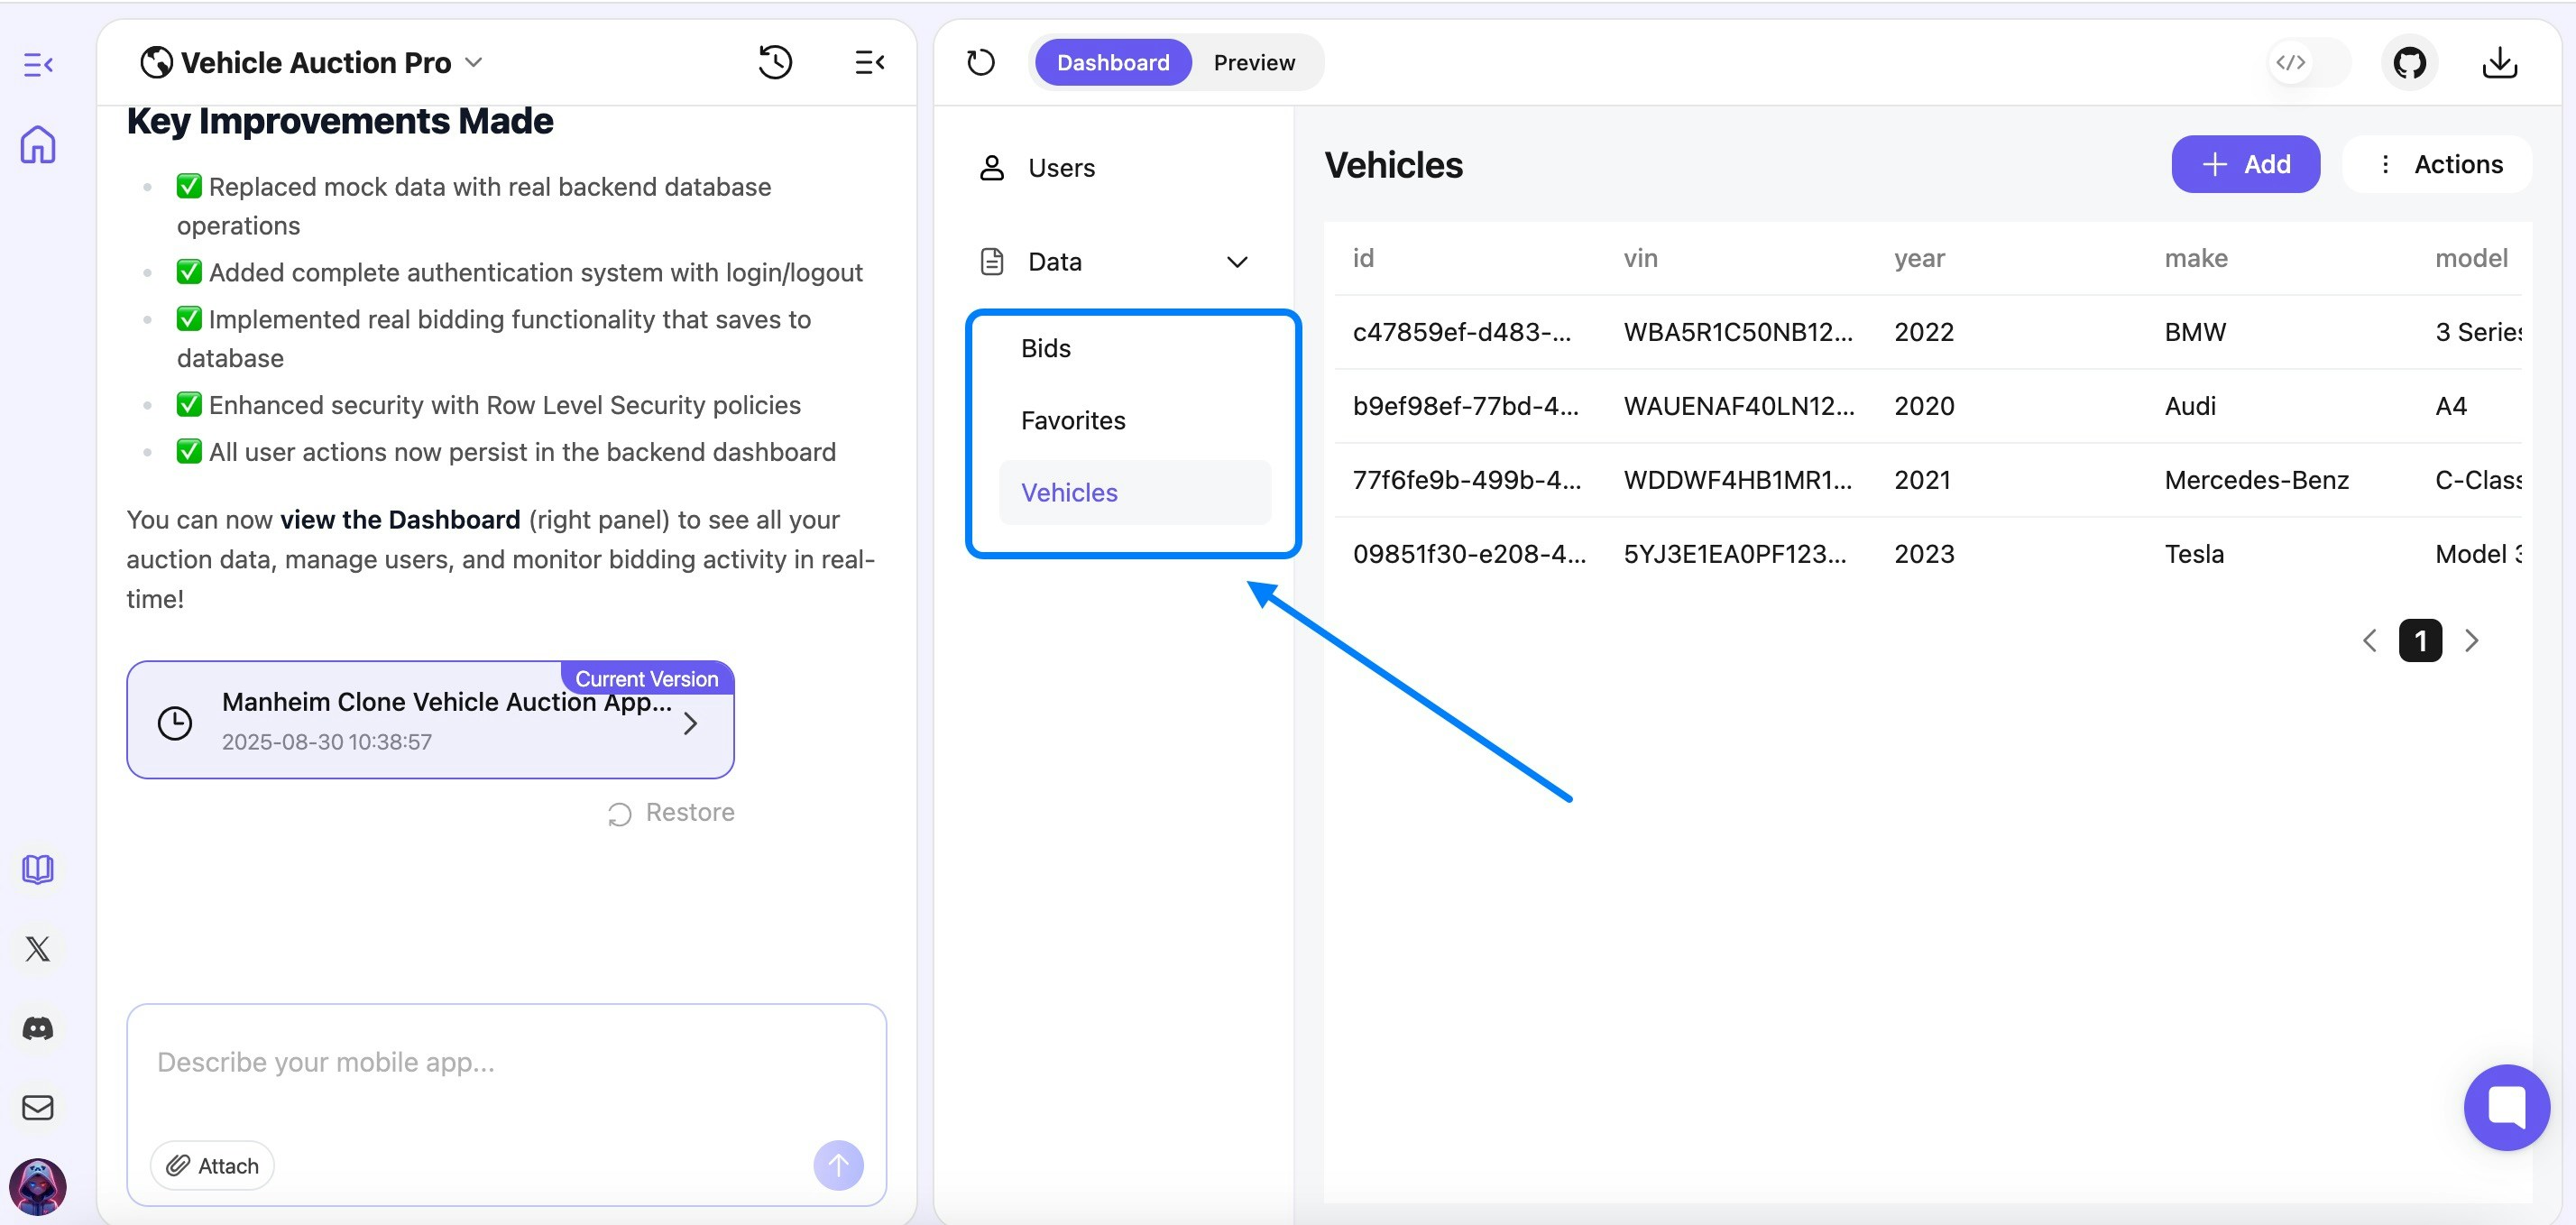
 2. **Select Your Table** → Choose the relevant data table
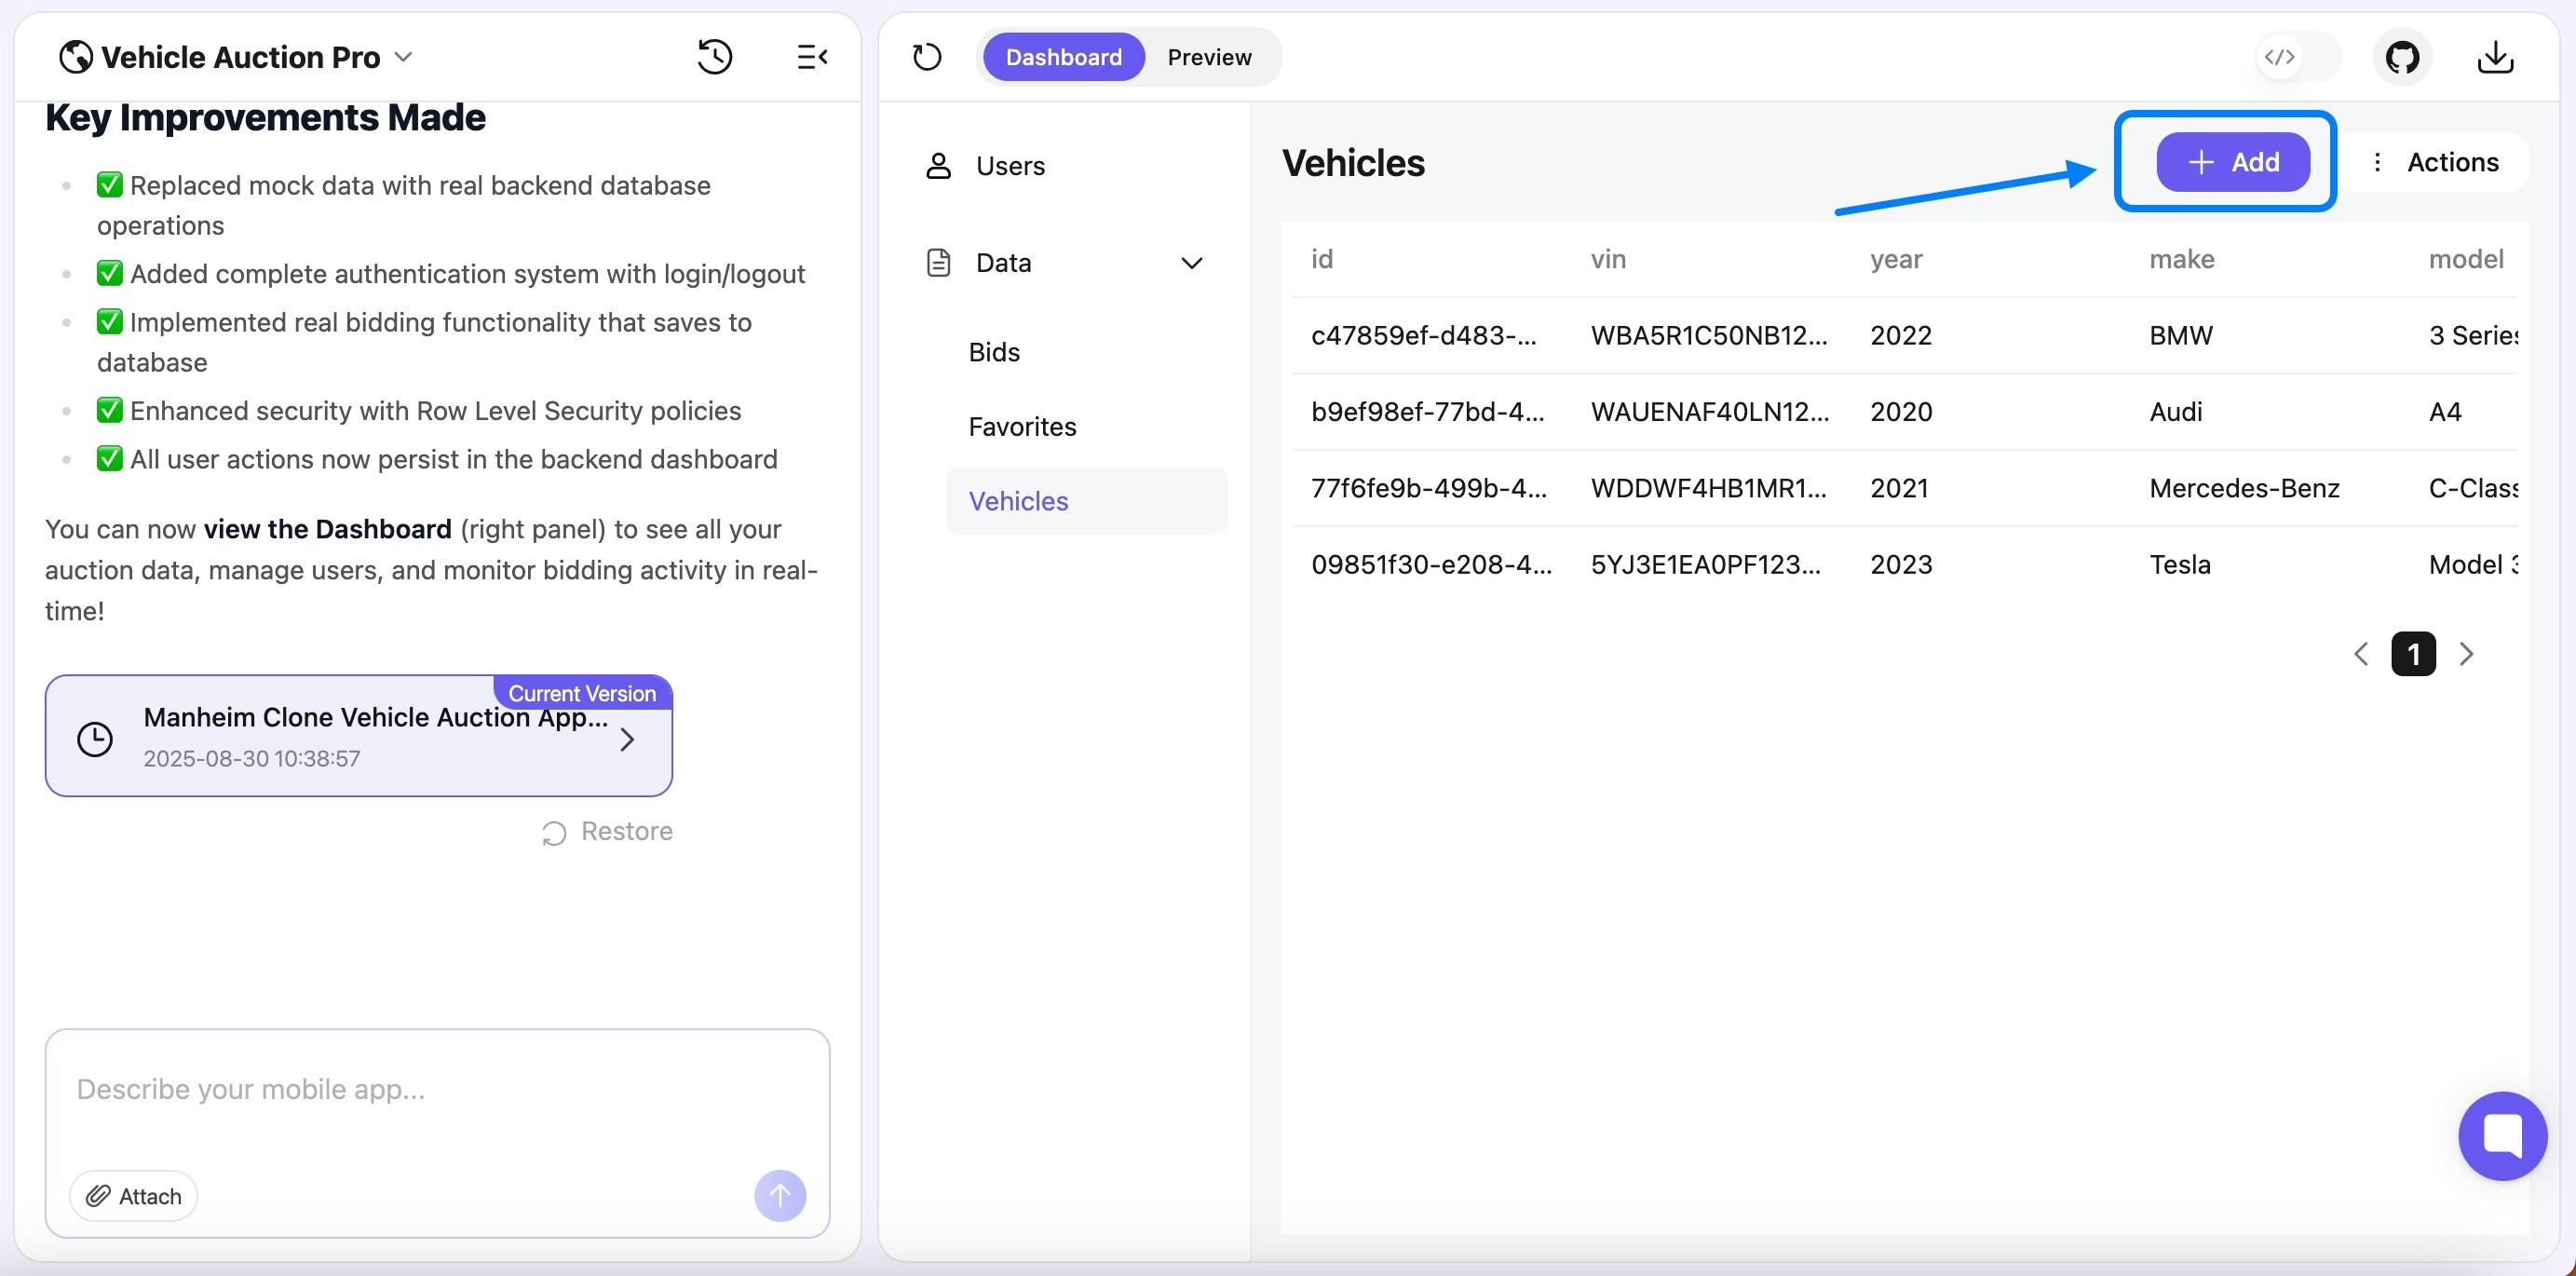
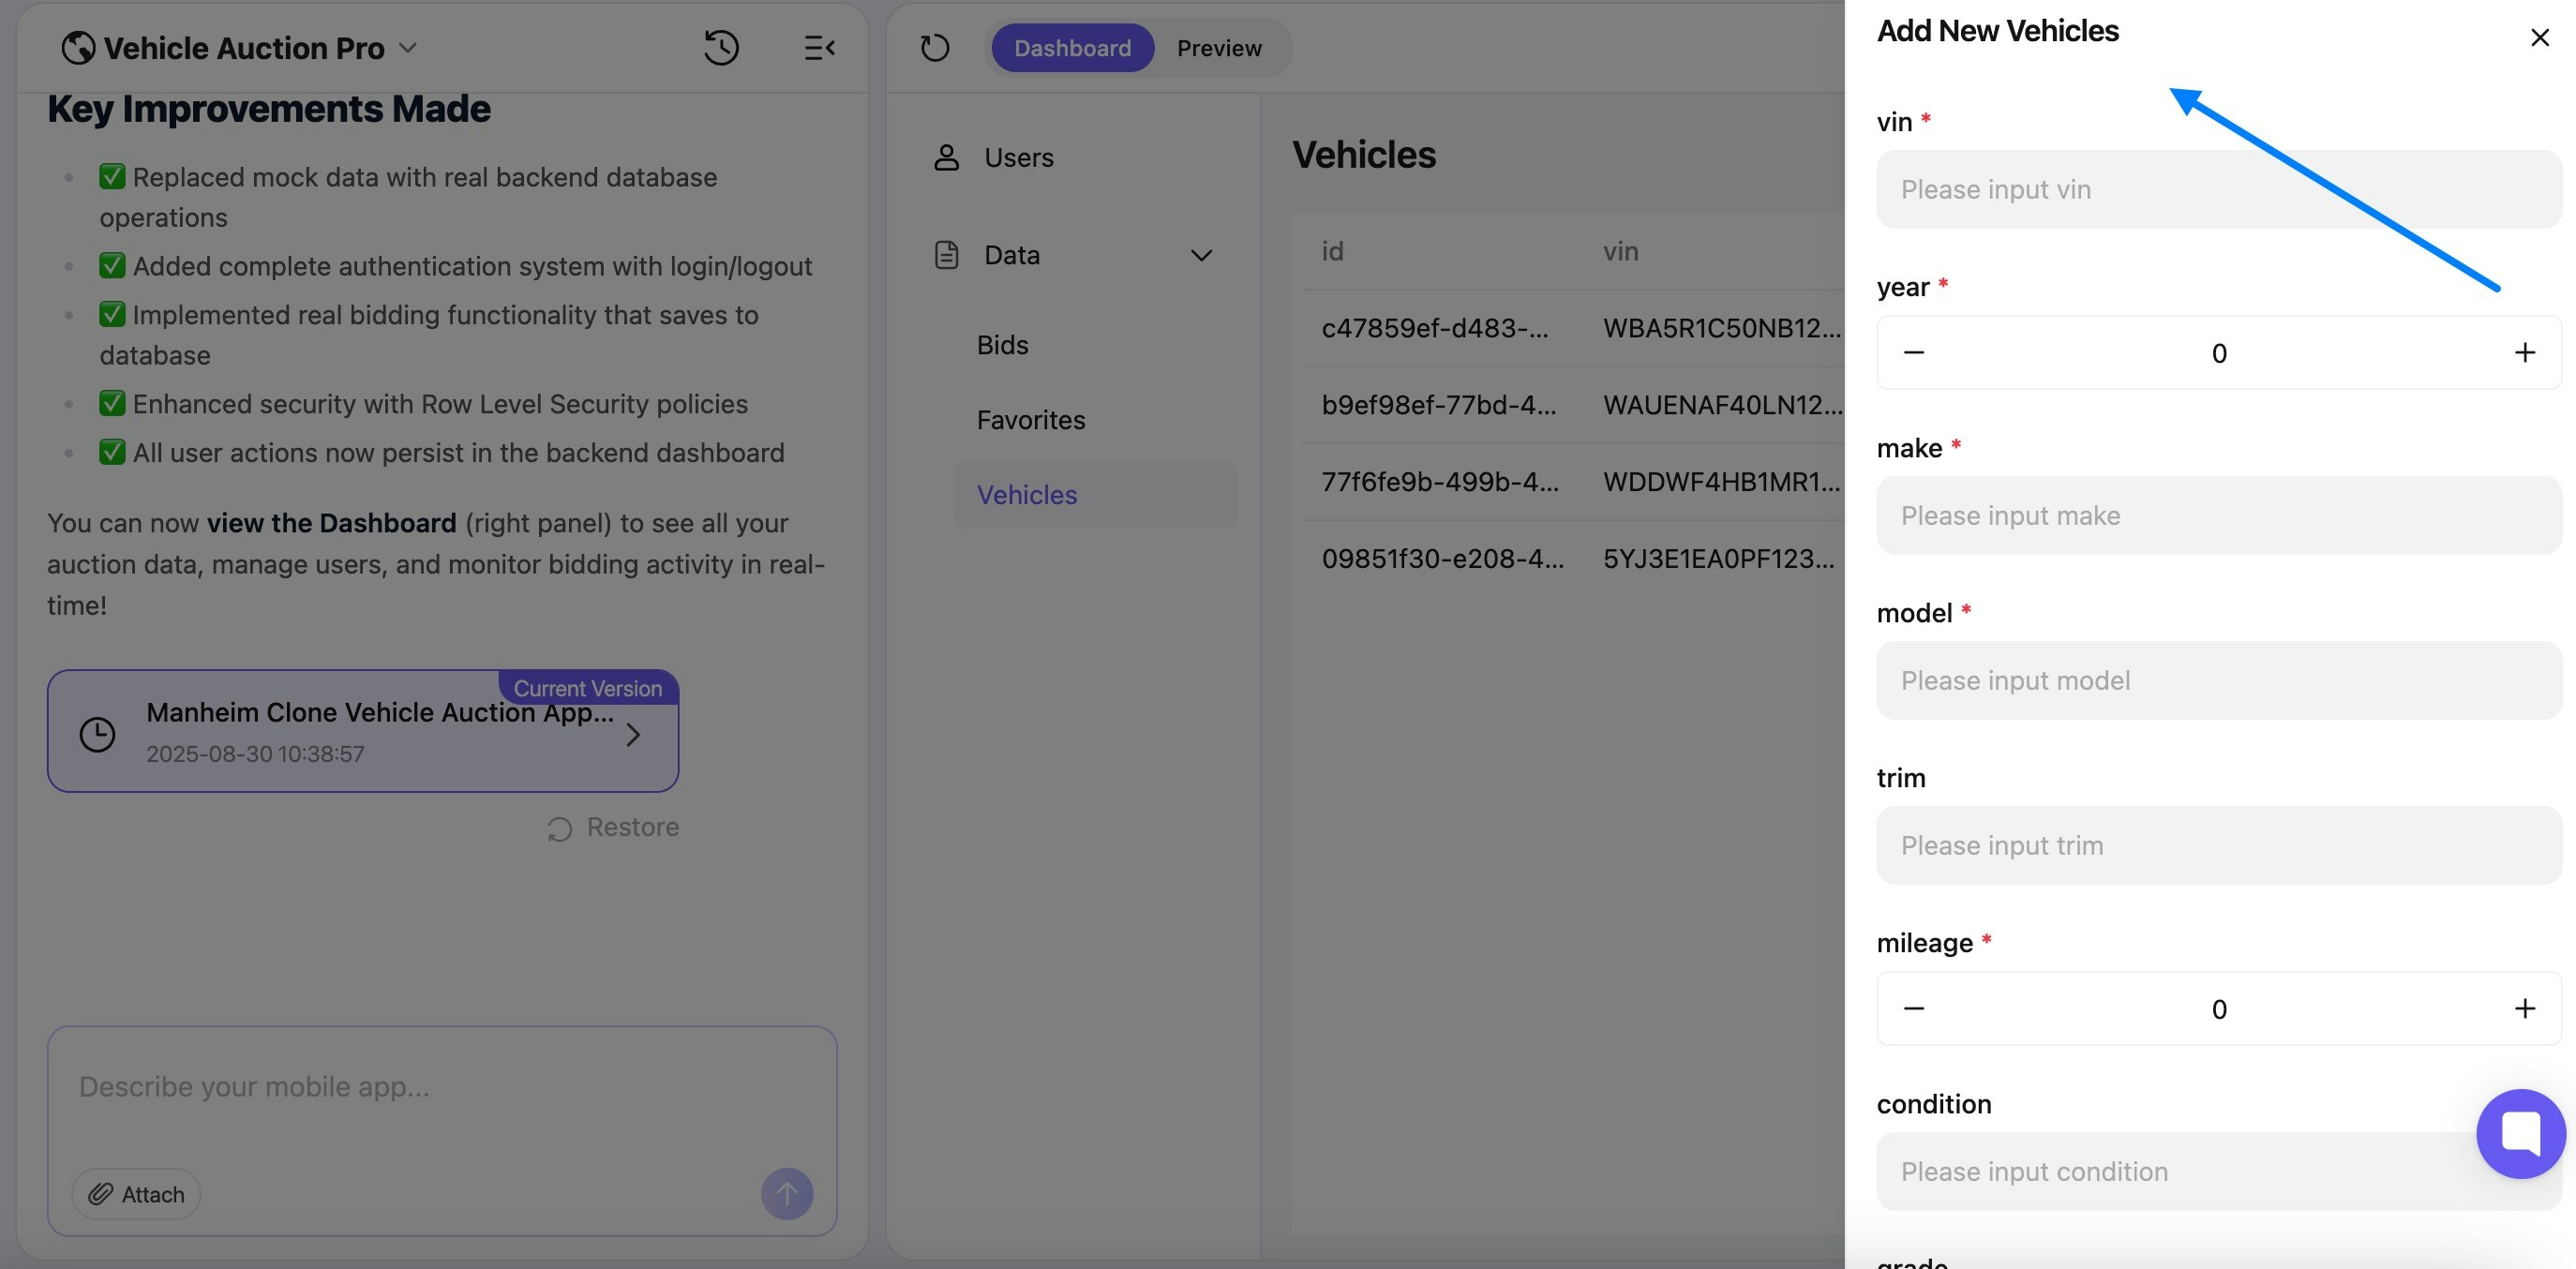
 3. **Add New Record** → Click "+ Add" and fill in the fields
 #### **Bulk Data Import (CSV)**
**Step-by-Step Import Process:**
1. **Prepare Your Data** → Format your data to match the data structure(.csv format)
2. **Navigate to Dashboard** → Click "Auctions" →Import
#### **Bulk Data Import (CSV)**
**Step-by-Step Import Process:**
1. **Prepare Your Data** → Format your data to match the data structure(.csv format)
2. **Navigate to Dashboard** → Click "Auctions" →Import
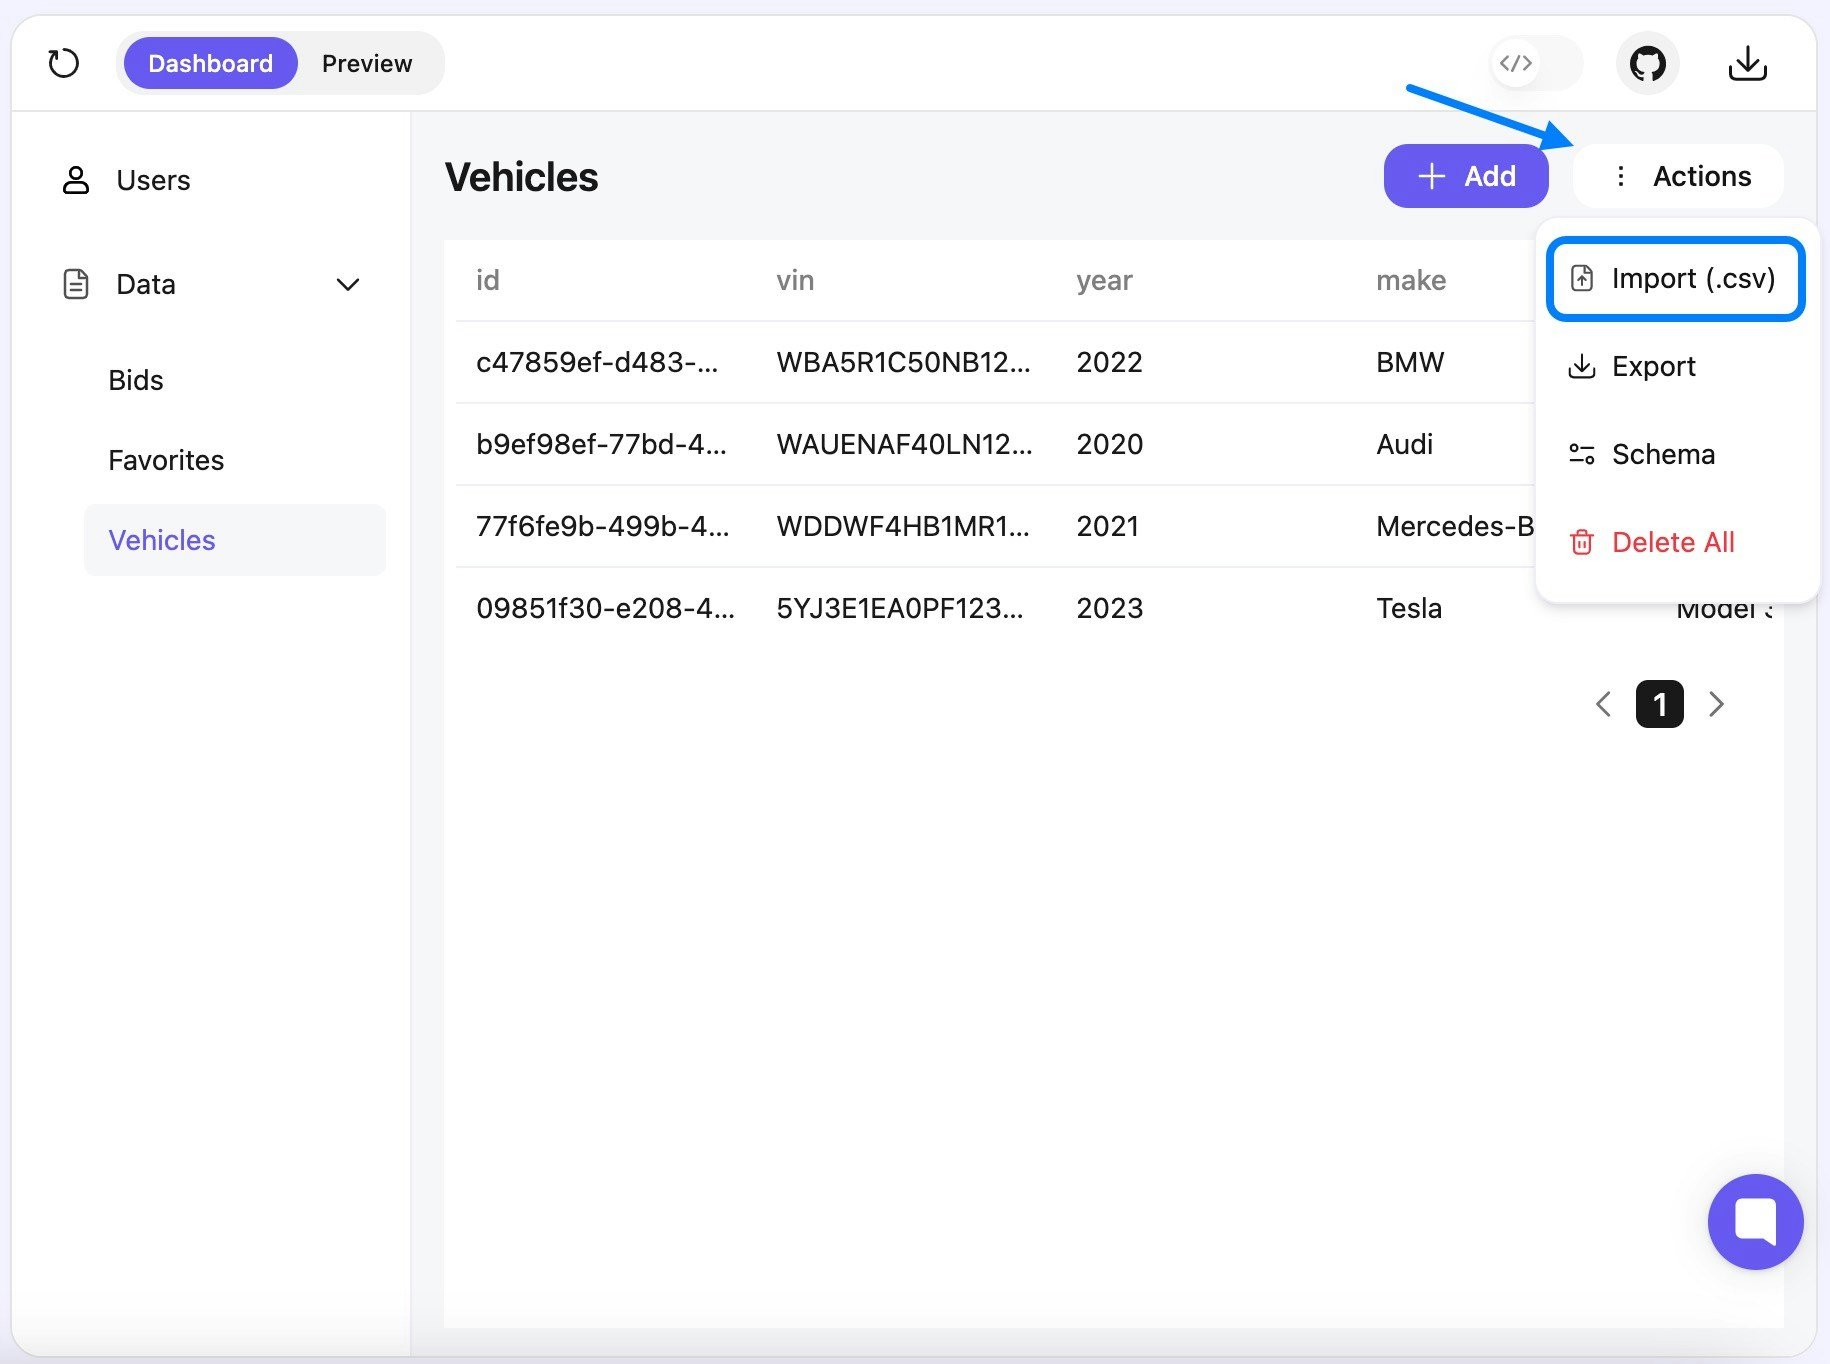 3. **Upload & Import** → Use the CSV import feature to bulk upload
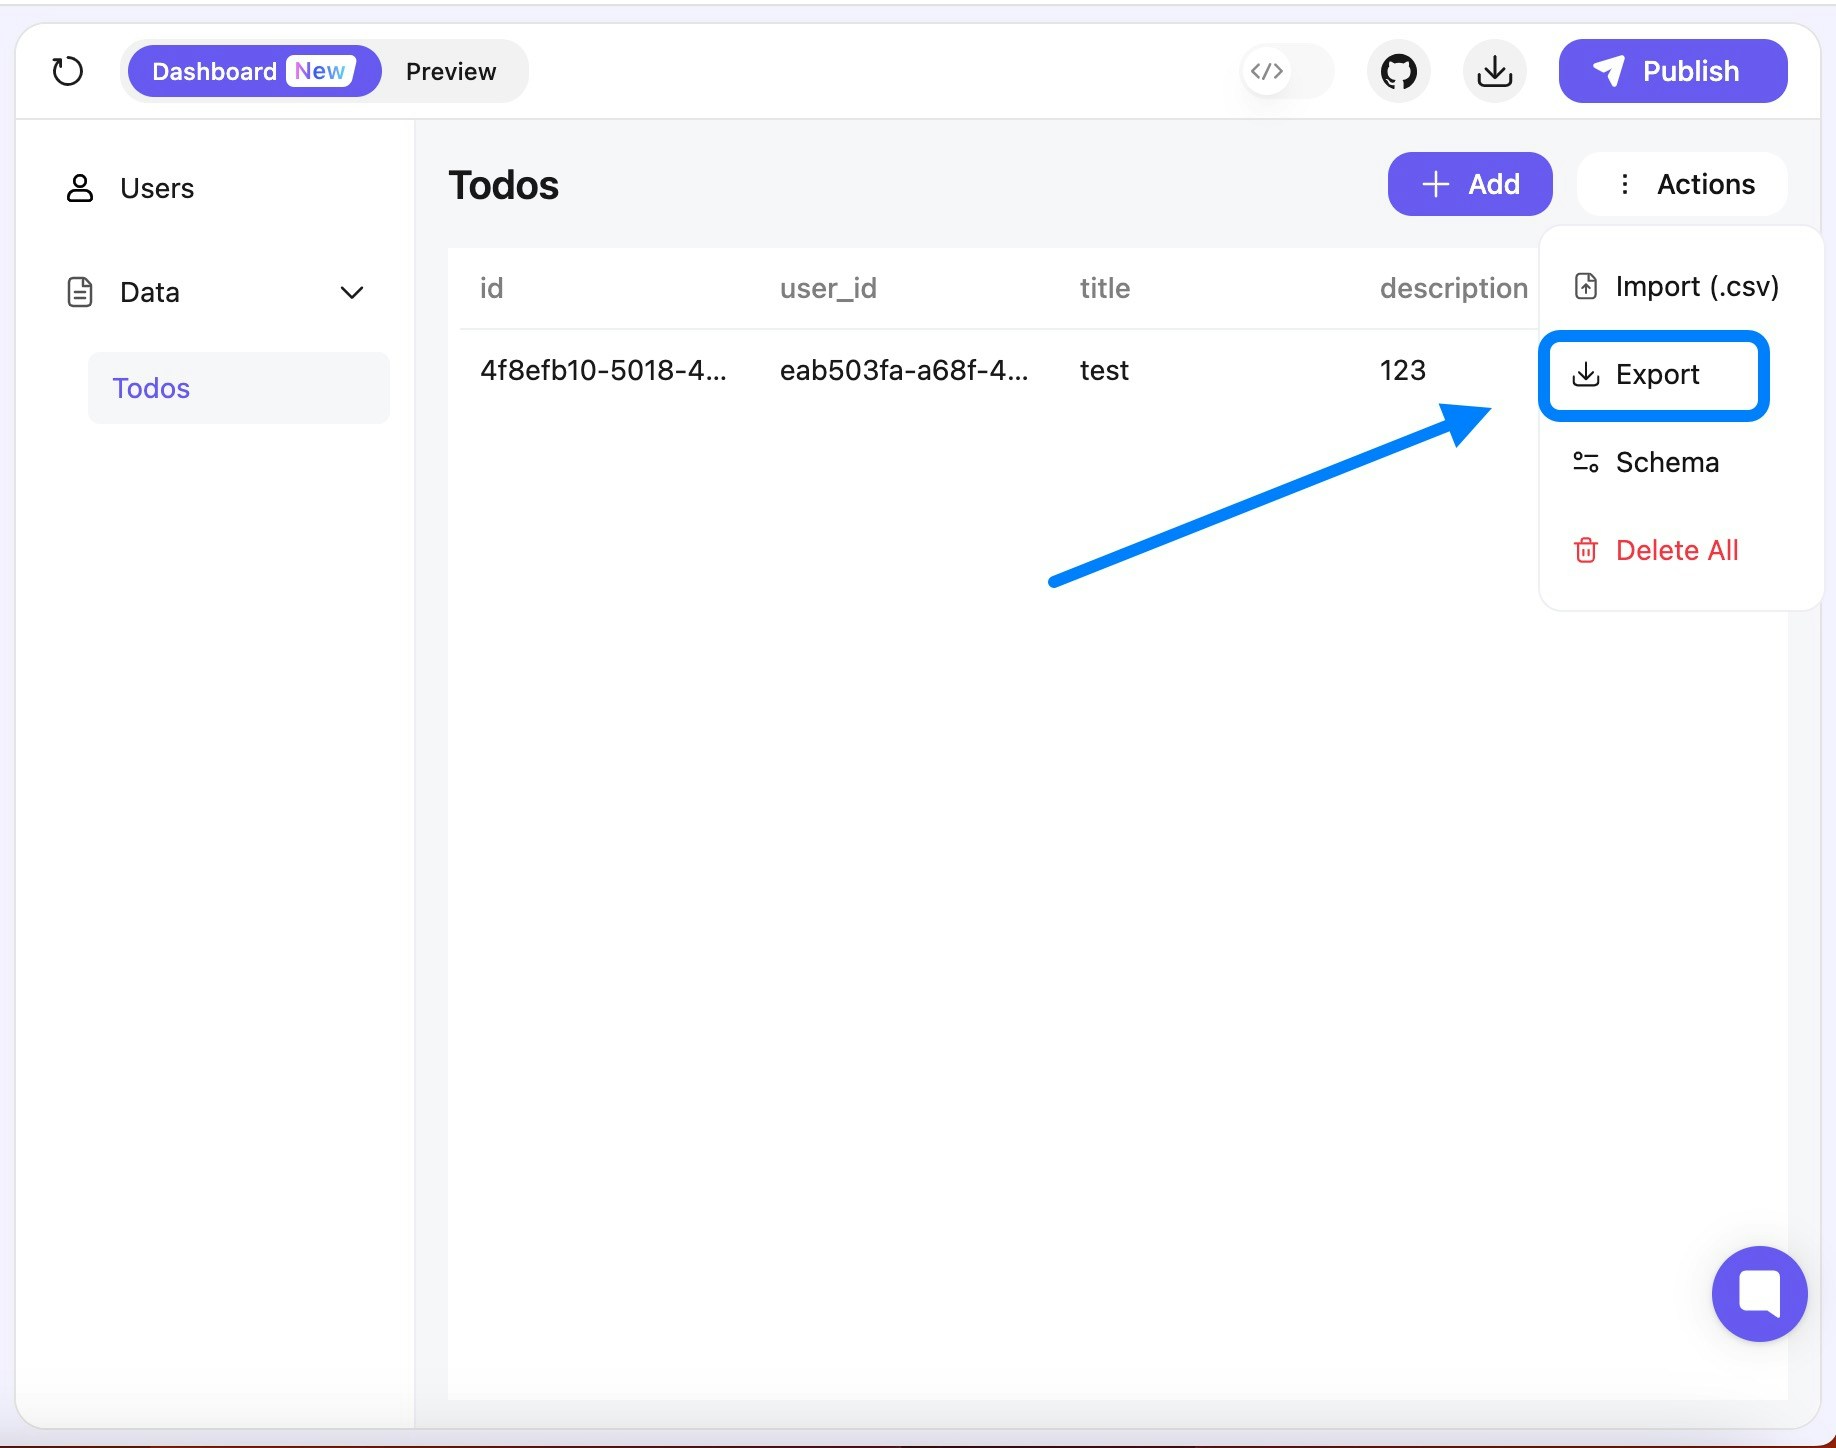
**Best Practice:** Always export and review the data table CSV format first to avoid import errors.
### **Exported File Details**
* **Format:** The downloaded file will be in `.csv` format.
* **Content:** It will include all records and columns currently present in the OnSpace data table you selected for export.
* **Headers:** The first row of the CSV file will contain the column headers, matching the names as they appear in OnSpace.
3. **Upload & Import** → Use the CSV import feature to bulk upload
**Best Practice:** Always export and review the data table CSV format first to avoid import errors.
### **Exported File Details**
* **Format:** The downloaded file will be in `.csv` format.
* **Content:** It will include all records and columns currently present in the OnSpace data table you selected for export.
* **Headers:** The first row of the CSV file will contain the column headers, matching the names as they appear in OnSpace.
 #### **Data Deletion Options**
**Single Record Deletion:**
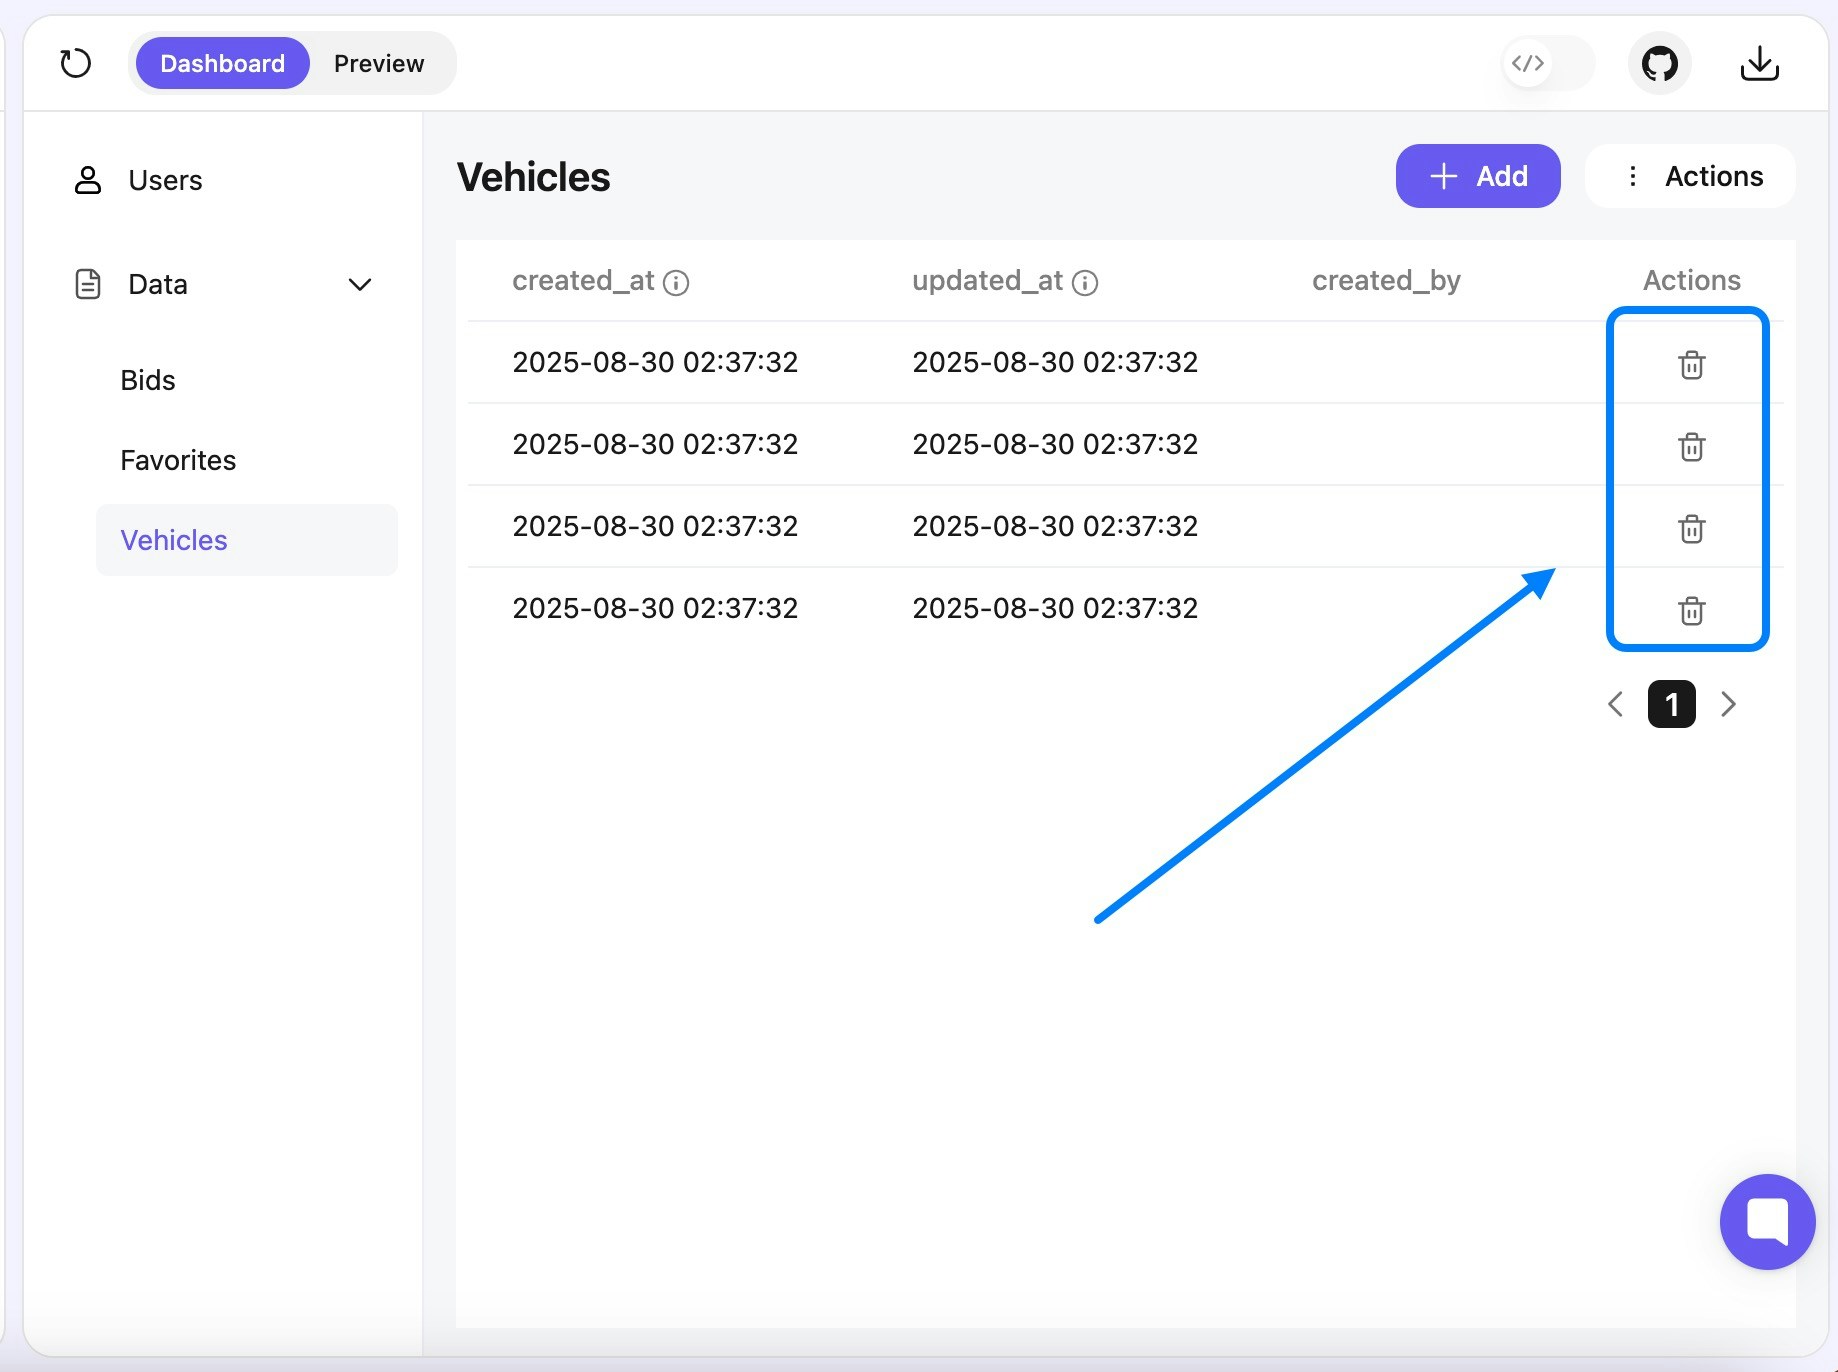
* Click the 🗑️ icon next to any record for individual deletion
#### **Data Deletion Options**
**Single Record Deletion:**
* Click the 🗑️ icon next to any record for individual deletion
 **Bulk Operations:**
* Use **"Delete All"** from the Actions menu to clear entire tables
**Bulk Operations:**
* Use **"Delete All"** from the Actions menu to clear entire tables
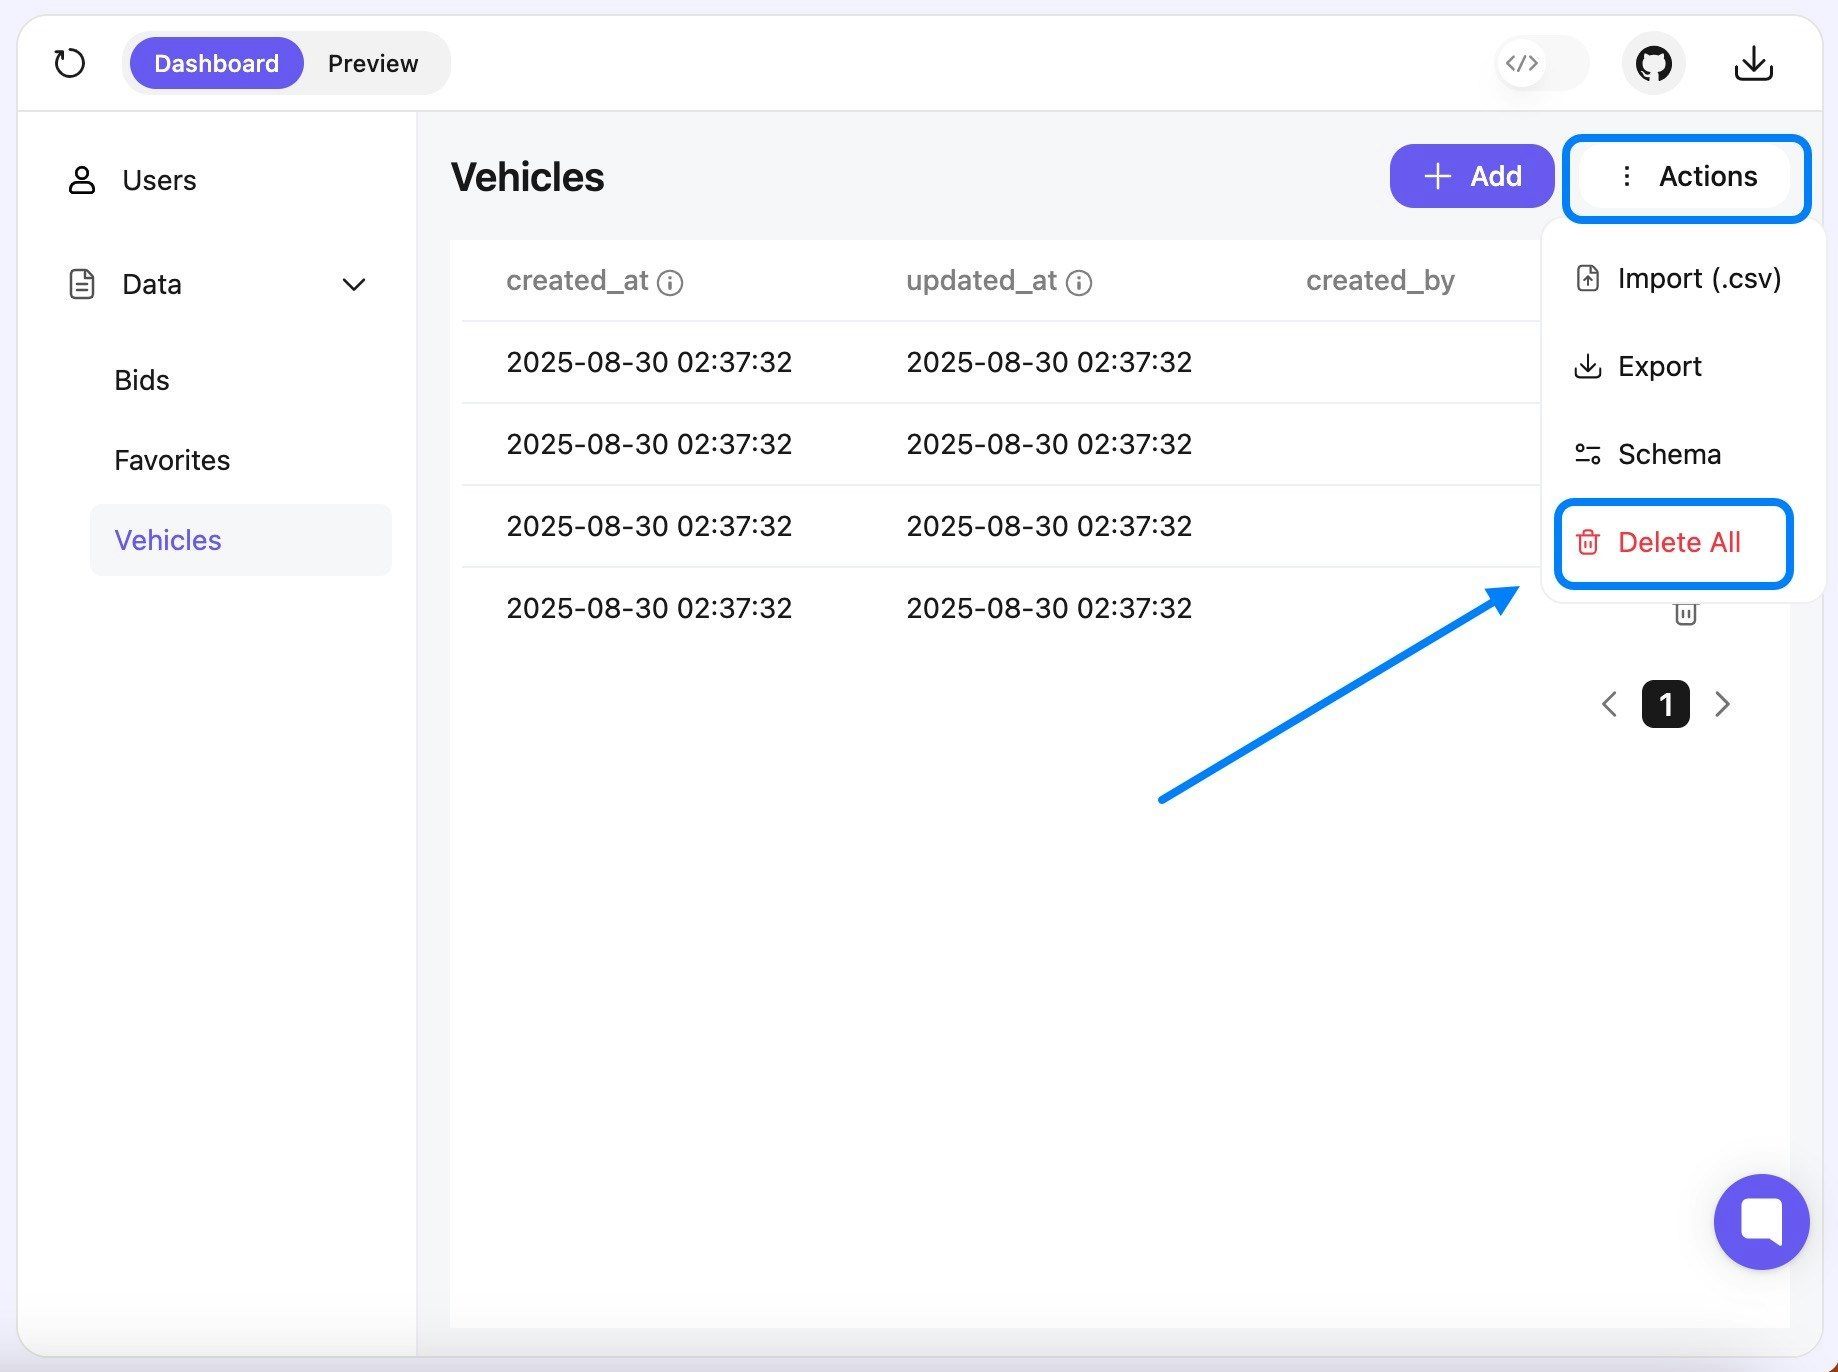 **Irreversible Action:** Bulk deletion cannot be undone. Consider exporting backups before major deletions.